Wood accent wall with Woodgrain Millwork at Home Depot.
Wood accent walls hold a special place in my heart. For me it all started when we decided to try our hand at shiplap. I started in the pantry.

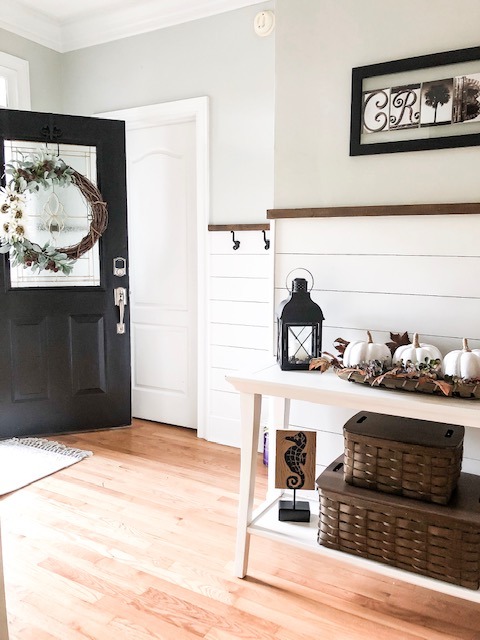
Expanded my shiplap skills it to the foyer.
Tackled the beast that was my home office.

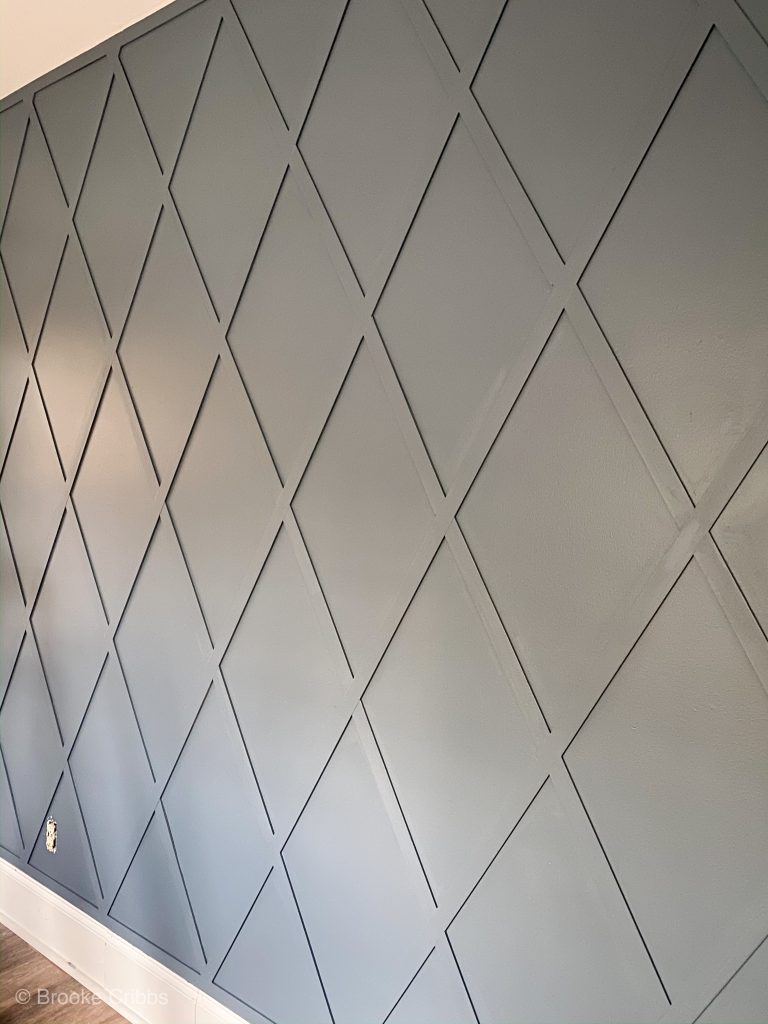
I love the subtle texture it brings to boring dry wall. Earlier this year I got the bright idea that I wanted to step up my wood accent wall game by adding a trellis pattern to my daughters room. The math was hard, the angles tricky, but man that wall was a looker.
**I was given product for this post, but the opinion is my own.**
Accent wall contest with Woodgrain.
Naturally when the opportunity came to throw my hat in the ring with the Woodgrain accent wall contest, I jumped all over it. My first thought was to finally address the fireplace, but my idea was vetoed. (Looking at you Courtney… love you mean it, but one day it will happen.) Mainly because the deadline was short and things are a little crazy right now, so tearing up the main part of the house was not appealing. I get it.
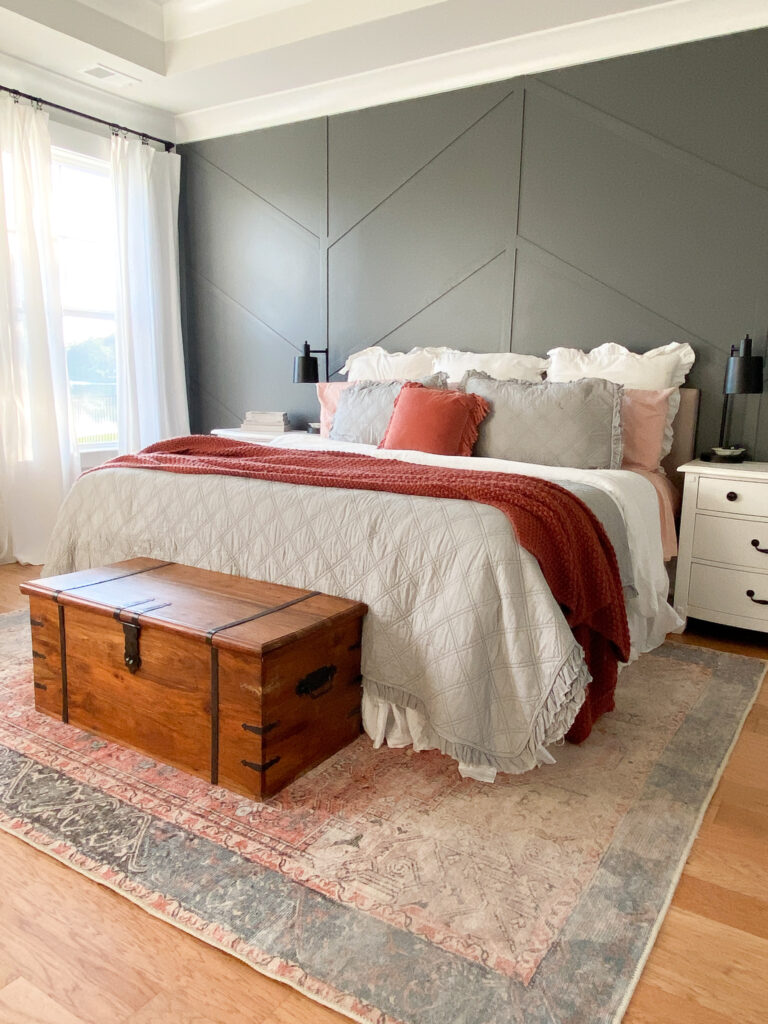
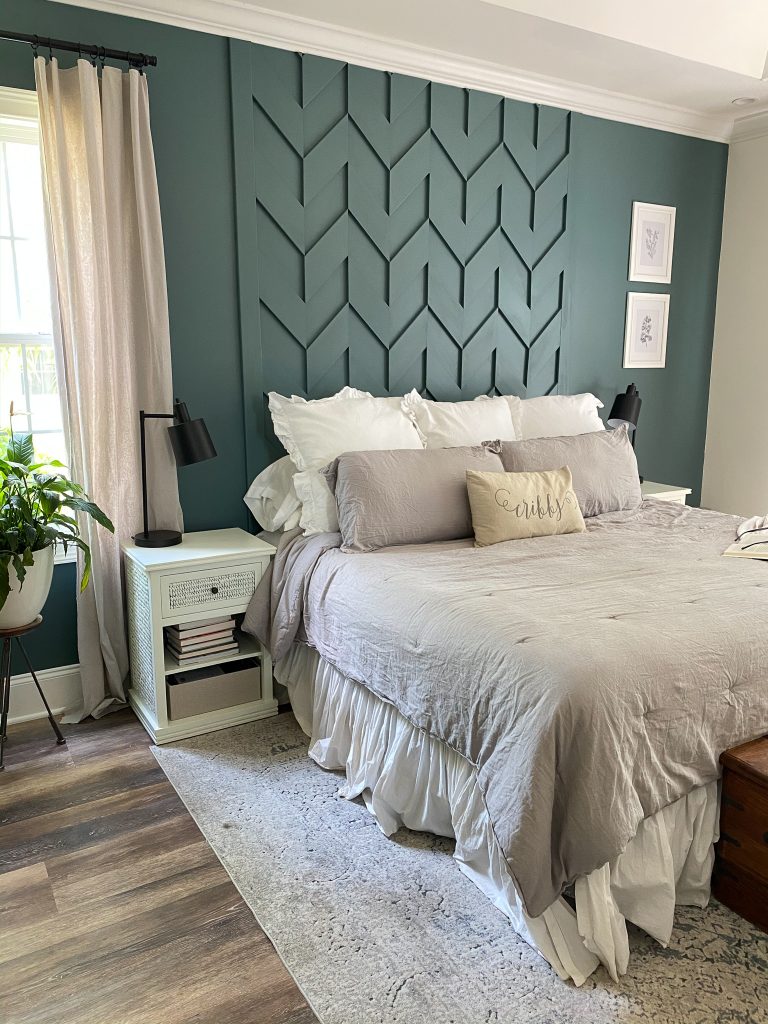
Here’s where things took a turn because while I loved how my faux headboard turned out, I never felt truly connected to it. I love the idea of a faux headboard and I loved the subtle texture of my daughters wall and decided that would be the project.

The design process
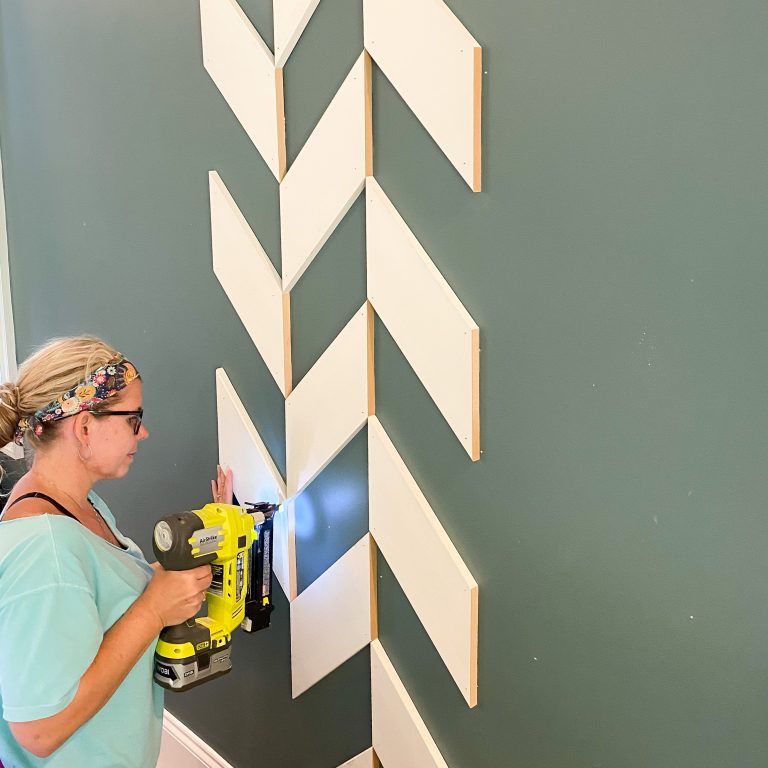
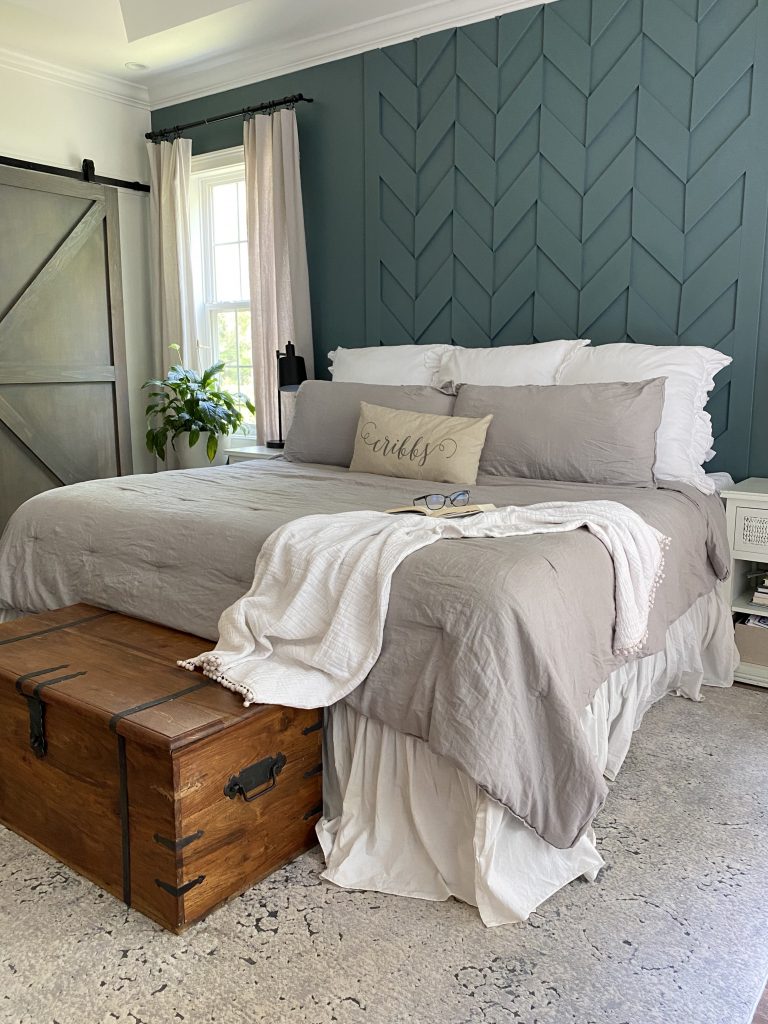
I chose 6 1/2” base moulding from Woodgrain because I loved the thickness it was going to give to this design. After cutting a few scrap pieces, I cut the molding into 12” length with a 45 degree angle cut.

This design required two different directions to achieve this look.

To give the wall even more dimension, I staggered the boards so there would be a blank space between. We found the middle line of where we wanted the headboard to be on the wall and worked out from the center point.

There were four rows on either side of the middle line. After we finished the last row. I used 3 1/2 wide moulding to create a border on the sides.

Even though this is only a headboard, I felt that the design needed to go from ceiling to floor. If we ever decided to change the room around, the wall wouldn’t look funny.

My most favorite and frequently asked painted color.
The one thing I did decide to keep was the wall color. It’s Riverway by Sherwin Williams, but I used Behr Marquee in eggshell for this project.

It gives me the best one coat coverage and because I didn’t pre paint the wood, and I wasn’t using a sprayer, I needed a paint that would make it a little easier on me.

All the feels…
Now that it’s done, I feel like this accent wall has always been there.
I am in love with this change and so happy with how well it goes with our luxury vinyl plank flooring.
I am very thankful to have this opportunity to do this contest with Woodgrain and the Haven Conference I couldn’t be more thrilled with my new room. I’m also super thankful for Courtney who is always willing to jump in on my crazy ideas.
Happy DIYing!
Brooke
Let's connect!!
Stay connected for all your DIY and organizing needs!