How to make a diamond pattern wood accent trellis wall
Breaking down all the math and how we made this garden trellis inspired diamond pattern wood accent wall come to life.
**This post may contain affiliate links, which cost you nothing extra, but help me maintain my site.**
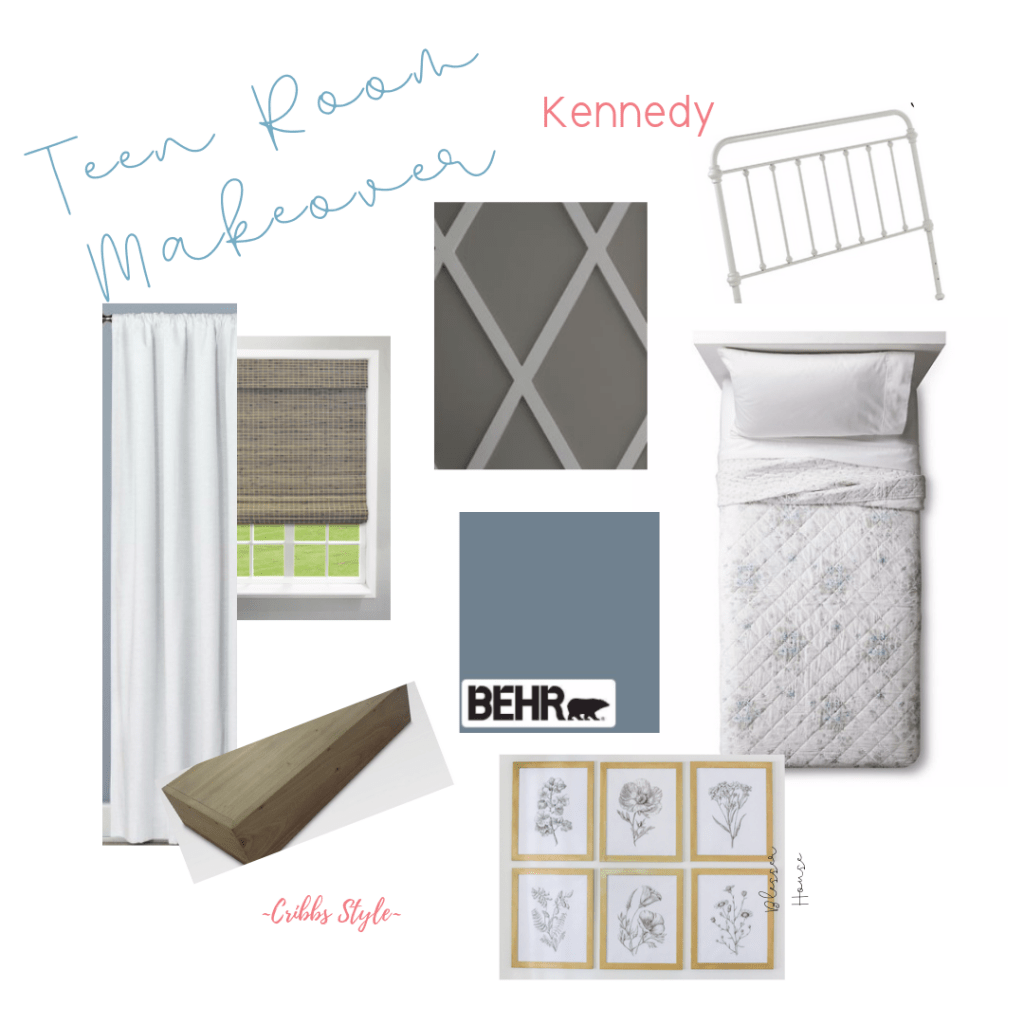
I was so thrilled that Kennedy gave me the green light to decorate her room. While I didn’t want to do wallpaper like I did in her sister Kelsey’s room, I wanted to do something fun none the less. Since she wanted flowers, I decided to take it a step further and recreated a garden trellis inspired diamond pattern wood accent wall.
I could see it in my head, it looked amazing, and then I quickly realized one slight problem, I had NO idea how to make it happen. First things first, I did know enough that I decided to buy a protractor to keep my angles accurate and consistent.

Thank goodness for husbands who are good at math.
After I told my husband what I wanted to do, and knowing that we were going to get super cozy with angles, I handed him over my design plans. Before I knew it, he was using terms like “pythagorean theorem” and just as my eyes rolled back in my head, he figured it out.

NOTE: This information is based on what worked for us. There is a chance for human error. Also, please read the instructions and follow the safety protocols when using tools and power tools.
Supplies
Wood Lattice Molding (The width is up to you for the look you want to achieve.) You’ll want to grab the longest pieces you can because when you set them on a diagonal, they’ll need to be long enough to reach the top and bottom of the wall.
Miter saw (If you have a larger sliding miter with a wider range of degrees, that would be most ideal)
Jig saw (If you don’t have a larger sliding miter, you will need this to make some of the angled cuts.)
Wood filler (I highly recommend making sure it’s paintable and stainable)
Frame your wall
Not all walls are truly square. Framing the wall with the lattice will help give you a straight line to work with all around. Plus is just looks more finished in my opinion.

Find the middle
The thought in doing this if the middle of the wall was set, it would help us build off and keep things consistent. Working from the middle out, there would be more whole sized diamond patterns and leave any partial diamond patterns for last. We were concerned if we started on one side and worked our way across, there was more chance to mess up the measurements.
Measuring out spacing
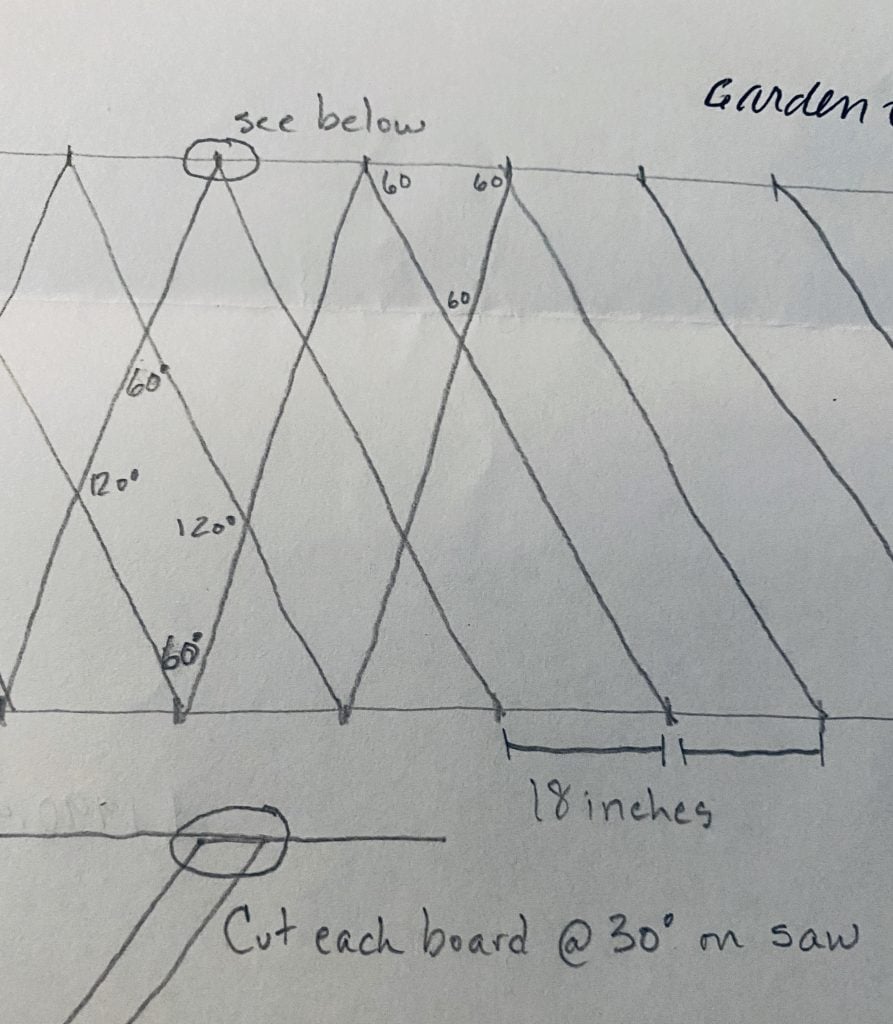
Courtney’s fancy math problem determined we were going to use 60 degree angle at the top of the diamond pattern and 120 degrees for the sides of the diamond pattern. To achieve that the lattice would need to be cut at a 30 degree angle. We also decided that 18 inches was a good amount of space between the cross pieces to create the size diamonds that I wanted. Check out our even fancier design software.
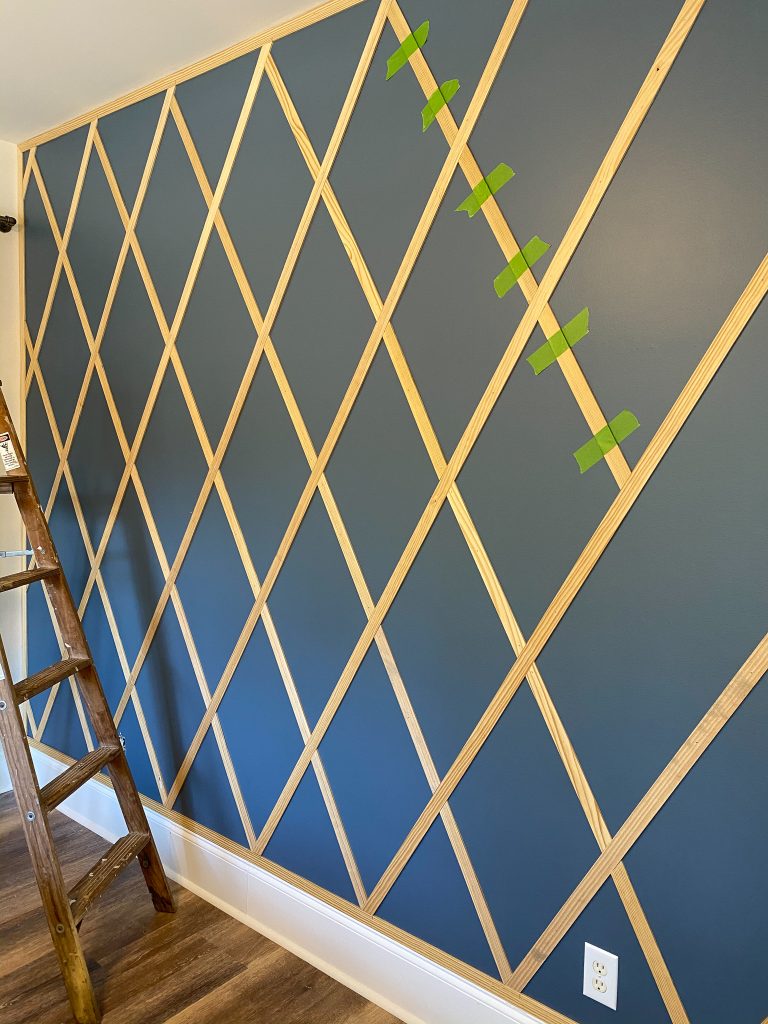
We cut the first piece of long lattice on one end to 30 degrees, set the top to where we marked the middle of the wall, and held it in place with painters tape.

With another long piece, it was set next to the first piece to get the 18 inches spacing between the two pieces. Next, we cut off the bottom of the lattice to 30 degrees and secured them with the brad nails. With these two pieces in place, we marked out the top and the bottom of the wall in 18 inch increments.

TIP: Mark on your piece of wood where you need to cut, but try to make a line to simulate the angle. There are going to be lots of angle cuts and by the time you get to your saw, you’ll want to remember which direction you’re cutting the angle.

Not only did the math need to be correct, it needed to be visually pleasing to the eye. Once we got all of the long pieces set on one side of the wall, we started with the cross pieces to form the diamond. This is where your protractor is going to be your best friend.

Measure, cut, check, secure, repeat, patience
Each row and each diamond helped build the row next to it. It was almost like a really big puzzle. There was a door to contend with, which made things a little tricky. To keep the pattern going, we held up pieces to see where the wood would intersect if the door wasn’t there, marked where to cut because of the molding, and pieced it together.
For the end pieces next to the wall, and because our miter saw couldn’t do angles greater than 45 degrees, we used a jig saw to cut the angle we needed. If you have a sliding miter that does greater angles, you should be totally fine.
Painters tap, brad nails, wood filler, but NO CONSTRUCTION ADHESIVE
Painters tape gave us the chance to see the pieces in place before securing it with a brad nail. Using the painters tape also allowed us to make any adjustments in keeping the rows in line because, well, human error. Setting individual pieces slightly off would throw the whole row off and like a ripple effect, throw off the next rows as well. Yes measurements are important, but the human eye is going to determine if things look right.

It was decided that we would only use brad nails to secure the pieces and NOT construction adhesive for a couple of reasons.
- While we love the design, it isn’t necessarily something that will stay forever. (Or at least I can’t guarantee that it will stay forever.)
- Using construction adhesive and then later removing those pieces later, will do major damage to the dry wall.
- I hate repairing drywall.
It is much easier to fill a million little holes as opposed to repairing a whole wall of drywall damage. Which is the same reason we did not caulk anything on the wall either. I know that there are plenty of DIY’ers and professionals that are probably cringing, but this is where you do you.
Wood fill and paint
Once everything was set and we were happy with the overall design, I used wood filler to cover all the brad nail holes. I chose something that was paintable and stainable. Using my fingers I covered each hole and sanded off any excess.
I was still on the fence to what color I wanted the wood to be. I debated painting it a contrasting color, but then decided later that I wanted the diamond pattern to be the same color as the wall. If you can buy the wood lattice that’s already primed, by all means do it. I skipped pre priming the wood before we installed it because the paint I use has primer already in it and I’ve had great success.

I used a brush to get in the edges, but a foam roller for cabinets to paint the wood lattice and the wall. To keep things looking cohesive, I switched out the outlet covers to wood so I could paint them the same color as the well.
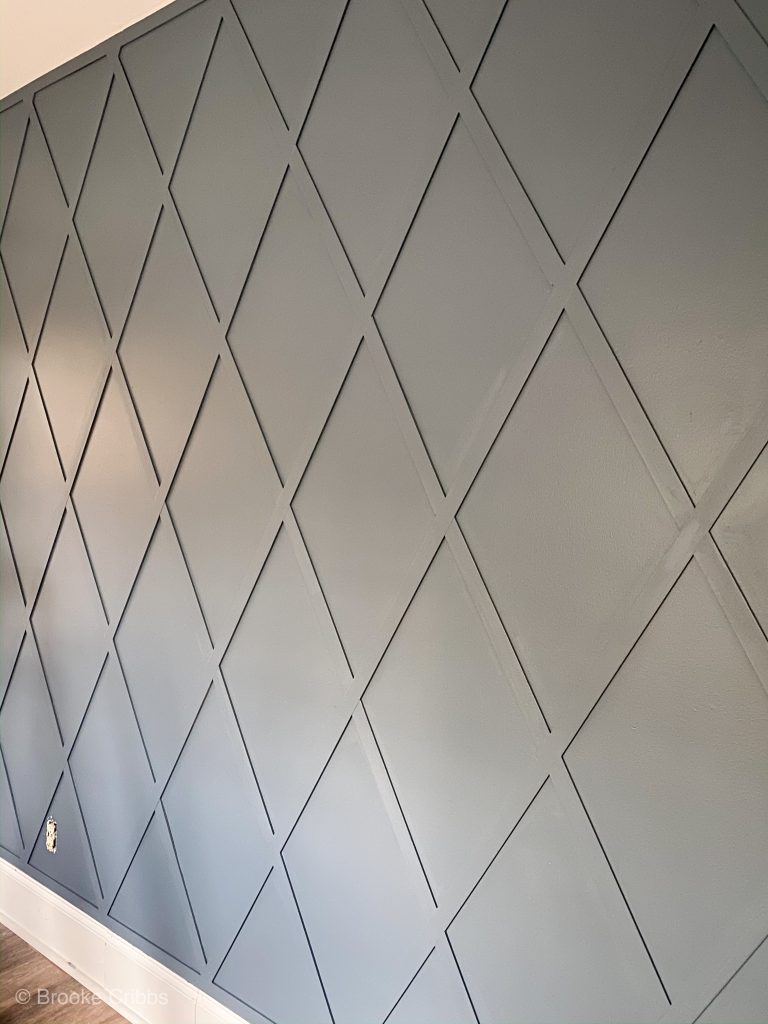
The diamond pattern wood accent trellis wall is DONE!!
Y’all, I am in LOVE!!! It turned out exactly how I saw it in my mind. Best part is I got to work side by side with my husband. He not only saved the day with the math, but helped making about a million cuts.
Now I’ll be able to mark one more thing off of Kennedy’s bedroom makeover and we are closer to being DONE!!
XOXO,
Brooke
Let's connect!!
Stay connected for all your DIY and organizing needs!