Easy herringbone accent wall in a day(ish)
Lately life has been known to throw a few curveballs making DIY a bit challenging.
That’s why when I decided that our primary bedroom needed a little pizzazz, I wanted an accent wall design that would take me no more than a day.
In full transparency, this project actually took a couple days, but in a couple hour increments because I’m a super poor planner.
Who decides to do a DIY project in the middle of one of our busiest weeks… this girl.
But trust me, if we scooped all the time together, it would have only taken me a day to complete and I truly believe you can too.
**This post contains affiliate links for various brands including Amazon, which does not cost you anything extra, but helps me earn a small commission that keeps my business grow. Click here for my complete disclosure.
The wood accent wall design process
I love a good accent wall and have been eyeing the wall behind our bed.
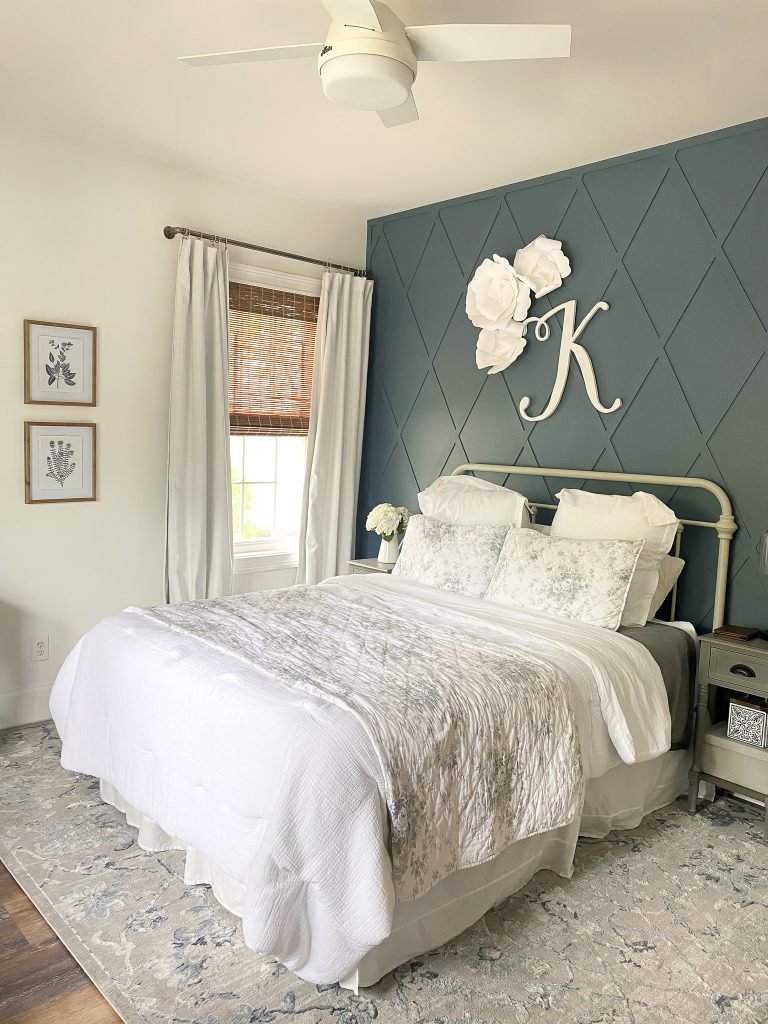
I even considered recreating my most favorite accent wood wall from our last primary bedroom.
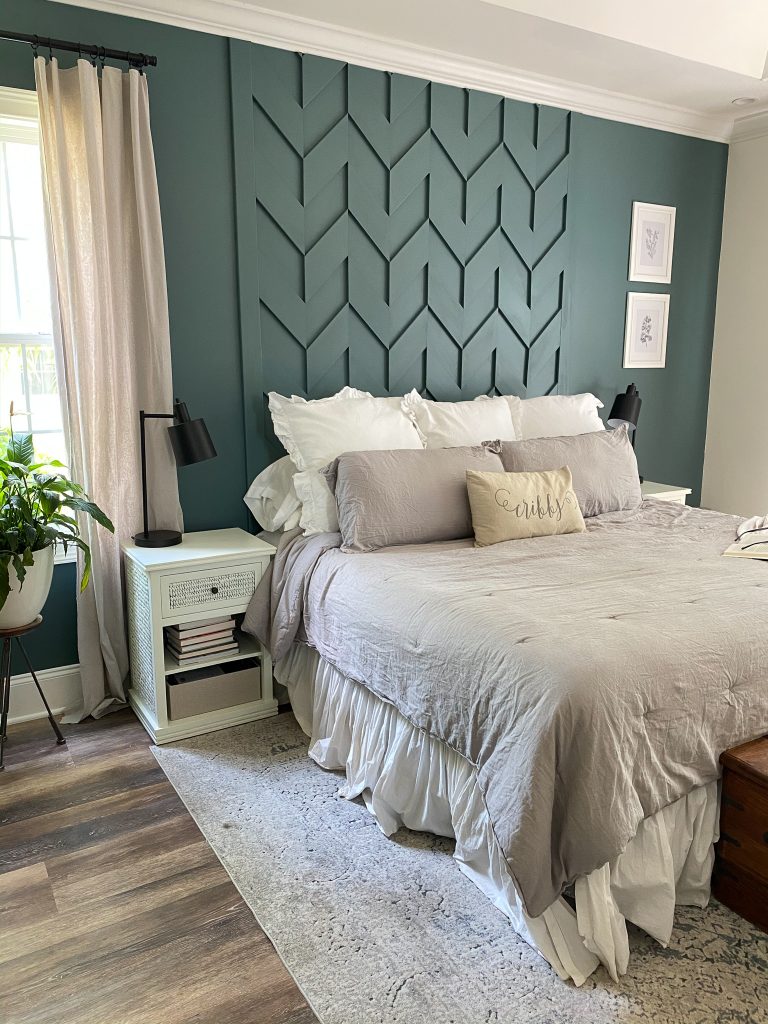
For this design I wanted simple, subtle, and bold.
Of course I took a trip through my Pinterest boards and saw a common design I was drawn to, herringbone.
Herringbone accent wall materials
I typically use primed MDF from Woodgrain to do many of my accent walls.
When we did the accent wall in our daughter’s room I loved using lattice because it was lightweight and not as thick as a regular board.
Thankfully I found 2 1/4 inch wide lattice and it was the perfect size for this project.
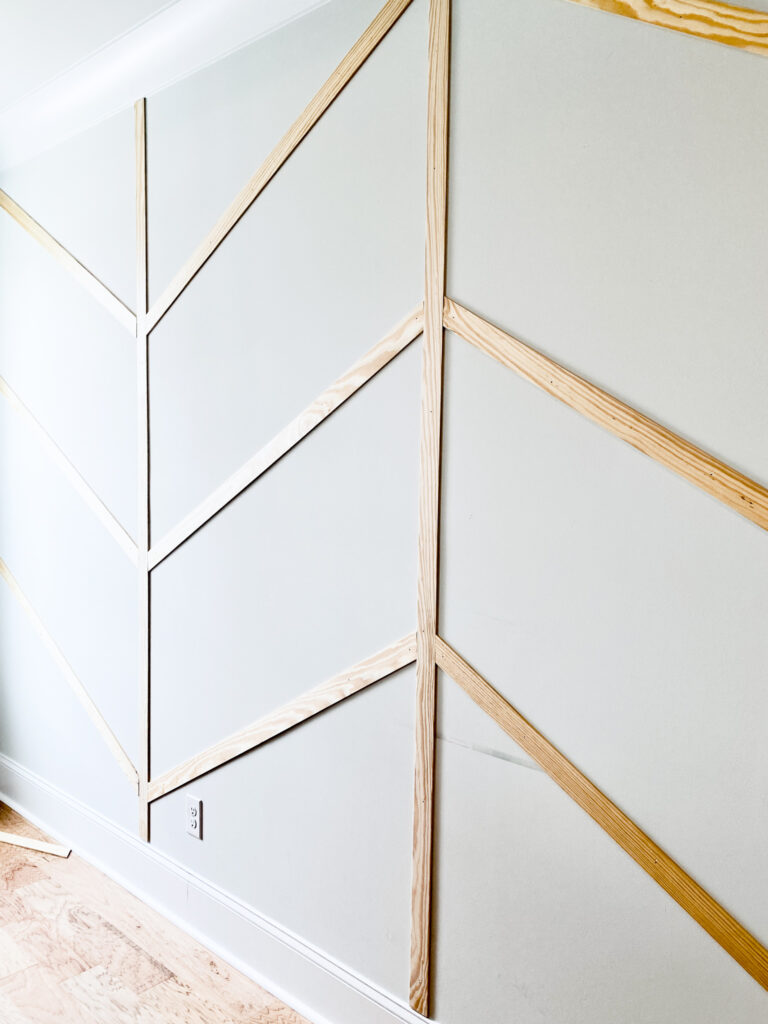
Herringbone accent wall the process
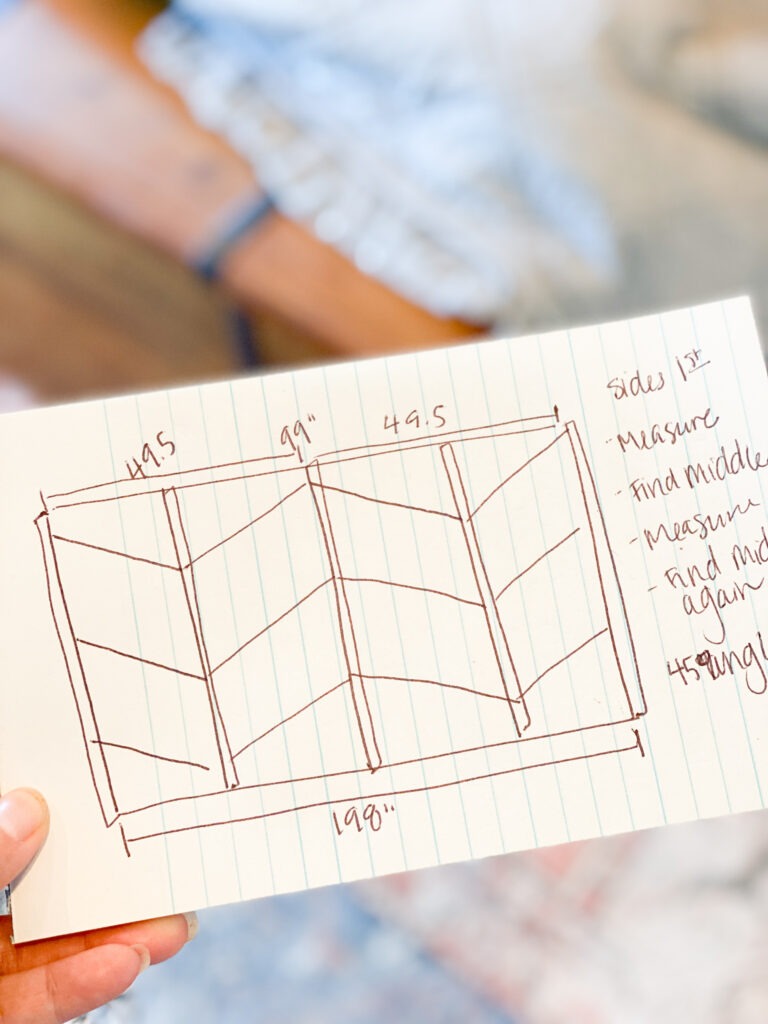
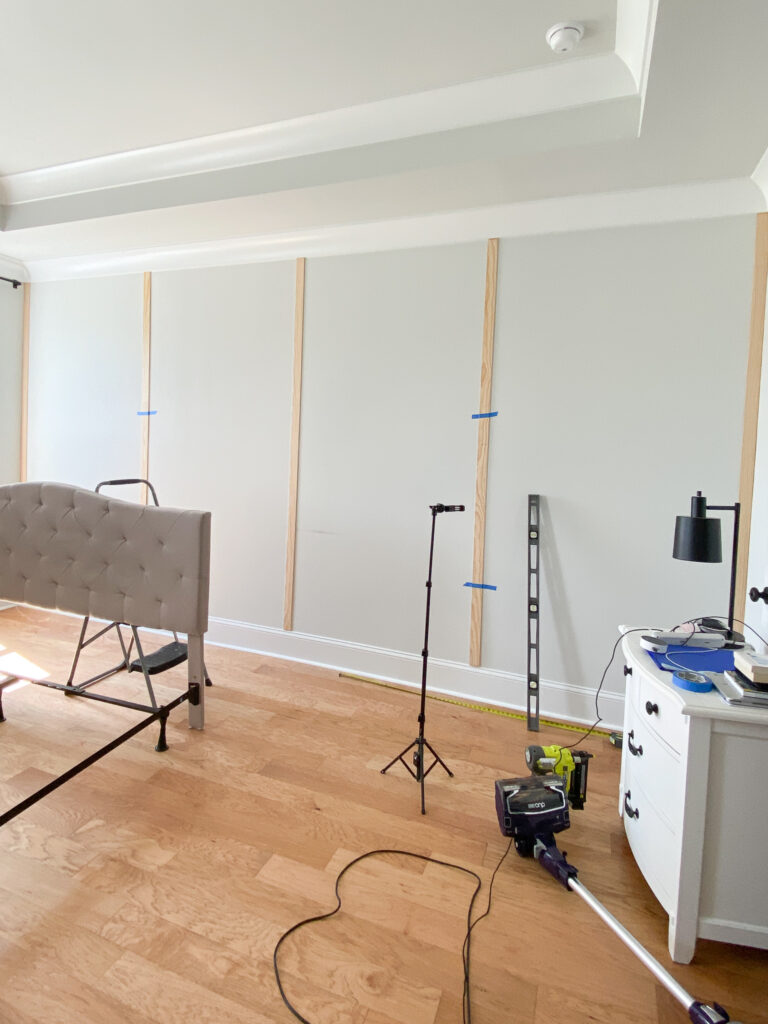
Even though our home is a new build, the walls are still not 100% straight.
To give the design some structure, I added framing pieces in both corners.
By doing this I didn’t have to cut my cross pieces at different lengths and the wonky part would be on the outside of the framing board.
After the two side lattice pieces were installed, I measured between them to find the center part of the wall.
This is where I added another lattice board and I measured between the center and side boards to add another vertical board for a total of 5 vertical lattice boards.
I settled on a 30 degree angle for the cross pieces, the bigger the angle the deeper the angle.
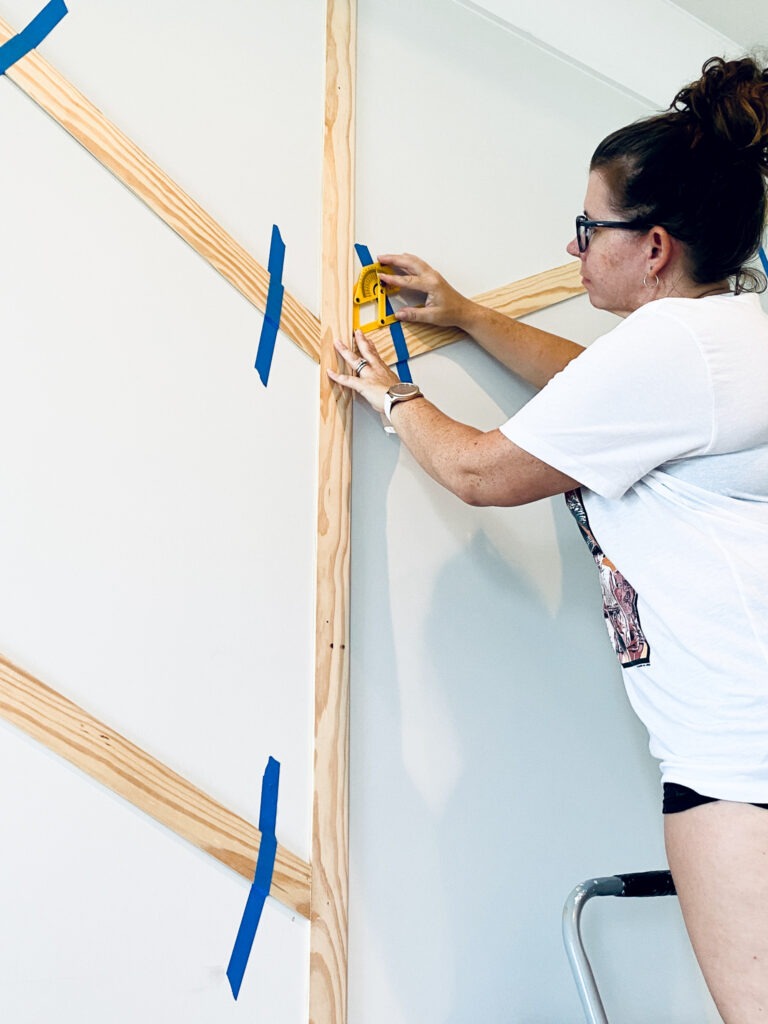
Because I wanted to keep the design larger, I spaced the boards 27 inches apart.
To get the design even, and because I was working by myself, painters tape was my friend to hold everything so I could see it before I nailed everything to the wall.
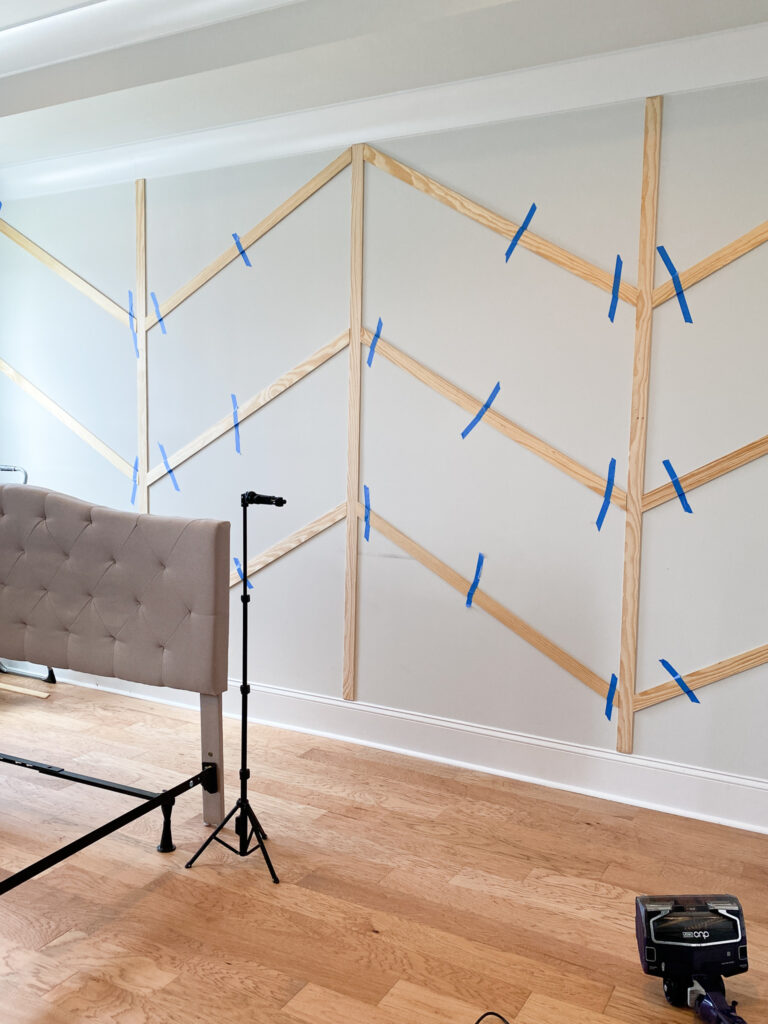
No matter how much you measure, there’s still a visual aspect that’s the most important in my opinion.
What I’m about to tell you next is a preference about how to attach the boards to the wall.
What’s a project without a little controversy?
This next part I’m about to tell you is a personal preference and I’m sure there are people who may disagree.
I only attached the boards using brad nails with my most favorite Ryobi brad nail gun using 18 gauge nails and I shoot the nails in at an angle.
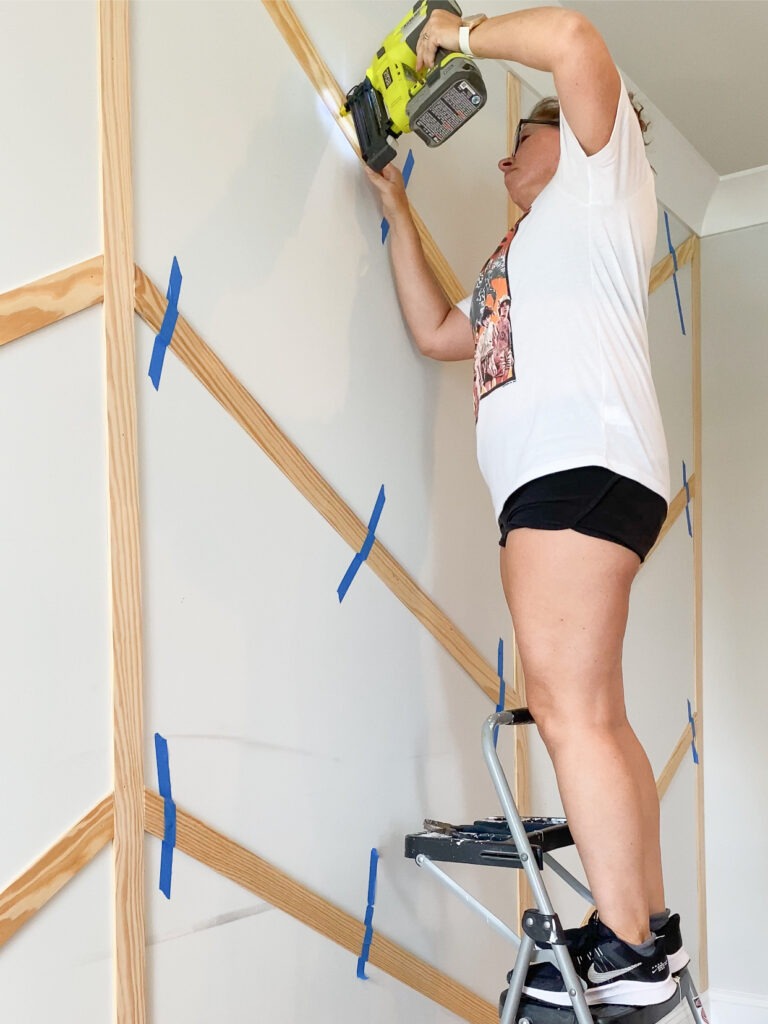
I refuse to use liquid nails and I also don’t caulk around all the boards.
The reason why, drywall repair.
If you’ve ever taken anything off a wall that someone has used liquid nails to adhere the product to the wall, it will destroy your walls and you’ll have a lot of drywall repair on your hands.
I would rather just patch a bunch of tiny holes than have to repair an entire wall of drywall damage.
But again that’s personal preference.
Once all the boards were up, I wood filled all the nail holes and caulked the side pieces that met up with the wall since the walls aren’t perfectly straight.
The most perfect gray
Rumblings in the design world tells me that many are over the color gray, but this girl is not.
Also, I already have the rug I love and I’m only adding the herringbone accent wall to design I’ve started, so I wanted to pull color from the rug.
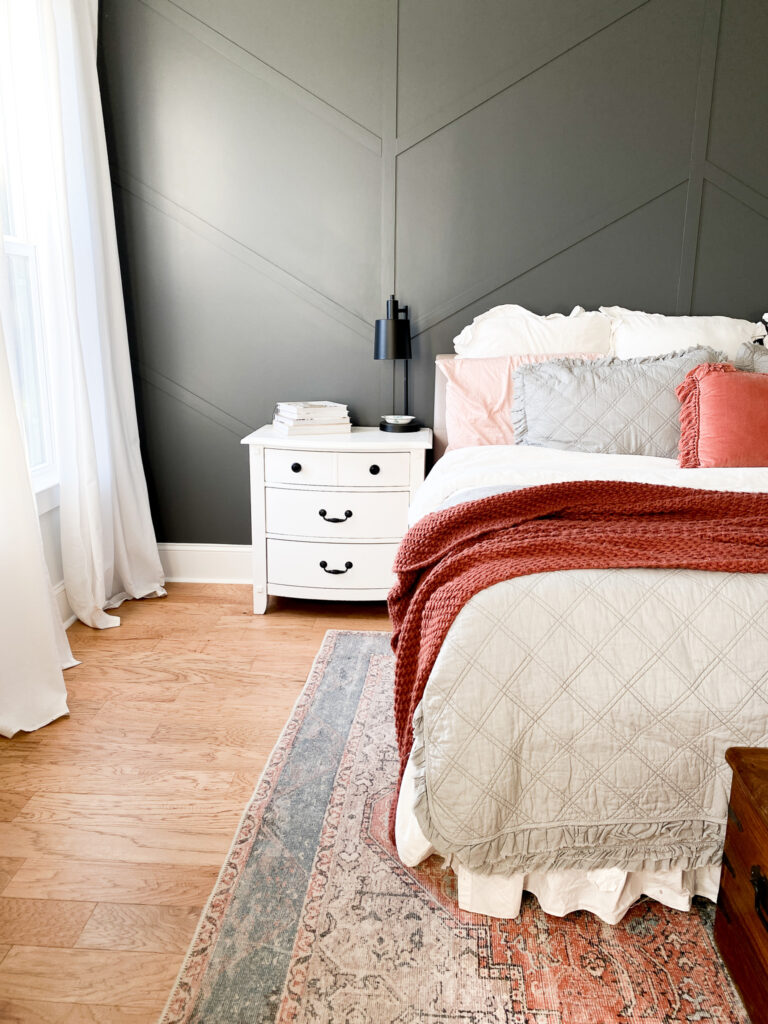
Our primary bedroom gets a ton of light and since it’s only one wall I knew I could go really dark and still be ok.
Plus I wanted the wall to pop against our white (tablecloth) curtains.
I used BEHR Paint Scuff Defense in Eggshell and chose the color Imperial Gray.
It’s truly a beautiful gray and I’m very funny about gray in general as some pull too much blue or too much brown, but this one was actually perfect.
Easy herringbone wall final thoughts
I ended up using 14 8″ boards total for this project and with the cost of the paint, the total cost was less than $250.
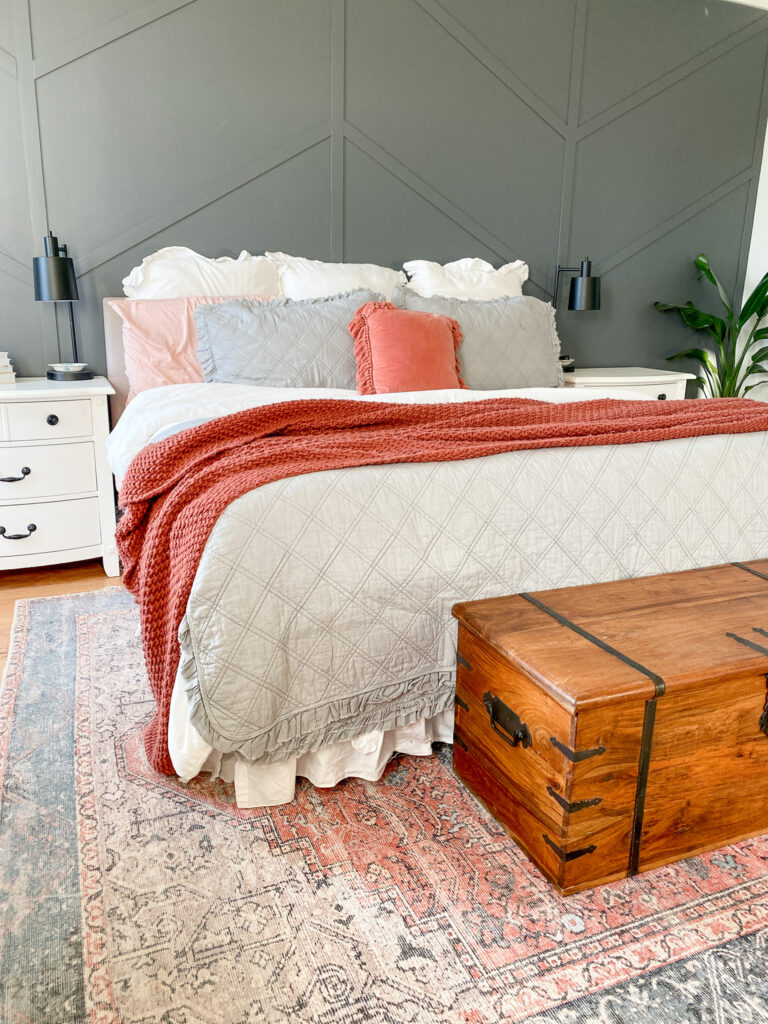
This easy herringbone wall is everything I had envisioned for this space: simple, subtle, and bold.
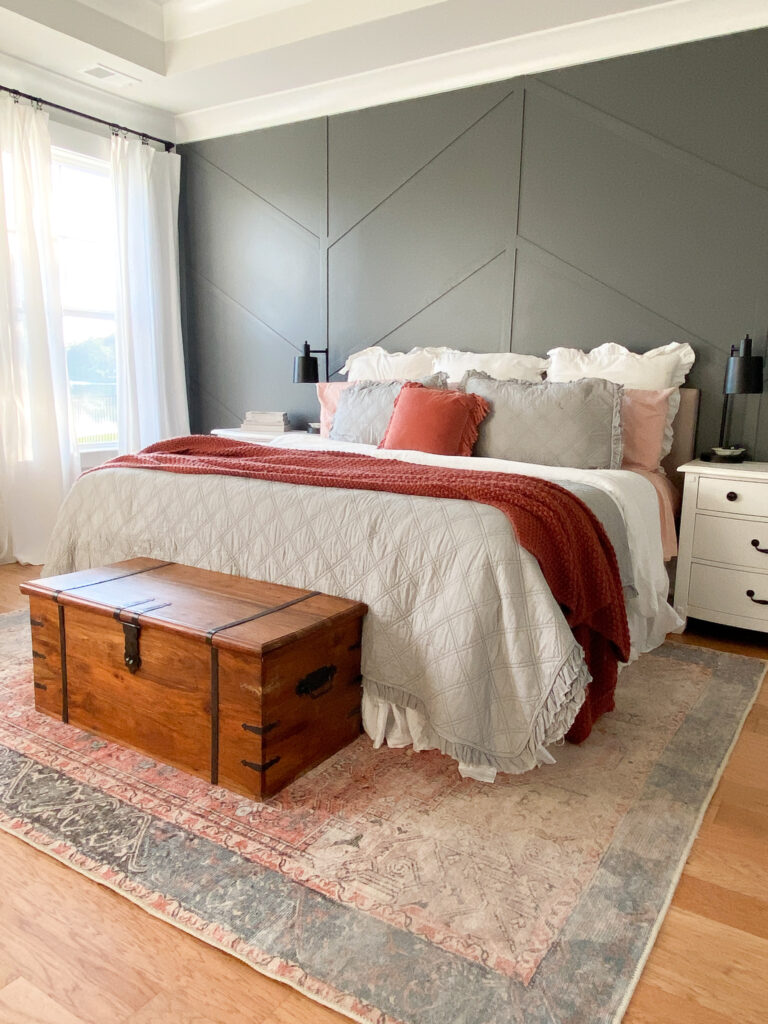
I still want to find something to go above the bed, but haven’t exactly decided what, until then I’m just going to enjoy this space.

Other Products
Let's connect!!
Stay connected for all your DIY and organizing needs!