Cribbs Style

  • About
  • Blog
  • Let’s Connect!
  • Privacy Policy and Disclosure

Home Office: Built In Wall Cabinets

DIY· Family· Farmhouse· Home Office· Paint· Shiplap Walls· Storage Soultions· Tips· Woodworking

29 Mar

**This post may contain affiliate links, which are of no additional cost to you, but help me buy more headache medicine because wow that was a lot of thinking!**

Coming up with ideas of what I envisioned my office to look like was one thing, making it come to life was another. I knew that I wanted built in cabinets on one wall of the office, but knowing what else we were doing in this space, to build them from scratch was NOT an option. You’ll never guess what we used!

Home office, shiplap, farmhouse, coastal farmhouse, built in
The bottom cabinets in this picture is the inspiration for the wall opposite the desk.
Home office, storage solutions, home office built in
Ta-daaaaa! I could cry I’m so happy the home office built ins are done!

We used stock kitchen cabinets! I know, I thought it sounded crazy too!  I thought that I was some sort of DIY genius when I came up with this idea, but since I have never installed kitchen cabinets and I took to Pinterest, I quickly discovered I wasn’t the first one to have done such a thing. (whomp, whomp)  My first thought was to use base cabinets, but instantly I saw a couple of problems.

1)  I wanted the cabinets to look like they had always been there and our baseboards are well over 7 inches tall. This meant that the cabinets would need to be built up on a base to give enough height to place the base board in front.

But then….

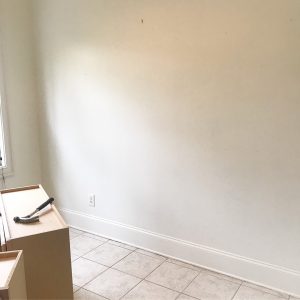
2) The windows in the home office are lower and didn’t allow much depth between the window casing and the wall, which meant base cabinets were out because they were too deep.

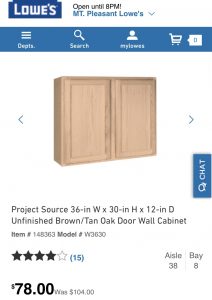
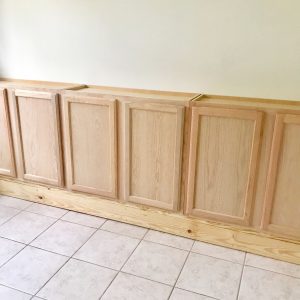
Then I looked at the upper cabinets instead and found they are less deep and would fill in nicely. Whew! We measured the wall and determined we would need three sets of these upper cabinets from Lowe’s. We would also have to install a filler piece on each end so that the cabinets appeared to span wall to wall.

Home office, storage solutions, home office built in

We scored these cabinets on sale AND had a 10% off coupon!

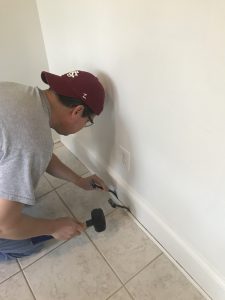
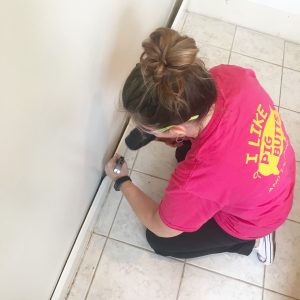
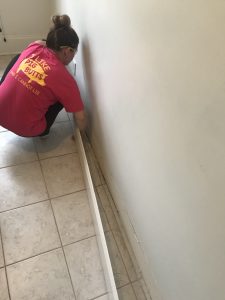
We removed the baseboard and shoe molding from the wall where the cabinet would live and were super careful. I wanted to reuse this piece to cover the base we would build and give it the “I’ve always been here” look.

Home office, storage solutions, home office built in
The hubby started things off with removing the shoe molding.
Home Office, Built In, Storage Solutions
Carefully removing the baseboards to reuse later. Oh and I LOVE me some BBQ.
Home office, storage solutions, home office built in
Carefully removing the baseboard and shoe molding allowed us to re-use it later.

To get the cabinet high enough off the ground, we used 2″ x 6″ boards. We built a rectangle long enough and wide enough for the cabinets to sit on and topped them off with two more boards to give it the correct height off the floor we needed.

Home office, storage solutions

Because I’m all about the base.

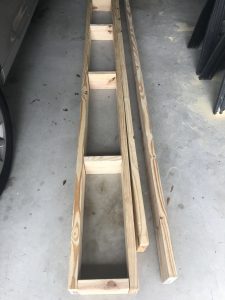
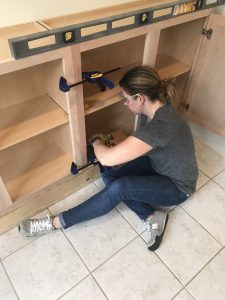
BEFORE we secured anything in place, we double checked everything, including the baseboard, to make sure it would all work. Slow and steady. Surprisingly the floor was level enough that we didn’t need to use any shims for the base or even when we placed the cabinets on top. We centered the base and secured the base into the wall using screws.

Home office, storage solutions, home office built in cabinets.

Base is in, cabinets are up and marked, time to install.

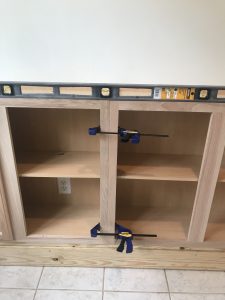
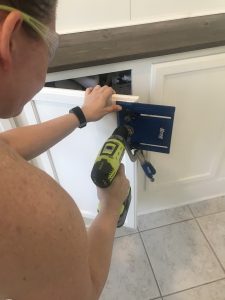
We placed the three cabinets on top and marked the cabinet location on the wall with a pencil. In that space, we used a Ryobi stud finder to mark where all the studs are to have something solid to secure the cabinets.  We needed to cut a square with our Ryobi Jigsaw on the back of the first cabinet to allow for the outlet behind it. We used an outlet extender to bring the outlet forward and after the third cabinet was installed and secured to the second cabinet, we placed the outlet cover back.  We used a large bit to create a hole at the top of the cabinet which would allow access to the outlet from the counter.

Home office, storage solutions, home office built in

Part of the arsenal from Ryobi we used for this project. If you have the right tools, you can literally do anything. (Drill and bits)

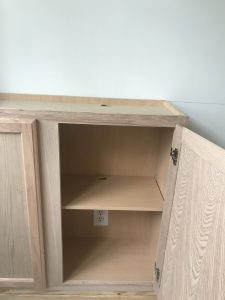
We then placed the first end cabinet and secured it to the wall using 3 inch screws.

Home office, storage solutions, home office built in cabinet

Using an outlet extender and making holes in the cabinet shelving, we still have access to the plug inside the cabinet.

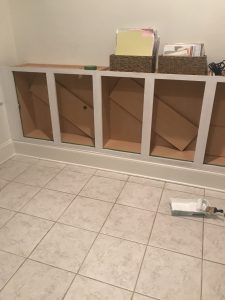
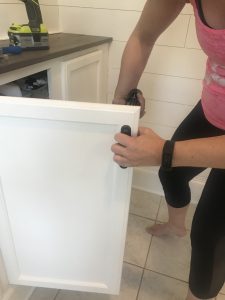
We added the second cabinet, clamped the two cabinets together and used 1 1/4 inch wood screws to secure them to one another before securing the second cabinet to the wall. Then continued to the third and final cabinet. We used a piece of wood to fill the gap on either side of the cabinets to fill in the space and again secured the filler piece to the wall.

Home office, storage solutions, home office built in
After the first cabinet was installed, the second cabinet was clamped to the first and both were checked with the level.
Home office, storage solutions, home office built in
After the cabinets are clamped together, I used smaller screws to secure the cabinets to one another.

Once everything was in place, we replaced the baseboard, shoe molding, and caulked any gaps. Then everything got a couple of coats of  the color “White Dove” from Benjamin Moore, but like all of my other paint, Lowe’s matched the color and I used Valspar paint. You can read all about my method for painting cabinets.

Home office, storage solution, home office built in.

After caulking and a fresh coat of paint, the built in cabinets look like they have always lived in this home office.

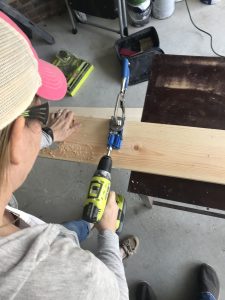
We couldn’t find one piece of wood that was long and wide enough to span the space for the counter on top of the built ins. Instead we used pocket holes, thanks to our Kreg pocket hole jig, to secure two boards together.

Home office, storage solutions, home office built in

Using another Kreg Jig to make pocket holes.

I used the same drill bit to make a hole in the counter where it would rest on the cabinet and allow access to the outlet inside the cabinet. The counter received the rustic wood look by first applying Weathered Gray by Rust-Oleum,  two coats of Classic Walnut from Minwax, then a top coat of  polyurethane.

Home office, storage solutions

View from the top to show the hole in the counter where we can still access the plug below.

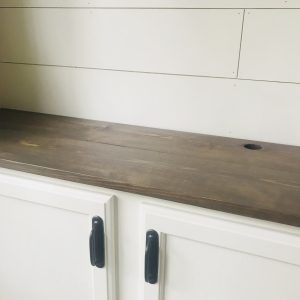
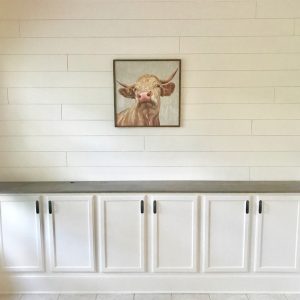
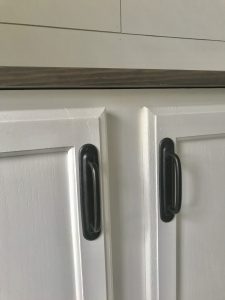
I stumbled upon these handles from Target and they are the perfect amount of farmhouse and industrial that I wanted for the space! Thankfully we had the Kreg Cabinet Hardware Jig and face clamp to install the cabinet pulls.

Home office, storage solutions, home office built in
The Kreg Jig was a huge help to make the holes for the cabinet hardware.
Home office, storage solutions, home office built in
Nothing sweeter than when you get close to the finish line.
Home office, storage solutions
Target saves the day with these super cute rustic door pulls.

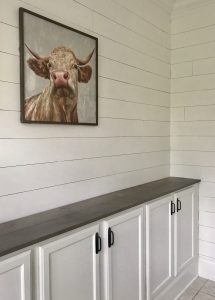
Once everything was in place, I felt like I needed to hang the star of the show, you guessed it, Ferdinand.

Home office, storage solutions

Ferdinand approved. All the rustic feels in one space.

What’s next?

  1. Shiplap (p.s. this was finished before this post)
  2. Build the desk
  3. Refinish side table
  4. Decorate

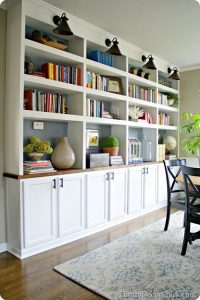
I feel like at this point the bulky part of the project is done, but there are still many things left to do.  Before we move on, I am IN LOVE with the wall of cabinets. Even getting rid of the two tall book cases, the built in cabinets have already provided so much storage.

Bye bye blank boring wall!
Home office, storage solutions, home office built in
Ta-daaaaa! I could cry I’m so happy the home office built ins are done!

XOXO,

Brooke

Home office, storage solutions, built in cabinets

Built in wall cabinets added style and function to our home office.

P.S. Don’t forget to subscribe below.

Let's connect!!

Stay connected for all your DIY and organizing needs!

Success! Now check your email to confirm your subscription.

There was an error submitting your subscription. Please try again.

We won't send you spam. Unsubscribe at any time. Powered by ConvertKit

« Clutter Free Home Organization Challenge- Master Bedroom
Home Office Refresh- Rustic Industrial Desk »

Hi, I'm Brooke! Welcome to my little corner of the web where I share my (hopefully) helpful tips about how I'm navigating through life, one organizing and DIY project at a time. Come on in, make yourself comfortable, and let's get to work!

Let’s Connect

  • Facebook
  • Google+
  • Instagram
  • Pinterest

Stay Connected

Features

Featured on Hometalk.com

cribbsstyle

Lover of DIY• Organizing Nerd• Chaos Coordinator• Momma of 2• Wife• Living the dream in Charleston, SC •
brookecribbs@live.com

Brooke Cribbs
From early in my relationship with Courtney, we lo From early in my relationship with Courtney, we loved going to open houses and parade of homes. Anything to get ideas and inspiration on what we wanted in our own home. Believe it or not, we’ve moved 10 times. Of those 4 were homes we bought and one of them a home we built. Needless to say when we saw the online photos of our “hopeful” future home plan, we agreed we had at least one more move in us.  What’s something you’re looking for in your next home?
In my lifetime of doing DIY, I’ve picked up a fe In my lifetime of doing DIY, I’ve picked up a few tips and tricks along the way. #partner Check out the link in my profile for my first @homesdotcom article of the year where I share all my juicy secrets. 🙌🏽
I needed to take a long break after last week to p I needed to take a long break after last week to process all that’s going on. I’m still processing. One of my favorite things to do is take long walks through construction sites surrounded by plumbing and framing.  No lie. This is where we’ve gone multiple evenings over the last couple of weeks. This place has brought us a lot of peace and on the blog I’m spilling the beans on our secret.
I had to do it too and pull up my top nine from th I had to do it too and pull up my top nine from this year. And I’m not surprised by what’s there. The tragic helicopter accident that took Kobe, his daughter, and their friends rocked me in a way I didn’t know it would.  It was clear that y’all loved the bedroom renovations this year and our @wearewoodgrain accent wall was a huge crowd favorite. Kennedy’s diamond pattern wall is one of my most pinned on Pinterest to this day. I’m deep in planning mode for this year and can’t wait to bring more fun content. Hope that everyone had a great night and an even better weekend!!
Walking out of this year with a whole new perspect Walking out of this year with a whole new perspective. While this year was filled with so much uncertainty, I was still able to find some light and a more clear vision. (I’ve always said the best lessons come in the valleys of life.) I’ve spent the last few weeks with Court and the girls and I’ve come to some realizations that will change the vision I thought I had for the future. I thank you for being on this journey.  I’m blown away by the people I’ve met online and in person from this community.  The opportunities I’ve been blessed to experience.  I pray that everyone has a safe night and we all wake up tomorrow with hope that the new year will bring more peace.
Christmas is only two days away, but there’s sti Christmas is only two days away, but there’s still plenty of time to make one of the perfect handmade holiday courtesy of  the @homedepot! Home Depot doesn’t just focus on big DIY projects, they have all the supplies to help you with your smaller personalized DIY projects too! From stencils to wood shapes they can help you bring your handmade gifts to life. Looking for more holiday DIY gift ideas?  Don’t forget to check the link in my bio for other great DIY Holiday Handmade Ideas  to make the ones you care about most, smile.  #THDxHoliday #HomeDepotPartner #sponsored #thdxdiyworkshops
The holidays can be a stressful time of year, and The holidays can be a stressful time of year, and this year is no exception. If you’re looking for a last minute, budget friendly, and sentimental gift, the @homedepot has you covered! What better way to show someone you care, than with a thoughtful homemade gift.  Check out the link in my bio for all the other amazing DIY homemade holiday gift ideas. Also, be sure to check out my blog and how I took @_ashleighlaurn lazy susan tutorial and put my own personal spin on it. (See what I did right there?) 😉 #homedepotpartner #thdxholiday #sponsored #thdxdiyworkshops
Remember that sweet three tiered tray from Decor S Remember that sweet three tiered tray from Decor Steals? Here she is all decked out for Christmas! Speaking of Christmas, I some how misplaced my favorite Christmas t-shirt. I spent the better part of the night tearing my closet apart.  No dice. But at least my kitchen’s cute. 😉
Load More...

The bottom line

All work is Copyright of Cribbs Style and are solely the opinion and suggestion of Cribbs Style. Any links to affiliate sites could result in payment to me, but my honest opinion will be given in regards to the products. You are more than welcome to use one picture as long as you link back to this site and please do not crop out any watermarking.

Copyright © 2021 · Refined theme by Restored 316