Beautiful update to old furniture using black paint as a stain
Out of all the DIY projects I have ever completed, nothing compares to a transformation using paint. From whole room renovations to furniture rehabs, paint can completely change the look and feel just by simply changing colors.

I’ve always had a love of rescuing furniture over buying brand new. Not only does it keep these pieces out of the landfills, I feel like old furniture has a story to tell.
**This post contains affiliate links for various brands including Amazon, which does not cost you anything extra, but helps me earn a small commission that keeps my business grow. Click here for my complete disclosure.
When we moved to our new house my decor style changed and I had a piece of furniture I loved. I wasn’t quite sure where it should go, but one thing was for sure it wasn’t going away.
This particular piece had a lot of history because it first belonged to my grandmother, Nonny, and she gave it to me right before she passed.
From there it lived in my childhood room and has followed me all the way until now many years later.
Just because the color of the piece no longer worked, the bones and structure were actually perfect.
The refinishing process
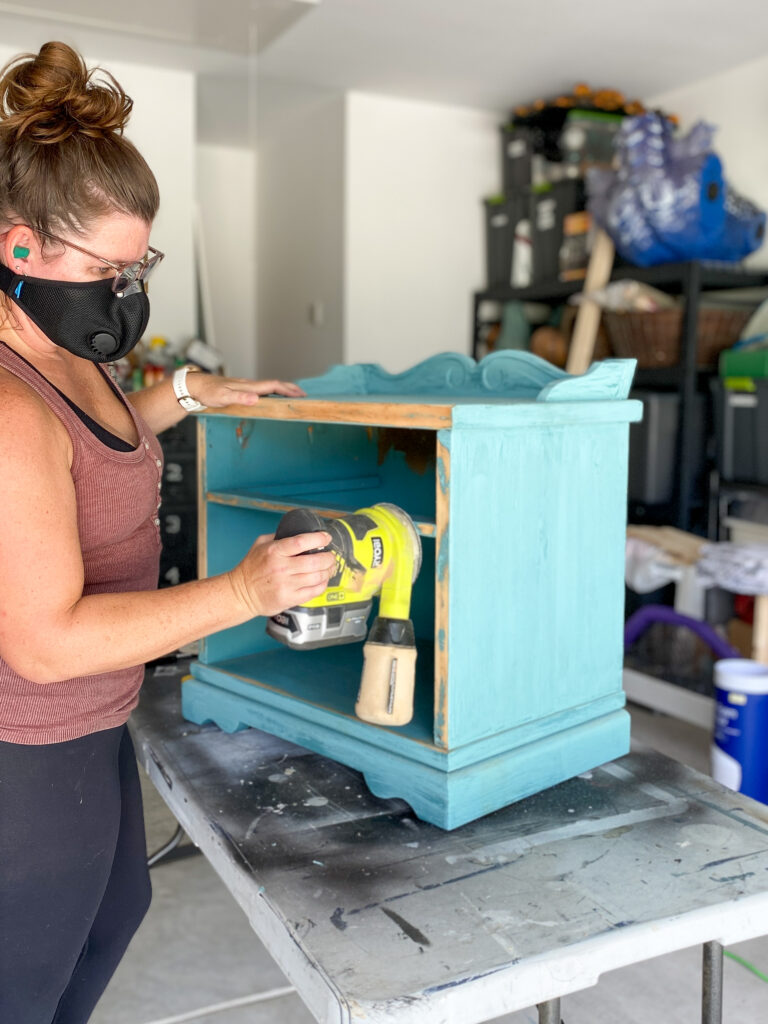
Because there was a crackle finish, I began the project by sanding using my Ryobi orbital sander and 80 grit sandpaper followed by 100 grit sandpaper.
My original thought was just to knock down the texture, but to my surprise, the paint came off relatively easy so I decided to sand down to the raw wood.
I think that’s my other favorite part about projects is just seeing where things go.
I’ve learned over time, being flexible in the creative process makes things a lot more exciting than frustrating.
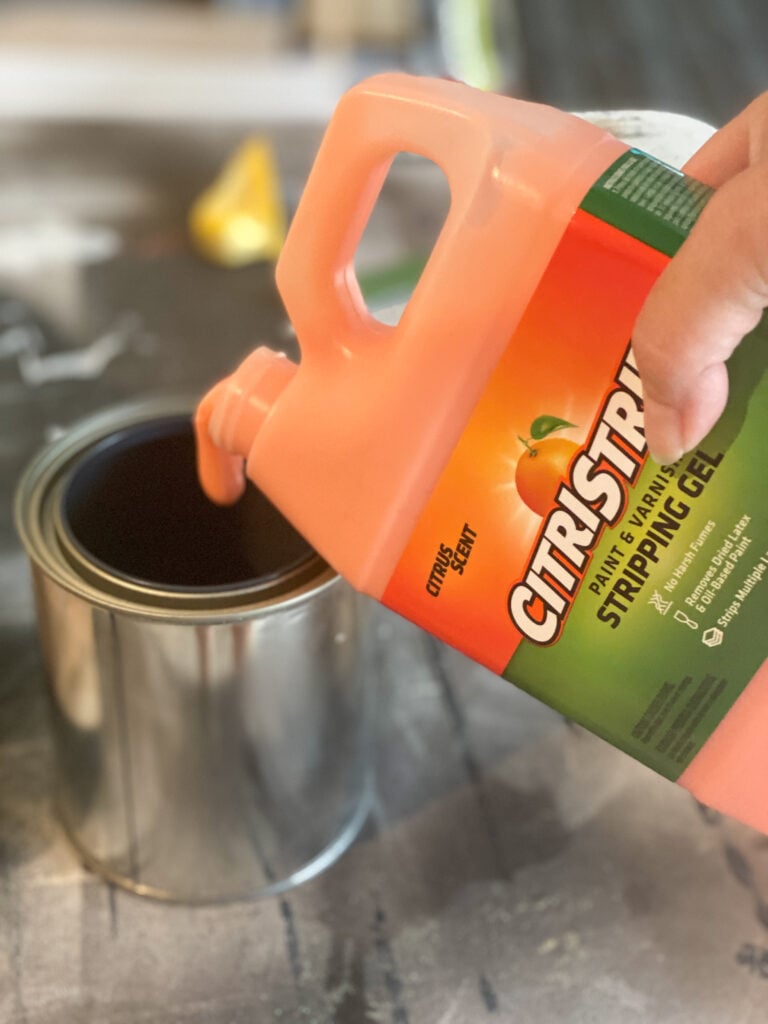
I did run into a problem in some spots, but with the help of Citristrip and stripper after wash, was able to get the remaining bigger areas of paint to go away.
**FURNITURE STRIPPING TIP** make sure you’re in a well ventilated area and use proper safety equipment. Read the labels on the back of the bottles for instructions and follow them please.
I then went over the entire piece with 220 grit sandpaper to smooth everything out and wiped the piece of furniture down with a microfiber cloth.
After all the sanding and furniture stripper I was able to get the piece of furniture back to its natural glory.

Using black paint as a stain
Instead of doing a black stain I decided to take a paint that I already had on hand, Tricorn Black by Sherwin Williams in BEHR Marquee Satin, and added water to thin out the paint.
Basically I made a stain out of the paint that I had on hand making this finish basically free.
The more water you add, the lighter the paint finish will be, but I kept mine a bit more on the dark side. I wanted to still see the woodgrain without being completely covered.

I applied the paint mixture in small areas and quickly wiped off the excess to expose the grain. I continued this process on the entire piece of furniture.
Once it was dry and I was satisfied with the color, I used 100 grit sandpaper to distress the edges and anywhere where something would naturally rub on furniture over time.

Using a brush I then added a coat of polycrylic in clear matte using my Zibra brush.
I love this product because it does’t yellow and it’s water based for easy clean up.
After the polycrylic dried, I used 220 grit sandpaper and lightly hand sanded over the piece to take out any brush marks and rough patches.
I followed with a second and final coat of polycrylic and let it dry.

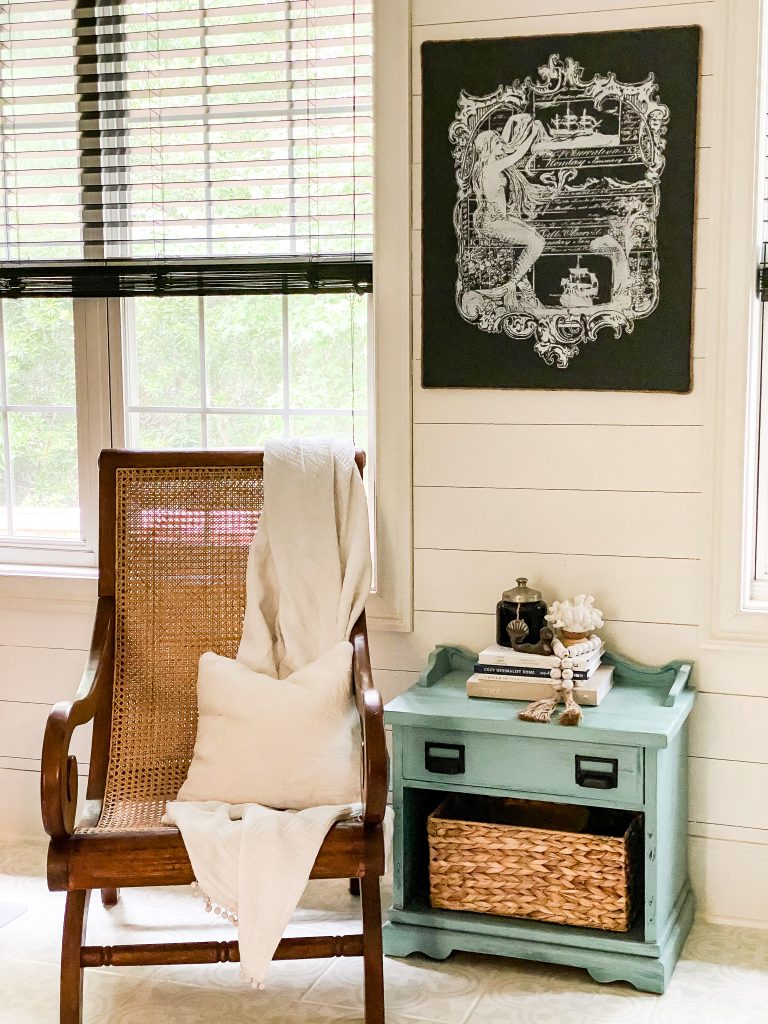
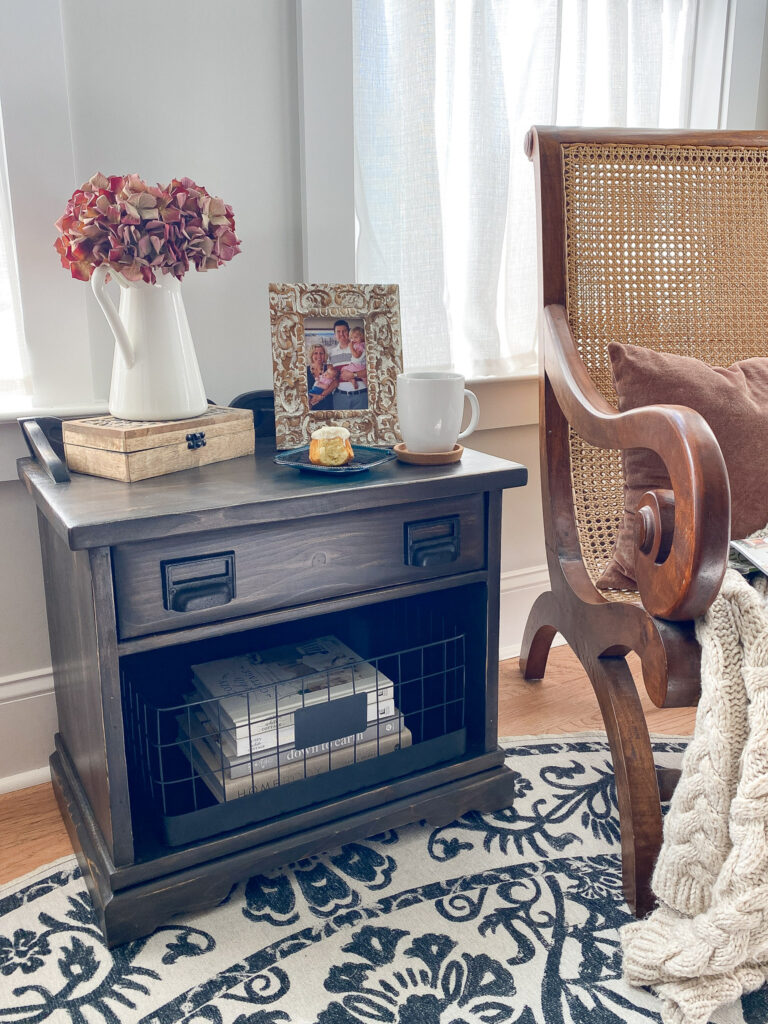
A beautiful update to old furniture
I added the hardware that was already on the piece of furniture before and I was completely amazed by this furniture transformation.

No one would every know this piece of furniture has been with me for well over 30 years, yet it has a gorgeous modern farmhouse finish that compliments my current decor.
I’m so happy that I held on to this piece of furniture and now it will have more new stories to tell.

Let's connect!!
Stay connected for all your DIY and organizing needs!