Cribbs Style

  • About
  • Blog
  • Let’s Connect!
  • Privacy Policy and Disclosure

How to stencil a tile floor to look like faux brick.

$100 Room Challenge· Budget Decor· DIY· Farmhouse· Flooring· Paint· Rust-Oleum

22 Sep

With no way to replace flooring, I decided to paint my tile floor to look like faux brick.

We’re coming into week 4 of the $100 Room challenge and this week I’m taking on faux brick! (FYI There isn’t a week 3 for me because I took that week off.)

I introduced my laundry room and the dilemma of the cracked tile floor. I already have practice since I stenciled my office flooring. This time, I wanted to try my hand at a faux brick pattern stencil.

Inspiration photo

**This post may contain affiliate links, which cost you nothing extra, but help me to maintain this site.**

Materials

Faux brick stencil

Sorry for the crappy photo

Kilz Primer The paint said it didn’t need a primer, but I wasn’t going to leave this to chance.

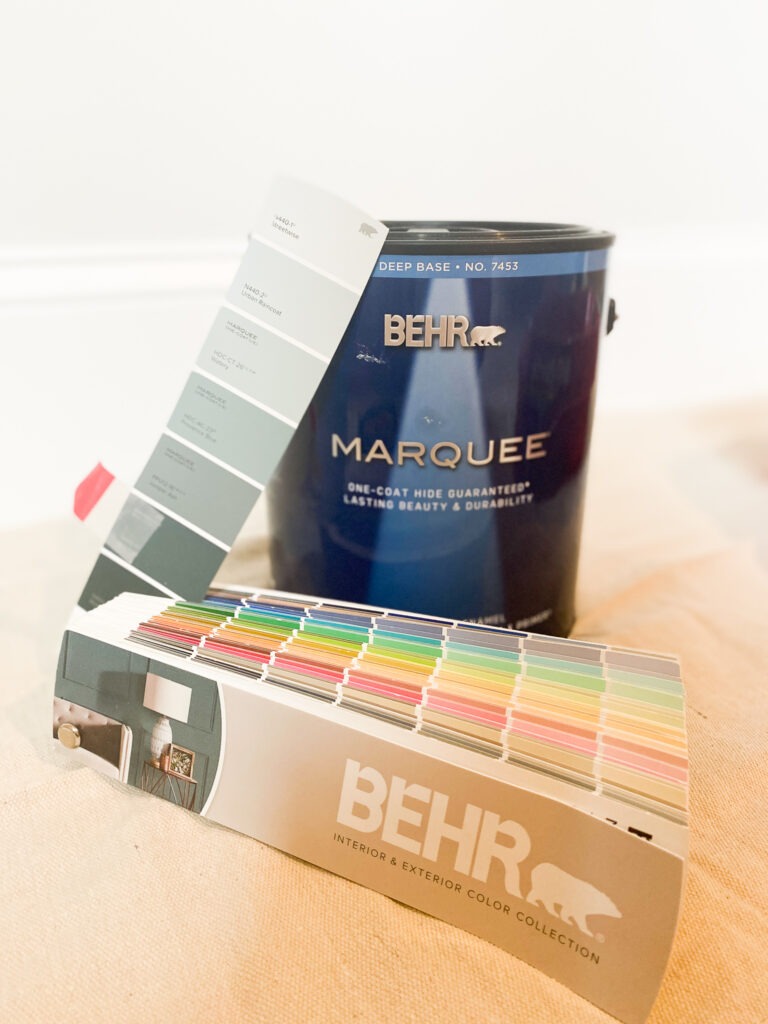
Rust-Oleum Home Floor Paint White 1 quart (this is a link to the gallon, but I only used a quart

Rust-Oleum Home Floor Paint Charcoal Gray 1 quart

floor paint

Painter’s Tape

Foam Roller

foam roller

Minwax Polycrylic Clear Matte: There is a protective coating that Rust-Oleum recommended with the paint. However, this is the protective coating I used with my other floor that worked really well.

Priming the floor

I painted the primer coat using a brush to get the grout and the edges of the tile. I then came back through with the foam roller to paint the rest of the tile. I allowed the primer to dry according to the instructions.

Priming floor tile

Painting the base coat.

After the primer dried, I painted a coat of the white Rust-Oleum Floor coating and allowed it to dry. It is important to note, this particular paint will dry tacky. I didn’t not know this and thought that I had messed something up.

Painting floor

Faux brick stencil

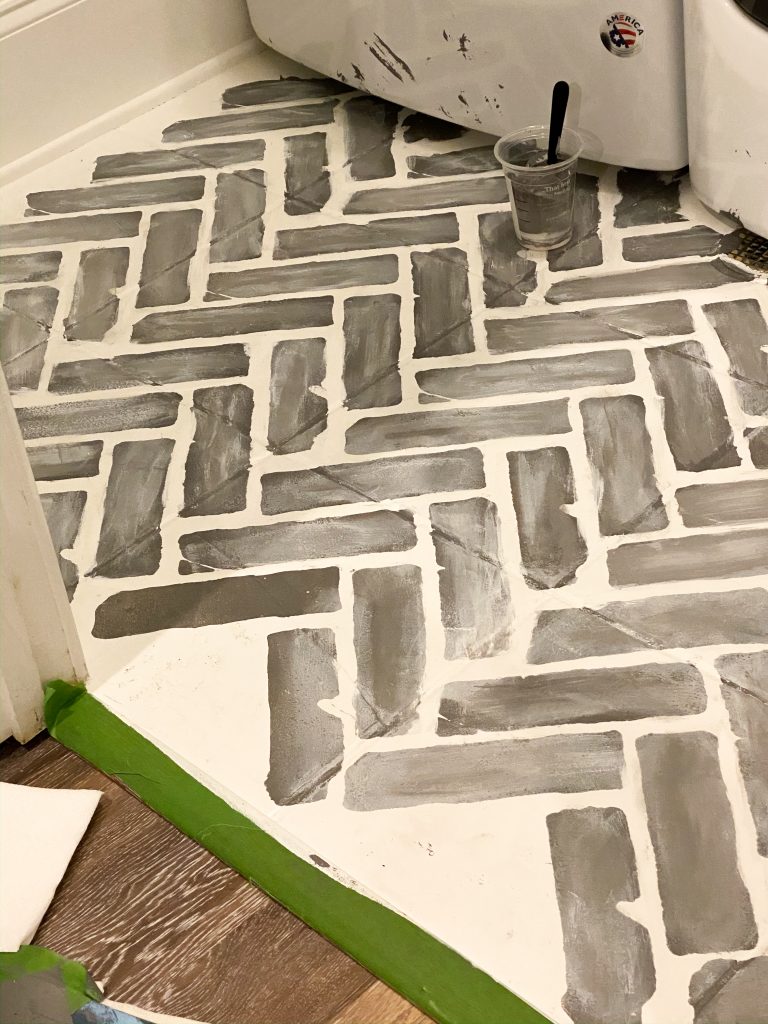
Next, using painters tape I secured the faux brick stencil to the floor. This is where you’ll need to check your inner perfectionist at the door.

Faux brick stencil

Speaking of the door, I started there with the faux brick stencil. Mostly because it was important that the faux brick design lined up when you first walked into the room.

Faux brick stencil

Using the charcoal gray Rust-Oleum floor paint and foam roller, I started laying down the design. I did thinner coats of paint, because that allowed the paint to dry quicker. I didn’t worry about complete coverage of the faux bricks because I knew I would be adding more paint later.

**Tip** When using a stencil and a roller, try not to push the paint as it will bleed under the stencil. You will also want to wipe the stencil off on the bottom to prevent ghost transfer of the stencil.

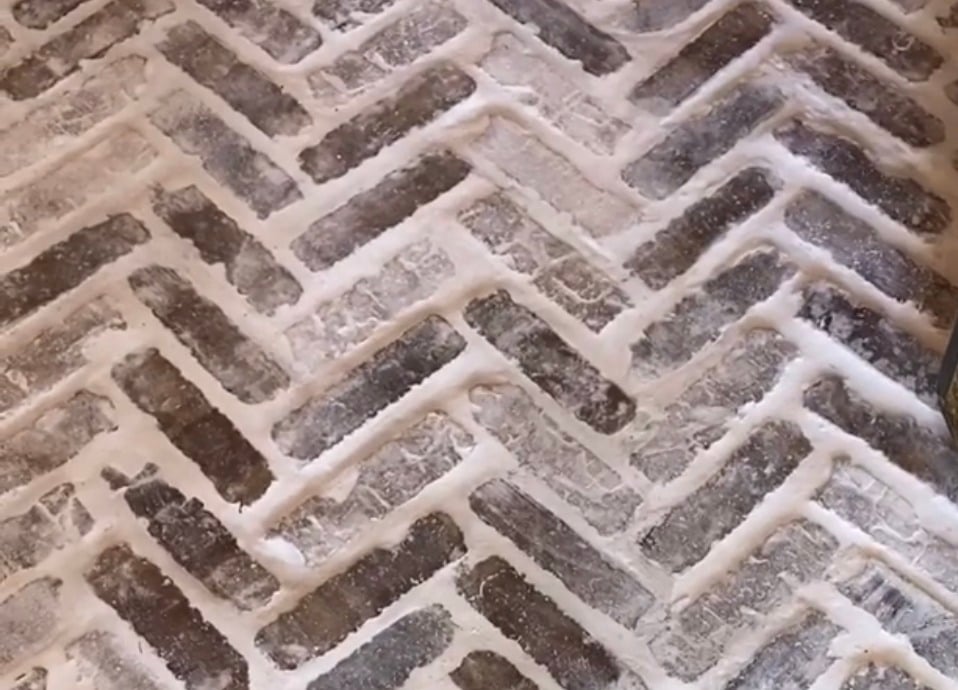
The faux brick stencil had tiny triangles to help me line up the design, but they were not the best to see. Once the full faux brick stencil was done, I went in with a paint brush to add the faux brick look to the painted floor. I used the white, the charcoal gray, and made a third middle gray color. This next part was fun.

Finishing the faux brick

Using the brush, I added varying colors to the faux brick.

Faux brick stencil
Brushing on different colors of paint.

I followed up with a paper towel to mix them all to give the faux brick stencil a weathered look.

Faux brick stencil
Blending the paint with a paper towel to give a weathered look.

I hand painted each faux brick, but this part was cool because each faux brick is different. After all the full sized faux bricks were done, I went in and did the partial faux bricks. This required me to use only parts of the stencil.

Faux brick

Any places in what would be the grout of the faux brick, I used and the white paint to clean up. The coverage with this paint was pretty impressive.

Faux brick

Finally, after the paint had fully dried, I added two coats of the Minwax Polycrylic. Yes the Rust-Oleum system has its own topcoat, but to keep within the $100 budget for this refresh, I used what I had on hand. I used the polycrylic for my last floor stencil project and it has worn really well and not yellowed.

Final thoughts and budget for the faux brick floor.

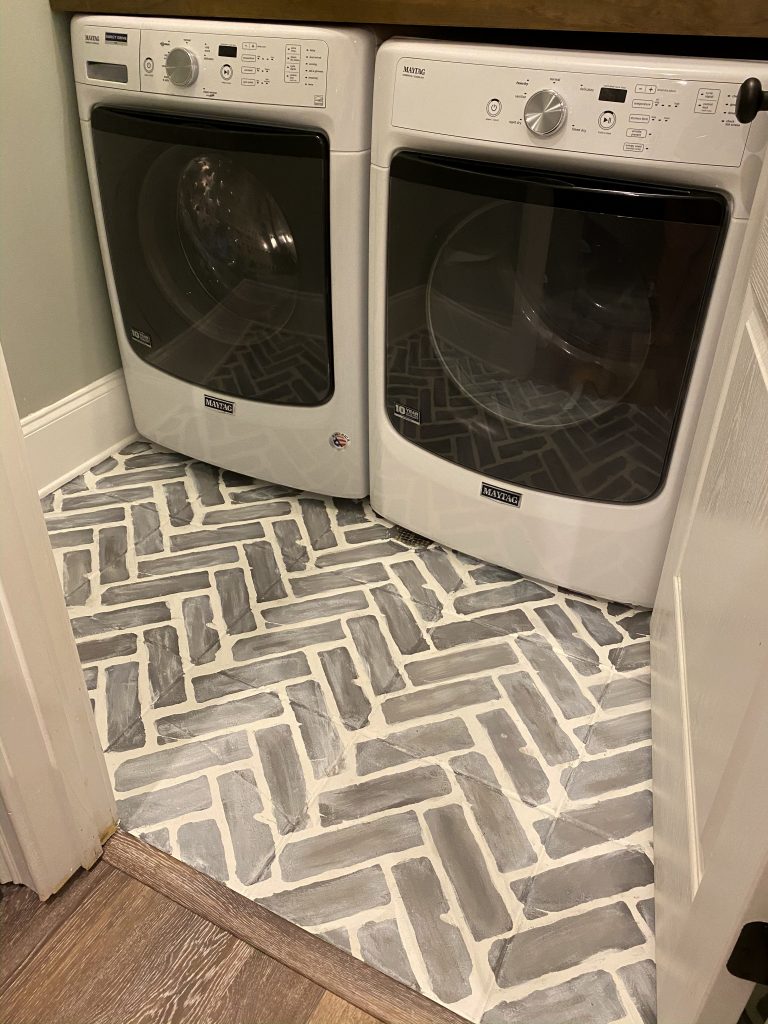
I’m glad I asked around about the floor being tacky after I painted. I was not aware that this was common with the Rust-Oleum floor paint. Overall I was very happy with the coverage and how easy the paint was to work with. No, I did not paint under the washer and dryer, and I sort of had to wing it when the faux brick stencil was under there. The paint also came off super easy from the front of the washer and dryer.

faux brick

I did have to step back several times to make sure I actually liked the look of the faux brick stencil. I honestly feel like the faux brick turned out just how I envisioned it in my head. This faux brick flooring is a great way to extend the life on the tile until I’m ready to replace the floor completely.

Let’s see how I’m doing on the budget:
-Rust-Oleum Floor paint- 2 quarts $39.96
-Faux Brick Stencil- $20.99
Total: $60.95

I already had the Minwax Polycrylic, painters tape, and foam rollers on hand.

faux brick

Next week is the final reveal and I might have one more trick up my sleeve.

Don’t forget to check on the progress of all of the other projects!.

XOXO,
Brooke

You are invited to the Inlinkz link party!

Click here to enter

Let's connect!!

Stay connected for all your DIY and organizing needs!

Success! Now check your email to confirm your subscription.

There was an error submitting your subscription. Please try again.

We won't send you spam. Unsubscribe at any time. Powered by ConvertKit

« How to fix a cracked tile.
DIY Hanging Laundry Hamper Inspired by Pottery Barn »

Comments

  1. AnnMari says

    September 22, 2020 at 10:05 pm

    The faux brick looks amazing! I have a linoleum floor in our laundry room and have been considering replacing with brick flooring but maybe I’ll try this first. I’m guess the tackiness went away after using the top coat? Thanks for the detailed tutorial.

    • Brooke says

      September 28, 2020 at 8:02 pm

      Thank you so so much!! I love how they turned out.

  2. Jen @ JENRON DESIGNS says

    September 23, 2020 at 2:32 pm

    Stenciling on vinyl floors have been such a pattern saver these days, I really love how they can change up a space.

    • Brooke says

      September 28, 2020 at 8:01 pm

      I completely agree! I think I just bought us a few more years with this floor.

  3. Leen Curinga says

    September 24, 2020 at 1:33 pm

    It looks so great! I can’t wait to see your final trick 🙂

    • Brooke says

      September 28, 2020 at 8:01 pm

      I hope it turns out, we shall see!!

  4. Maria Brittis says

    September 25, 2020 at 8:31 am

    OMG its just gorgeous! Thats not an easy thing to do. I had my driveway done like this years ago and it was amazing watching the wormaship.

    • Brooke says

      September 28, 2020 at 8:00 pm

      Thank you!!! I had to step back several times because I wasn’t sure how it was going to turn out.

  5. Maria Brittis says

    September 25, 2020 at 8:33 am

    Its me again sorry for typo I meant to say workmanship lol, could not change it typing to fast.

    • Brooke says

      September 28, 2020 at 8:00 pm

      You are too cute, I love it! 🙂

  6. Jackie @jackiecantblog says

    September 28, 2020 at 7:10 am

    This looks great! I really like the gray and white combo for this little space. Looking forward to seeing your space complete

    • Brooke says

      September 28, 2020 at 7:59 pm

      Thank you!! I am in love with them.

  7. Erin- Lemons, Lavender, & Laundry says

    September 28, 2020 at 7:39 pm

    What a cool idea! I have stenciled floors before but never even thought about a faux brick. Love it!

    • Brooke says

      September 28, 2020 at 7:59 pm

      Thank you! I wasn’t sure how it was going to turn out, but I’m in love.

  8. Amy Dowling says

    September 29, 2020 at 5:57 pm

    It turned out great and looks just like faux brick! What a great money saver!

    • Brooke says

      October 4, 2020 at 7:29 pm

      Thank you!!

Hi, I'm Brooke! Welcome to my little corner of the web where I share my (hopefully) helpful tips about how I'm navigating through life, one organizing and DIY project at a time. Come on in, make yourself comfortable, and let's get to work!

Let’s Connect

  • Facebook
  • Google+
  • Instagram
  • Pinterest

Stay Connected

Features

Featured on Hometalk.com

cribbsstyle

Lover of DIY• Organizing Nerd• Chaos Coordinator• Momma of 2• Wife• Living the dream in Charleston, SC •
brookecribbs@live.com

Brooke Cribbs
From early in my relationship with Courtney, we lo From early in my relationship with Courtney, we loved going to open houses and parade of homes. Anything to get ideas and inspiration on what we wanted in our own home. Believe it or not, we’ve moved 10 times. Of those 4 were homes we bought and one of them a home we built. Needless to say when we saw the online photos of our “hopeful” future home plan, we agreed we had at least one more move in us.  What’s something you’re looking for in your next home?
In my lifetime of doing DIY, I’ve picked up a fe In my lifetime of doing DIY, I’ve picked up a few tips and tricks along the way. #partner Check out the link in my profile for my first @homesdotcom article of the year where I share all my juicy secrets. 🙌🏽
I needed to take a long break after last week to p I needed to take a long break after last week to process all that’s going on. I’m still processing. One of my favorite things to do is take long walks through construction sites surrounded by plumbing and framing.  No lie. This is where we’ve gone multiple evenings over the last couple of weeks. This place has brought us a lot of peace and on the blog I’m spilling the beans on our secret.
I had to do it too and pull up my top nine from th I had to do it too and pull up my top nine from this year. And I’m not surprised by what’s there. The tragic helicopter accident that took Kobe, his daughter, and their friends rocked me in a way I didn’t know it would.  It was clear that y’all loved the bedroom renovations this year and our @wearewoodgrain accent wall was a huge crowd favorite. Kennedy’s diamond pattern wall is one of my most pinned on Pinterest to this day. I’m deep in planning mode for this year and can’t wait to bring more fun content. Hope that everyone had a great night and an even better weekend!!
Walking out of this year with a whole new perspect Walking out of this year with a whole new perspective. While this year was filled with so much uncertainty, I was still able to find some light and a more clear vision. (I’ve always said the best lessons come in the valleys of life.) I’ve spent the last few weeks with Court and the girls and I’ve come to some realizations that will change the vision I thought I had for the future. I thank you for being on this journey.  I’m blown away by the people I’ve met online and in person from this community.  The opportunities I’ve been blessed to experience.  I pray that everyone has a safe night and we all wake up tomorrow with hope that the new year will bring more peace.
Christmas is only two days away, but there’s sti Christmas is only two days away, but there’s still plenty of time to make one of the perfect handmade holiday courtesy of  the @homedepot! Home Depot doesn’t just focus on big DIY projects, they have all the supplies to help you with your smaller personalized DIY projects too! From stencils to wood shapes they can help you bring your handmade gifts to life. Looking for more holiday DIY gift ideas?  Don’t forget to check the link in my bio for other great DIY Holiday Handmade Ideas  to make the ones you care about most, smile.  #THDxHoliday #HomeDepotPartner #sponsored #thdxdiyworkshops
The holidays can be a stressful time of year, and The holidays can be a stressful time of year, and this year is no exception. If you’re looking for a last minute, budget friendly, and sentimental gift, the @homedepot has you covered! What better way to show someone you care, than with a thoughtful homemade gift.  Check out the link in my bio for all the other amazing DIY homemade holiday gift ideas. Also, be sure to check out my blog and how I took @_ashleighlaurn lazy susan tutorial and put my own personal spin on it. (See what I did right there?) 😉 #homedepotpartner #thdxholiday #sponsored #thdxdiyworkshops
Remember that sweet three tiered tray from Decor S Remember that sweet three tiered tray from Decor Steals? Here she is all decked out for Christmas! Speaking of Christmas, I some how misplaced my favorite Christmas t-shirt. I spent the better part of the night tearing my closet apart.  No dice. But at least my kitchen’s cute. 😉
Load More...

The bottom line

All work is Copyright of Cribbs Style and are solely the opinion and suggestion of Cribbs Style. Any links to affiliate sites could result in payment to me, but my honest opinion will be given in regards to the products. You are more than welcome to use one picture as long as you link back to this site and please do not crop out any watermarking.

Copyright © 2021 · Refined theme by Restored 316