Easy Linen closet built in refresh
What was once a coat closet turned linen closet, just got a built in refresh.
I am a firm believer of making your house your own fully functioning home, no matter how the builder intended it.
When we moved into our new home, the first thing I noticed was that the storage wasn’t very well thought out.
The bathroom that the girls shared had a linen closet, the primary bathroom did not.
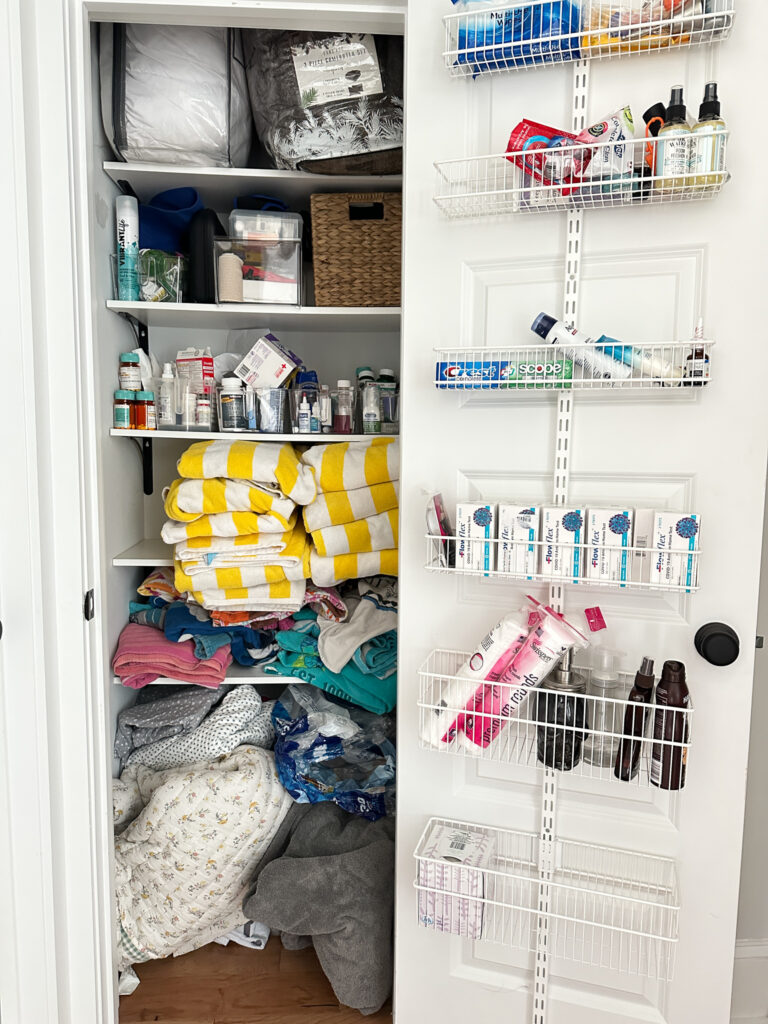
Instead of using the coat closet as it was intended, I decided to turn it into the family linen closet.
**This post contains affiliate links for various brands including Amazon, which does not cost you anything extra, but helps me earn a small commission that keeps my business grow. Click here for my complete disclosure.
What started as a quick fix for the linen closet, turned into an organizational nightmare.
In an effort to try to get the house unpacked, I added shelves and shelving brackets inside this closet thinking that would be sufficient.
I was wrong.
The makeshift shelving system barely worked and I was looking for the perfect time to do something a little more permanent.
You know, the same time we had multiple lacrosse games, doctor’s appointments, and a weekend trip to Florida planned.
My timing is impeccable.
Materials
I used 1″ x2″ firing strips to create the back and side supports. Using my most favorite screws and my RYOBI drill I secured them into the studs creating a “U” for the shelf wood to sit on.
DIY TIP: If you’re working solo, use a brad nailer to temporarily secure your wood to the wall to act as another set of hands so you can secure the wood into the wall with screws.

The shelves in the makeshift makeover initially were’t deep enough and things kept hanging over and falling off.
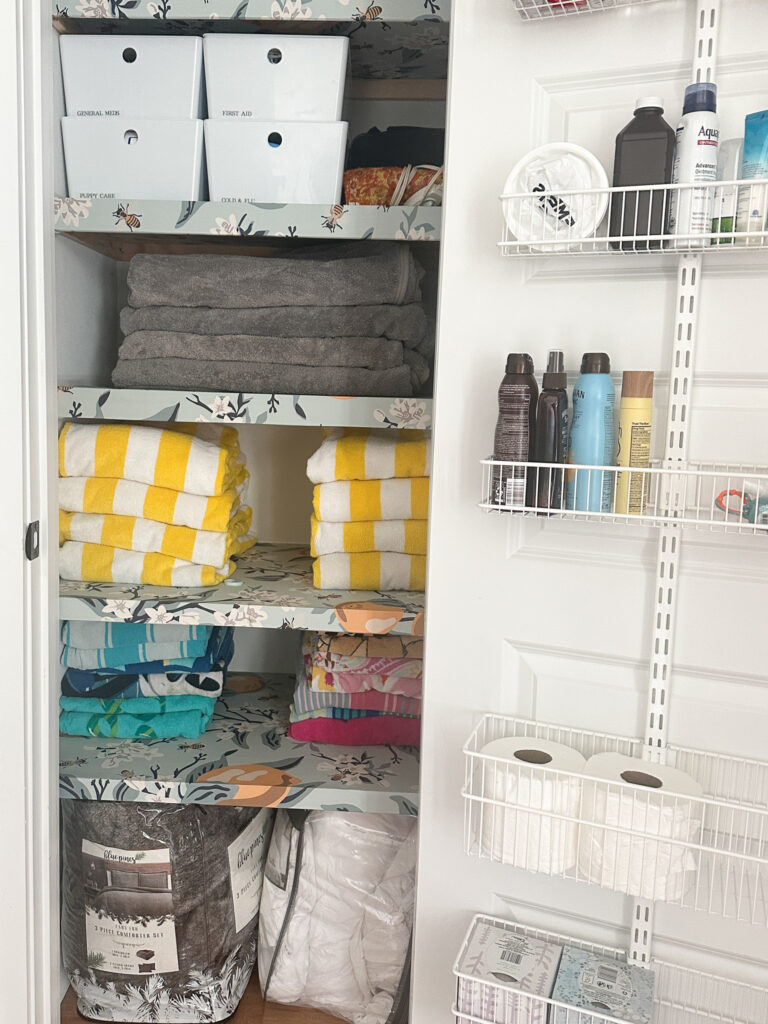
I decided to make the bottom two shelves extend the full depth of the closet using one edge glued panel.
I could have made things more simple by purchasing a sheet of plywood, but buying premade glued panels was slightly cheaper and easier to transport.
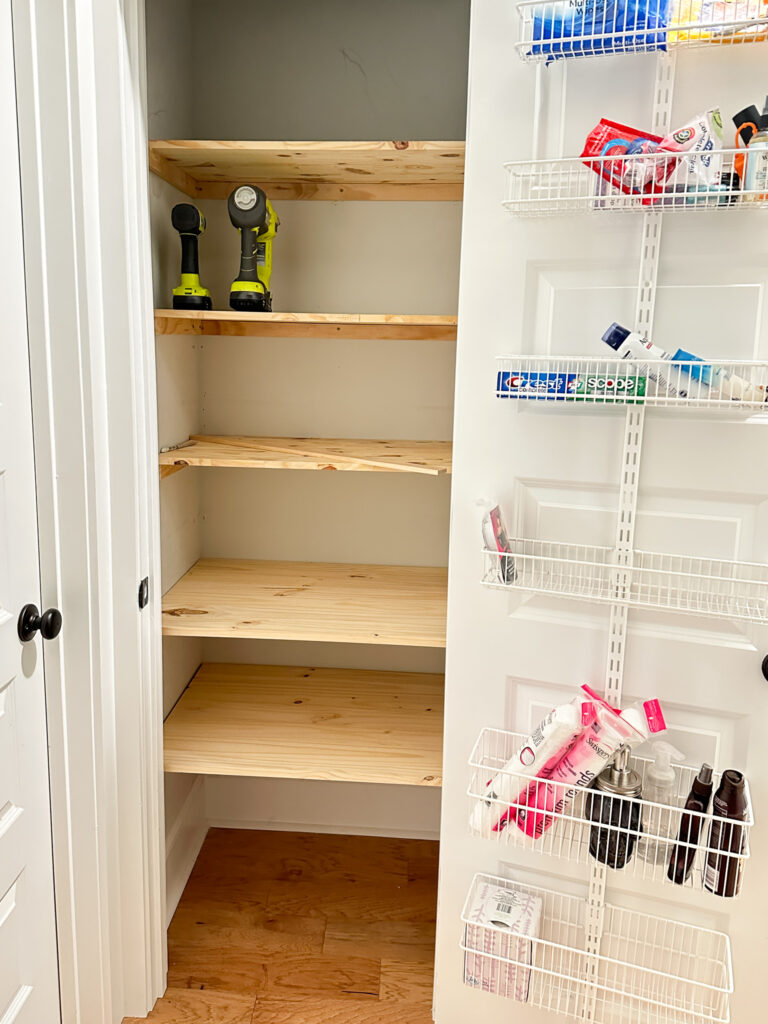
Because the wood was just slightly wider than what I needed, I used my RYOBI circular saw and KREG Rip Cut jig to cut the wood down to the width that I needed.
I gave everything a real good sand down and wiped everything off before installing in the closet.
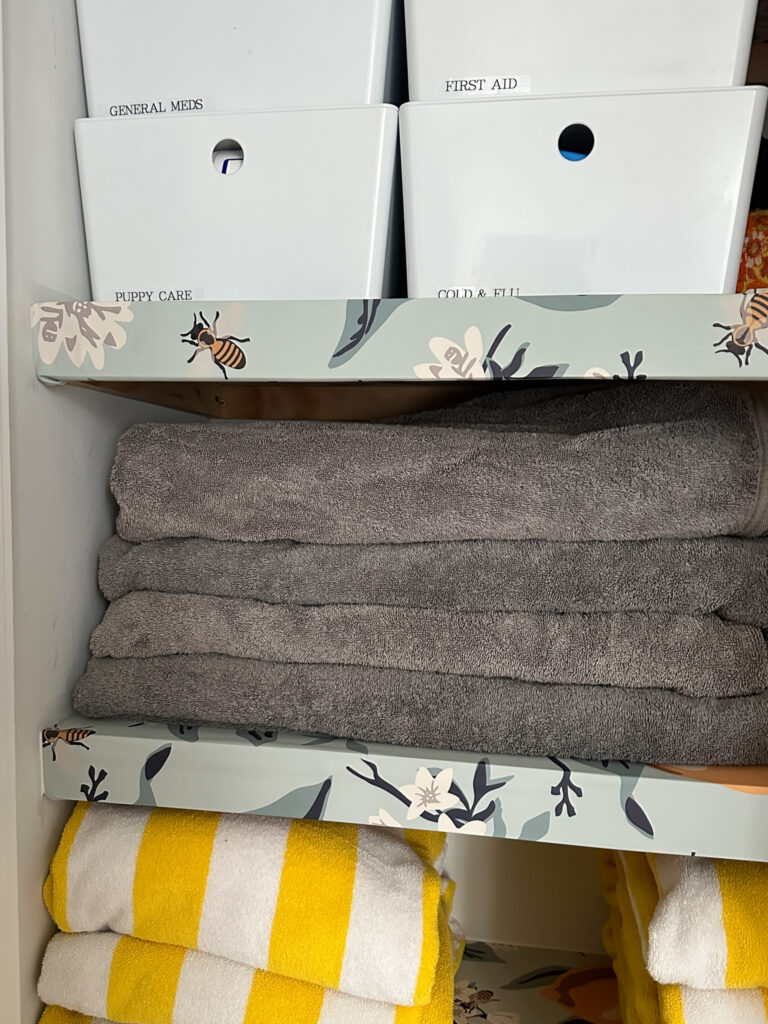
To finish off the look I added 3/4″ x 2″ pieces of wood securing them with wood glue and brad nails to give the appearance that the shelves were thick.
After the wood shelves were in their final spot I caulked and filled in all the nail holes.

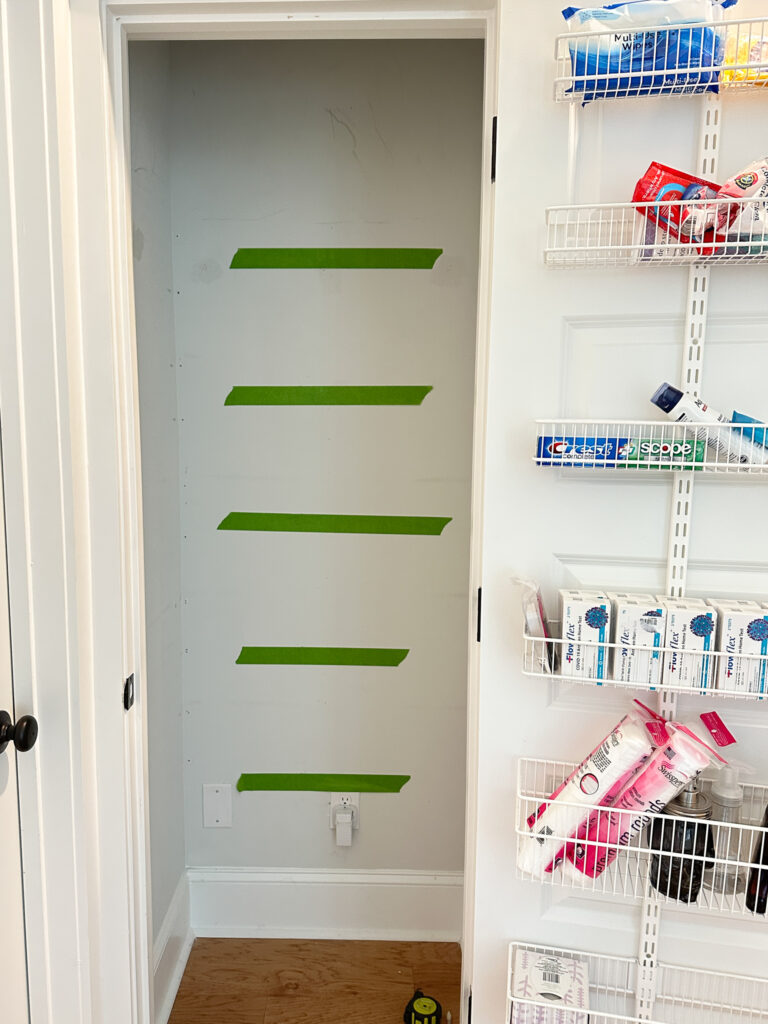
Here’s where the linen closet built in refresh got tricky.
Remember me saying that I picked the best timing for this project?
With the days ticking away I realized I wasn’t going to have enough time to prime, paint, get everything put back together, AND clean the house before our trip.
Then it hit me.
The amazing peel and stick wallpaper I had left over from our half bath renovation would be perfect to wrap the shelves.
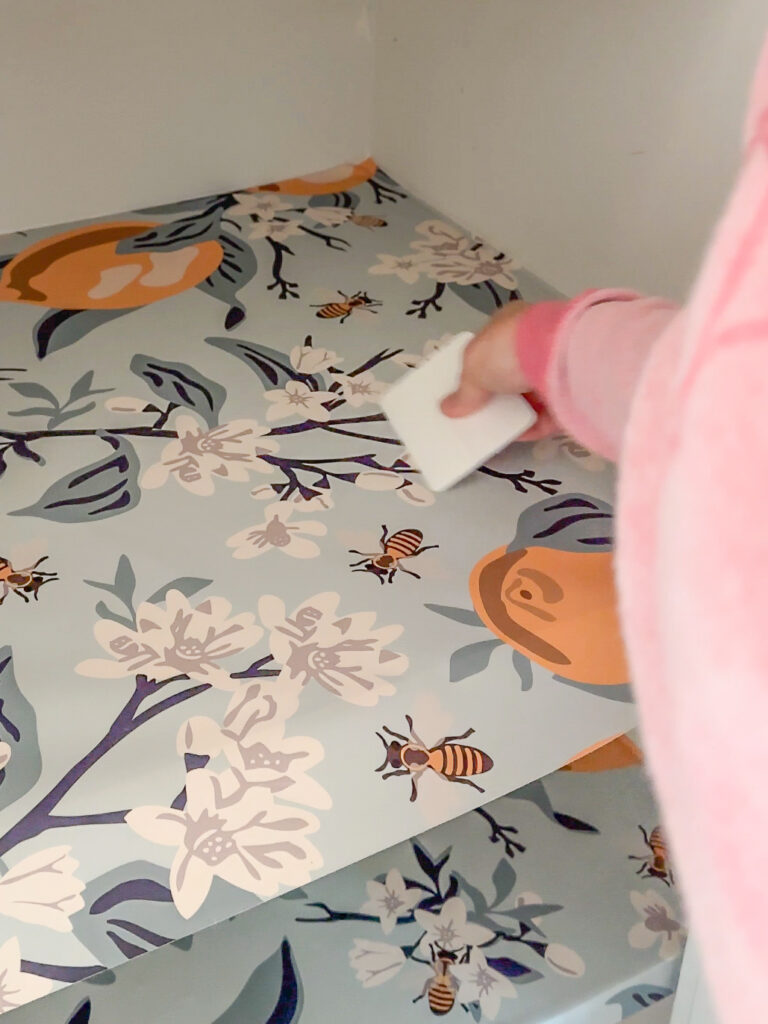
Later if I decided that I wanted to paint I still could, but for right now this was a great fix.
Bottom line and final thoughts of the linen closet built in refresh.
It’s ok to do your own thing even if it means you had to redo it later.
Getting moved in and settled was priority number 1 a couple years ago and now that we’ve had time to get settled in and figure out our flow, it’s ok to circle back and redo a project.
I love how theres now more room if I need to add things later.
And yes we need all the towels. Living near the beach and having the hot tub keeps me from doing endless loads of laundry.
I like having the quick grab and go items on the door even with all the space in the closet.
At the end of the day, your home needs to function the best way possible for YOUR family and no one else.

Let's connect!!
Stay connected for all your DIY and organizing needs!


Looks great! We moved into a new home almost three years ago and I completely understand the need to live in your house for a while to figure out how best to organize and make things functional. Love the wallpaper! Thanks for sharing!