Thrifted bathroom cabinet makeover.
When a happy sanding accident changes the course of a thrifted cabinet makeover.
**This post may contain affiliate links, which cost you nothing extra, but help me maintain my site.**
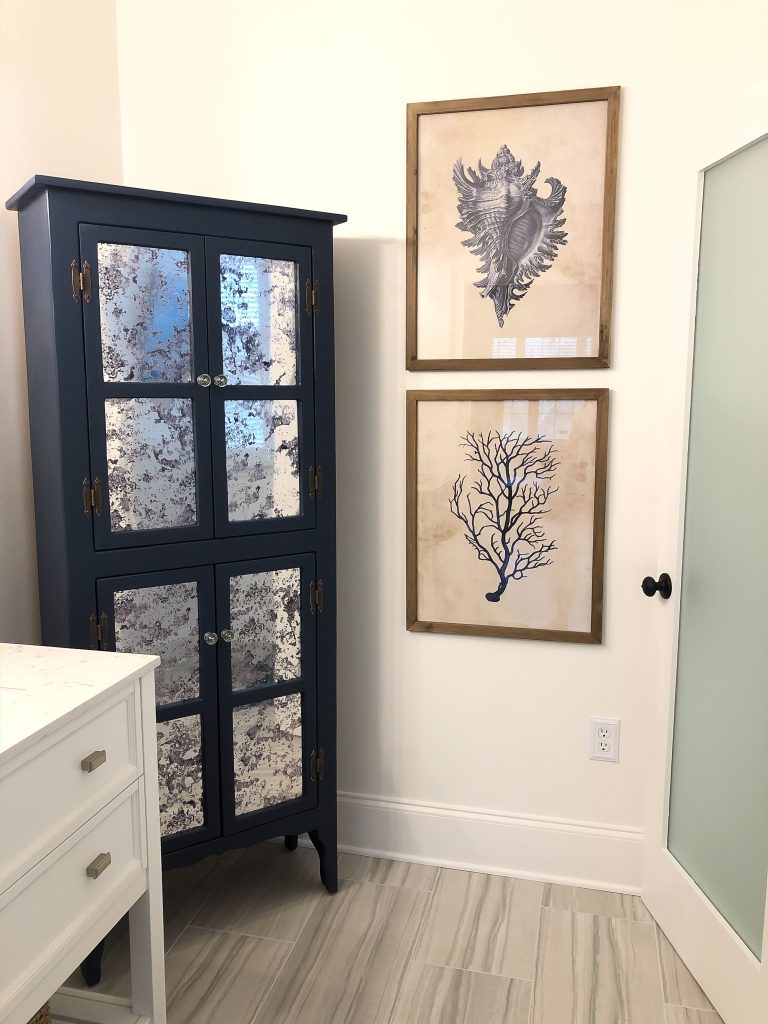
Recently we completely renovated our master bathroom again. (You read that right, AGAIN.) Which opens up more space allowing us to add additional storage. The problem was finding the perfect piece that would combine style and function. Then I stumbled upon this beauty at Habitat Restore and it was love at first sight.
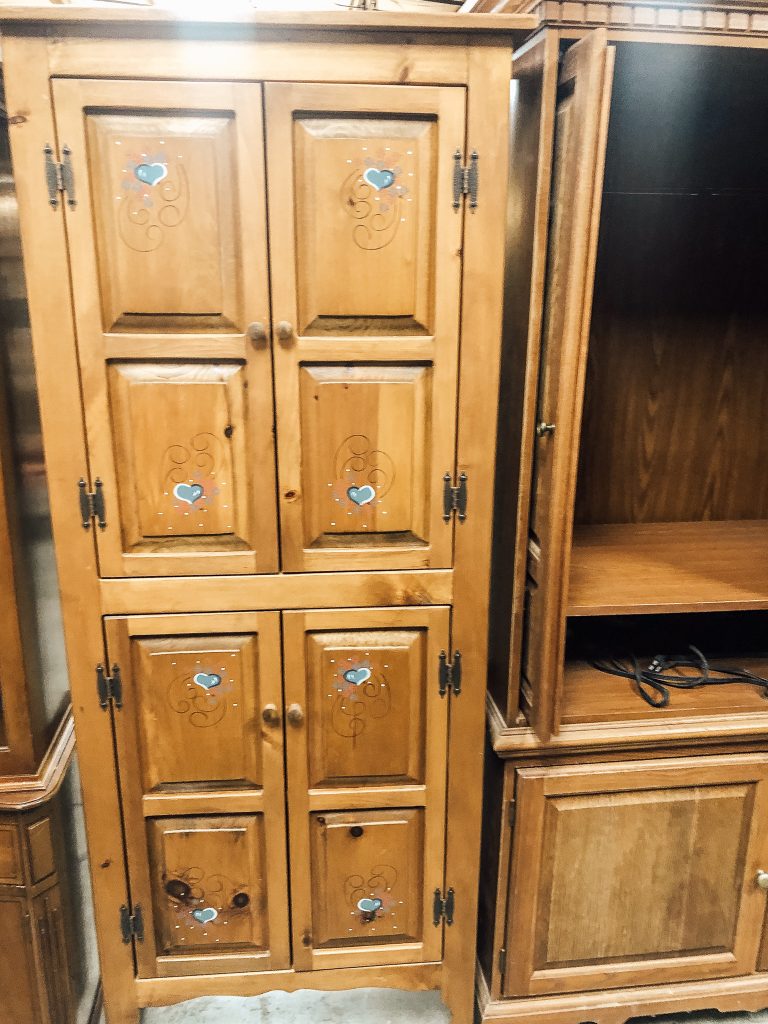
It was the perfect size and shape that we needed without being too overwhelming for the space. This thrifted soon to be bathroom cabinet, just needed a whole lot of TLC.
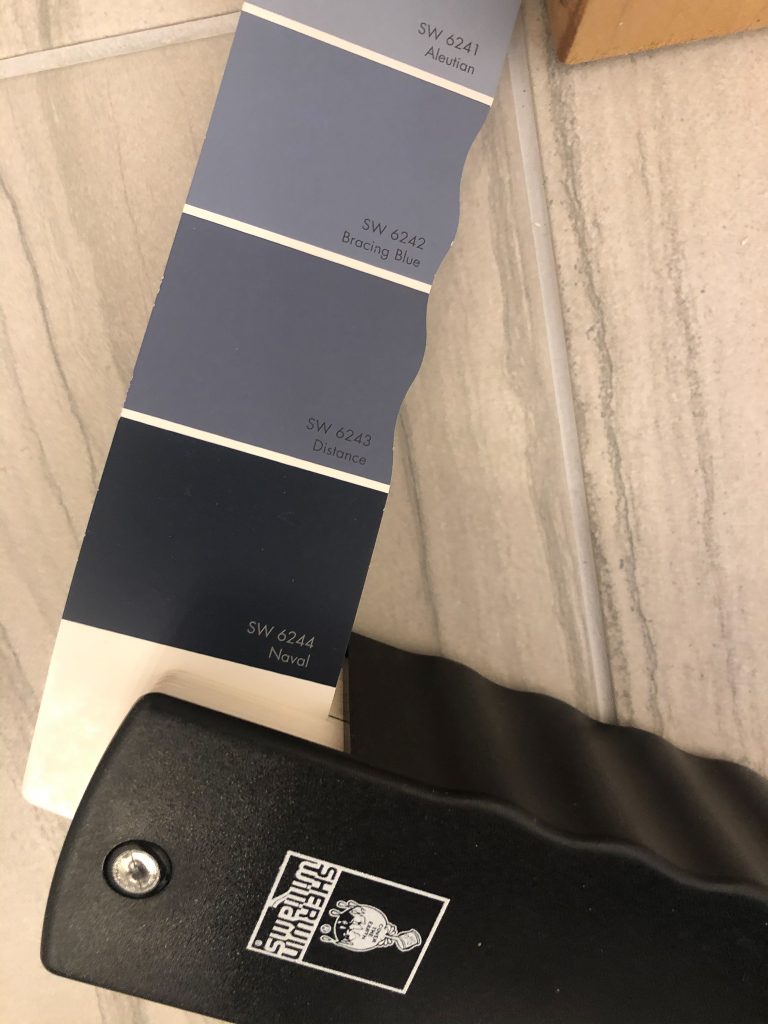
My original plan was to sand it all down to the natural wood and give it the weathered wood look. However, I realized that the color of the wood was so different than the wood around our mirrors kicking my OCD in high gear. What it really needed was a pop of color and since we wanted to keep the coastal farmhouse vibe, I painted the cabinet. I chose Naval by Sherwin Williams in my favorite paint, Behr Marquee in Satin.
Except, I ran into a little problem.
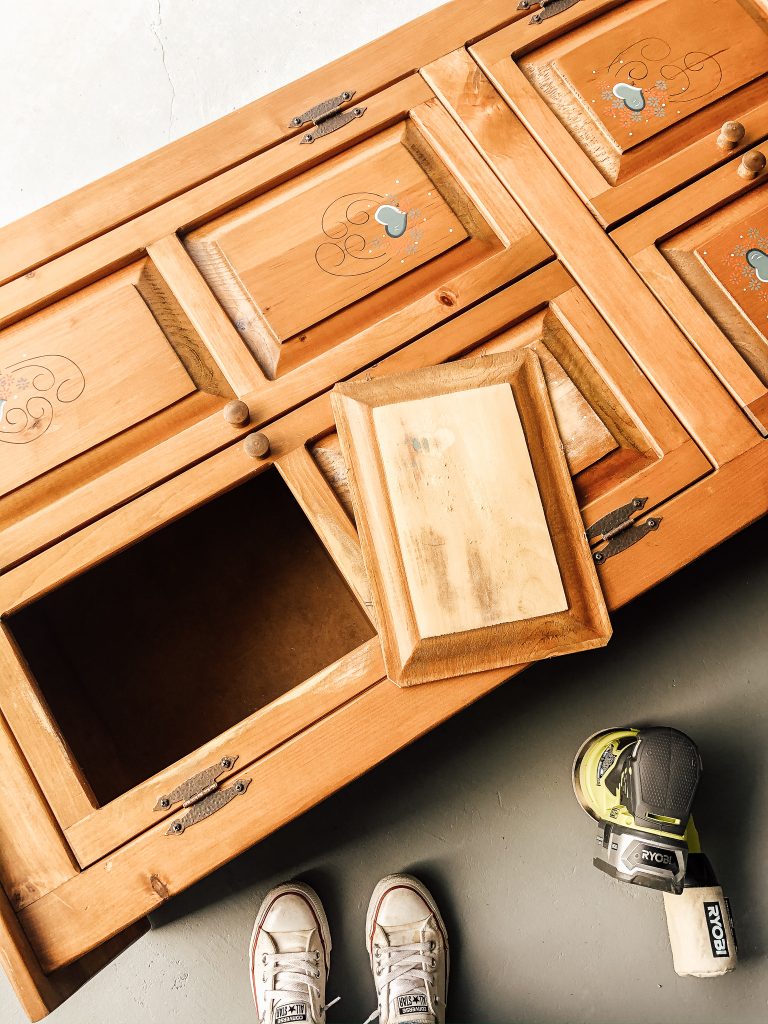
Sanding one of the doors, I accidentally popped one of the panels out. That’s when I decided to just leave it out and figure out some other alternative. Then I remembered Lauren from Bless’er House redid her cabinet and used antique mirror film.
Lightbulb!
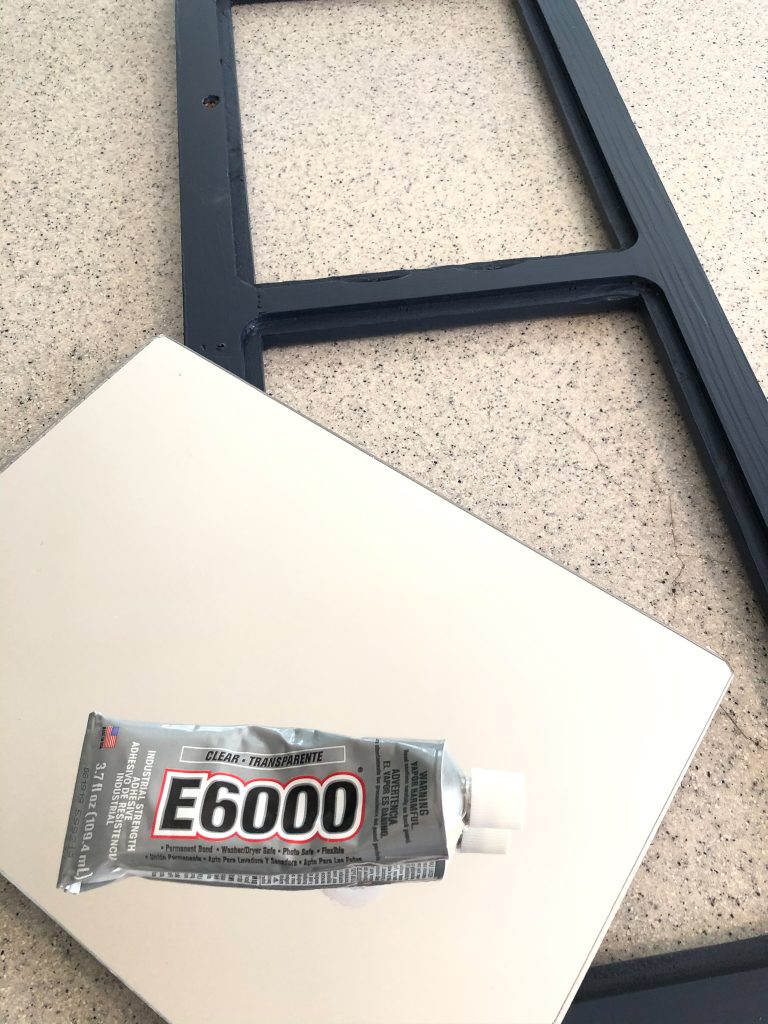
I gave the cabinet and its doors two coats of the Naval paint and absolutely loved how it looked. I decided to use plexiglass instead of real glass for the panes. And then I ran into another problem, I couldn’t get it to cut without lots of cracks and chipping. Thankfully when I asked the home improvement store, they cut the pieces for me.
Installing the antique mirror film was probably the easiest part of this process:
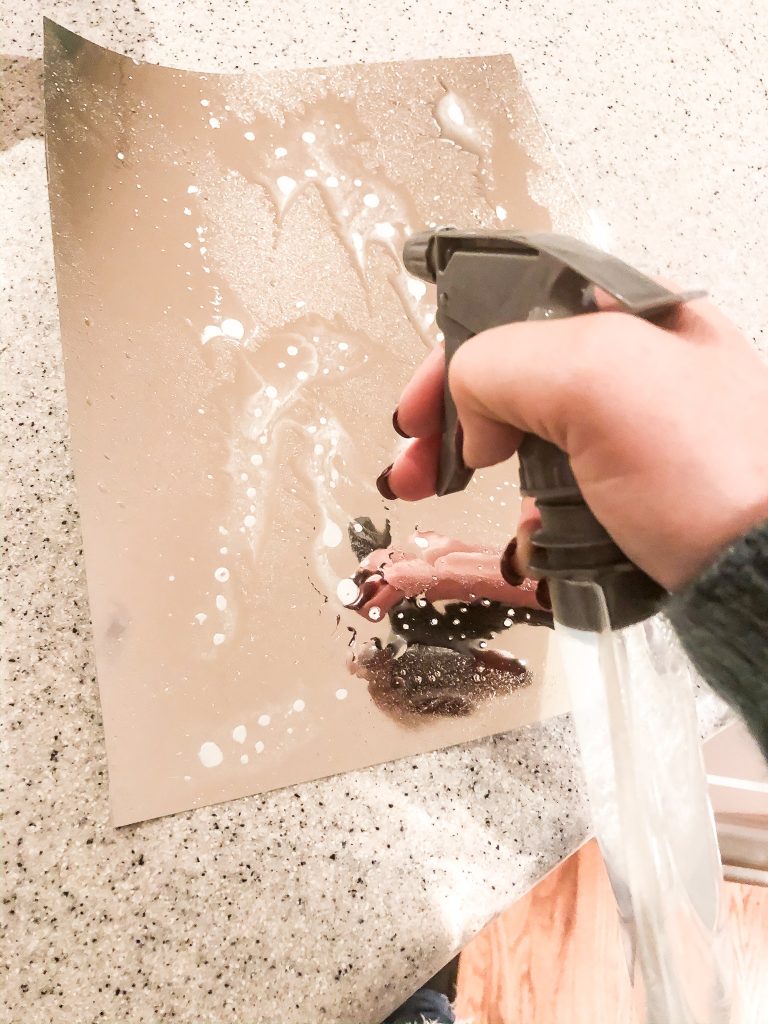
- I peeled back the protective sheet off of the plexiglass.
- Cut the sheet of film to size and peeled of its protective film.
- I sprayed the back of the film with soapy water and then placed the film on the plexiglass.
- Using a squeegee, I pushed all the excess water out, trimmed off any excess film, then set the pane aside to dry.
Once everything was dry, I used E6000 on the inside edge of the pane to secure the plexiglass to the door. The doors again had to dry for about 24 hours before being attached back to the cabinet.
Final touches for this thrifted bathroom cabinet.
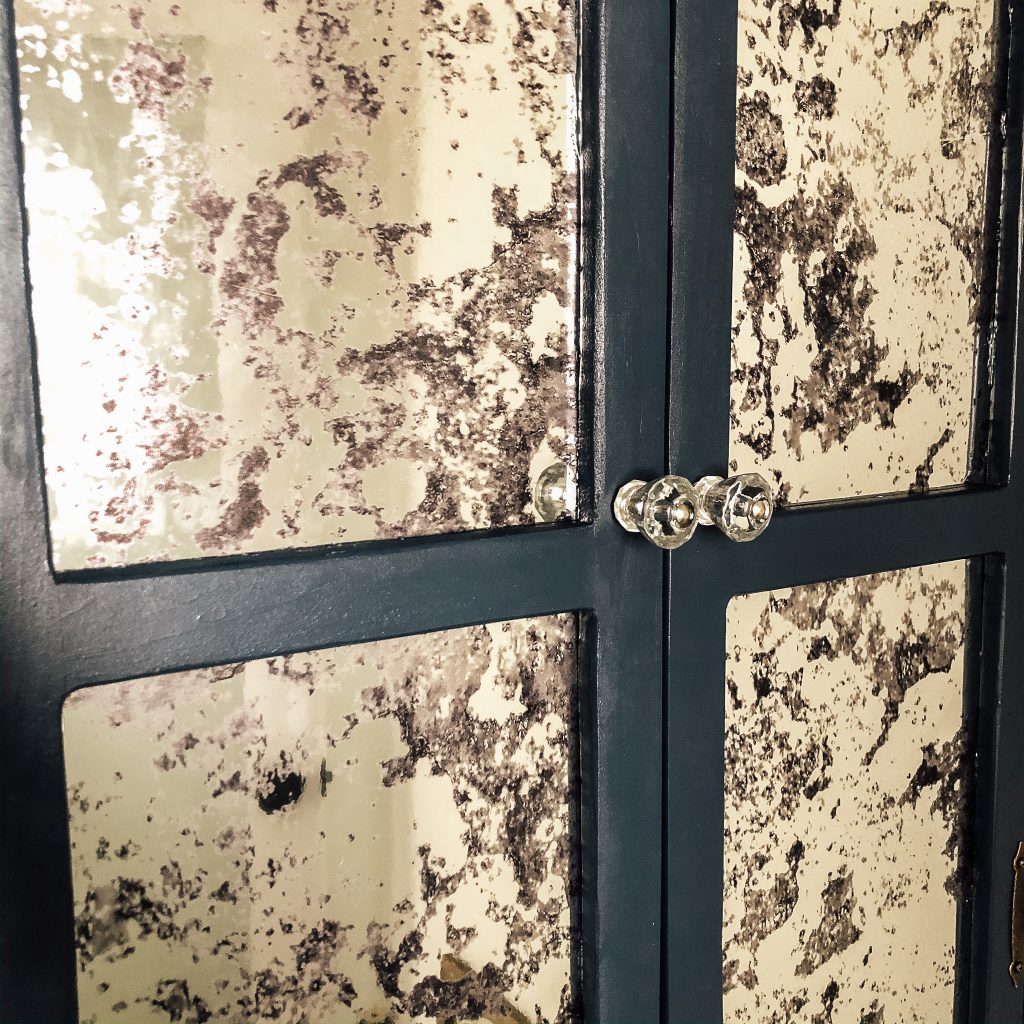
To keep with a more vintage coastal vibe, I swapped out the wood door knobs for clear glass. Right before my eyes, this cabinet became exactly what I envisioned in my mind. It now has the perfect spot in our master bathroom and marries the perfect combination of function and fashion.
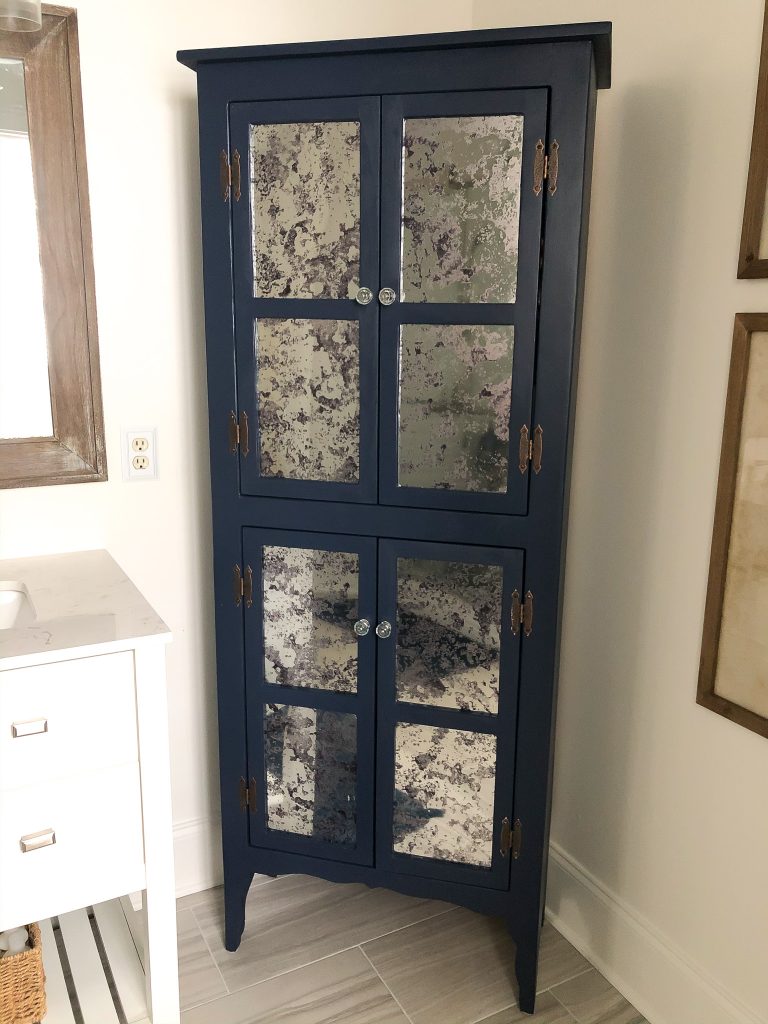
One mans trash is definitely another mans treasure, and I will cherish this for years to come.
XOXO,
Brooke
If you love furniture transformations like I do, check out these beauties:
Let's connect!!
Stay connected for all your DIY and organizing needs!