How to strip and stain furniture for a coastal farmhouse look.
I cannot believe how easy it was to remove the factory finish on this piece.
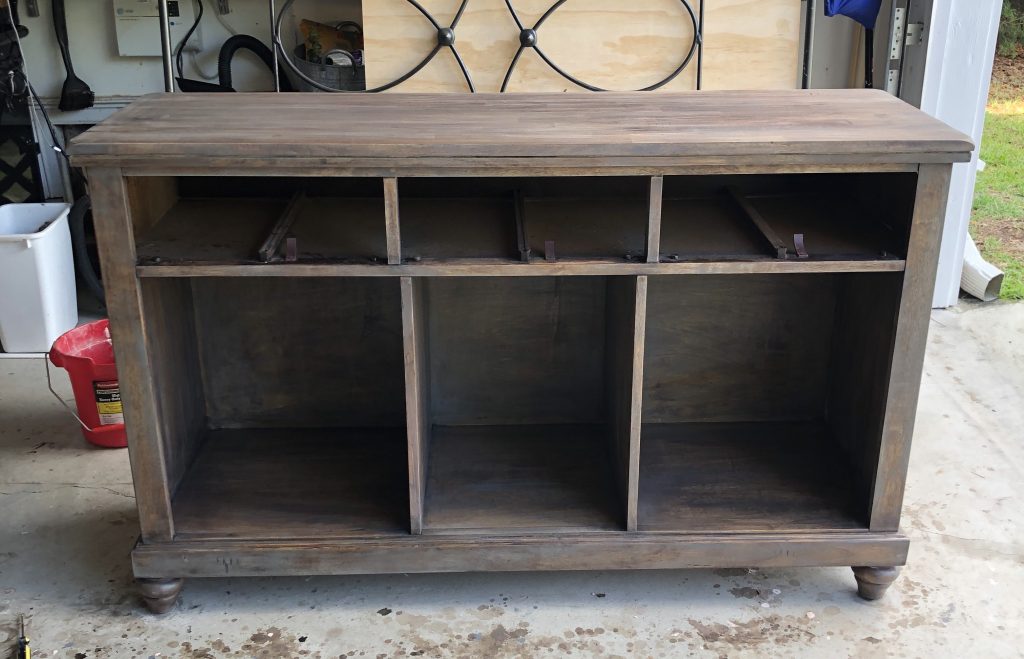
Having kids and animals, I need my furniture to be super durable, but I also want something that’s functional and fits our aesthetic as well. On top of all of that I don’t have a ton of money to spend on furniture so I do the next best thing, I look for the free stuff. However, I found the PERFECT piece of furniture on Facebook Marketplace and while the look was too dark, I knew I could make it fit.
**This post may contain affiliate links, which cost you nothing extra, but help to keep this site going.**
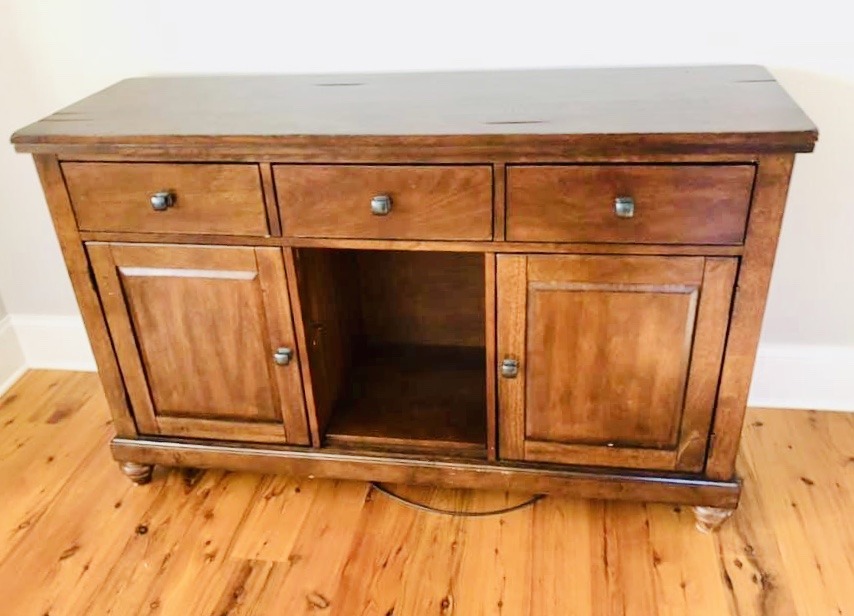
I sort of felt bad when I found it, because it really was a pretty piece, but it just didn’t work with our current decor. My first thought was to strip the entire piece back to it’s original wood, bleach it, then add a protective finish.
Step 1: Remove the hardware.
I removed all of the drawer pulls and door knobs as well as the hinges. Keep everything together in a container or a plastic baggie. I know that this may seem a little tedious, but in the end it will make a huge difference.
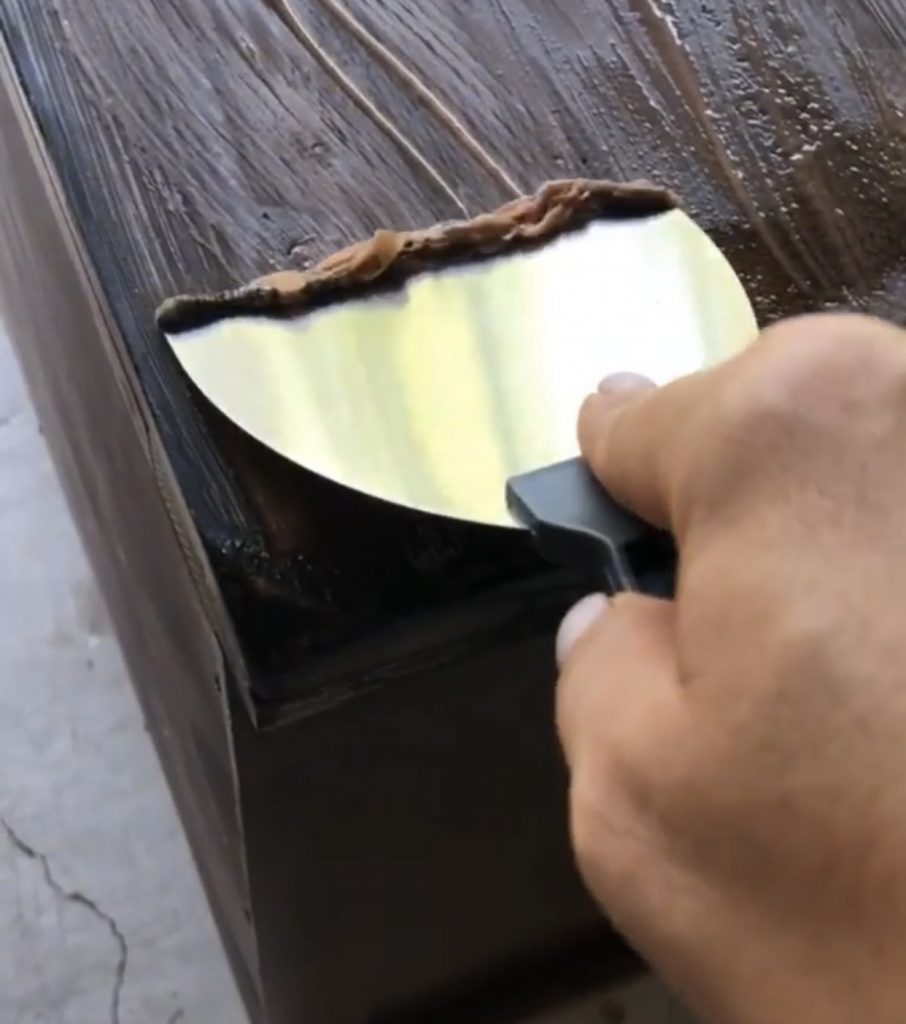
Step 2: Apply paint/ stain stripping agent.
My personal favorite is Citristrip because it doesn’t have much of an odor, but you should still be in a well ventilated area for this project. Also make sure you’re wearing eye protection and gloves meant to handle chemicals.
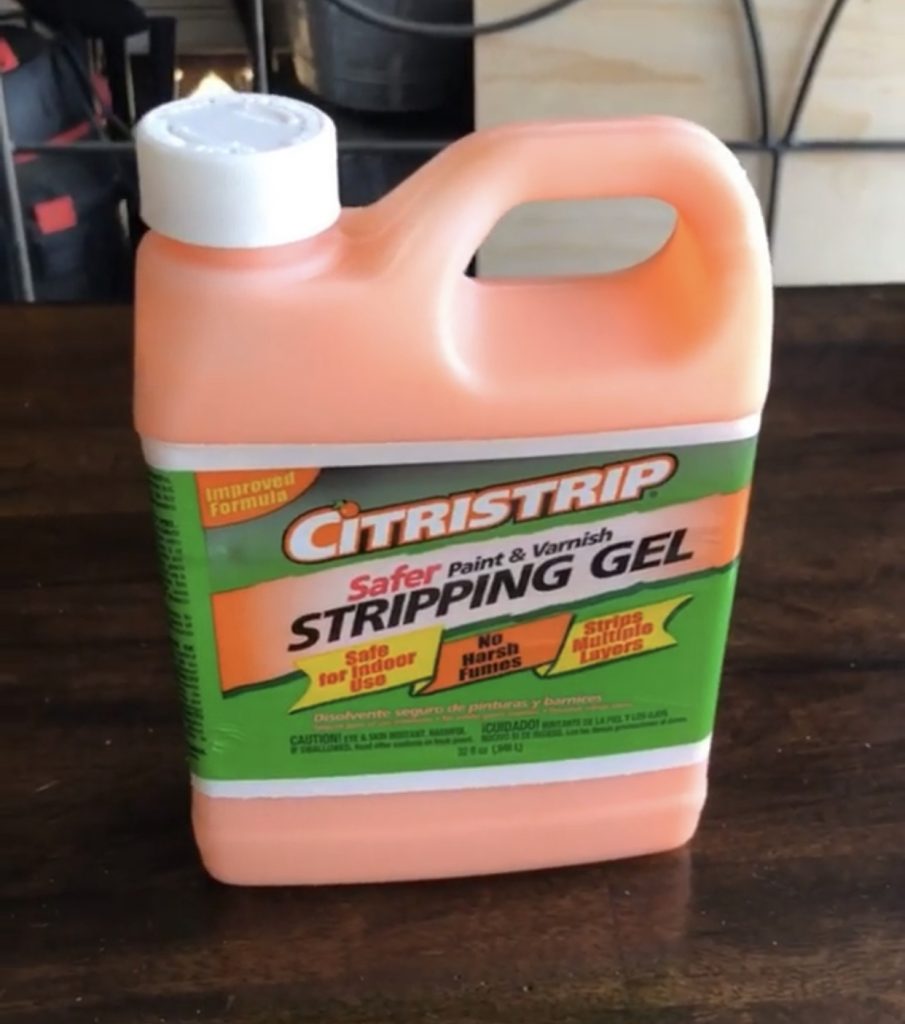
Apply the Citristrip, according to the directions, in sections and let it sit for about 20 minutes. I do not recommend leaving it on much longer than that or it will create more work later. Using a metal scraper, carefully remove the Citristrip/ stain mixture and scrape off into a metal container.
Step 3: After Wash
Once the stain has been stripped off, you’ll need to get any remaining residue off before moving on to the finish using After Wash. For this particular part I recommend wearing a respirator like this one because the fumes are intense.
Follow the directions on the can and use a scrubbing pad, actually several, to clean off the piece. I also followed up with a damp cloth to make sure the piece was completely clean.
Step 4: The Finish
It was at this point my intention was to bleach the piece, but after I cleared off the factory finish, I really loved the color of the wood. Instead I opted to do my favorite stain combo, Weathered Gray and Special Walnut, to blend the piece in with the rest of the wood in our home.
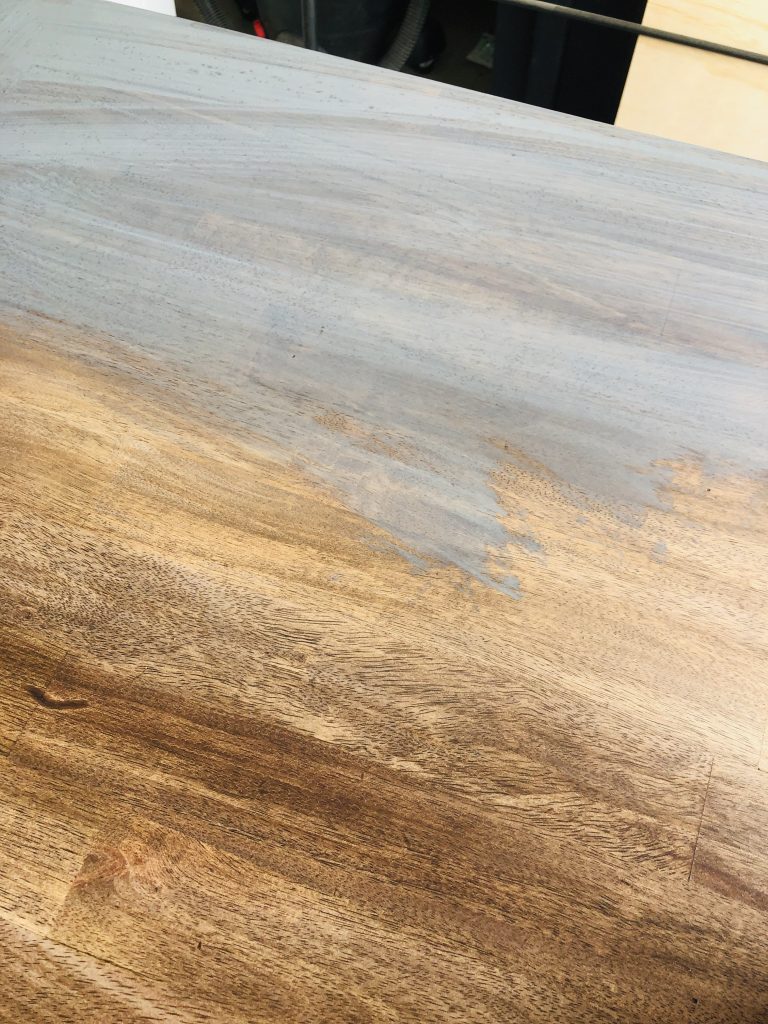
After I add the Weathered Gray, I immediately add the Special Walnut which gives the wood a weathered look.
Step 5: Protective Coating
I decided to use a Polycrylic in Matte to finish off the piece and give it a protective coating. I did one even coat, lightly sanded, then did a finial second coat. This was my first time using the Matte and I actually loved it because there is still just enough sheen.
Step 6: Enjoy
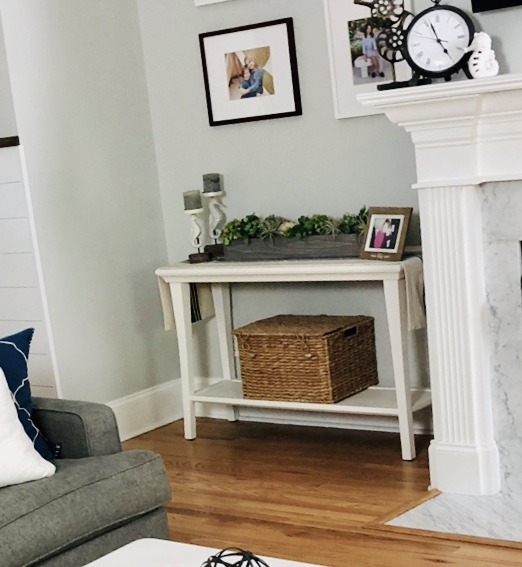
The little corner by the TV went from boring to a statement piece. I love that I’ll be able to move family albums into the family room as opposed to their other hiding places all around the house. With a little elbow grease this piece looks like it’s been here all the time.
XOXO,
Brooke
Let's connect!!
Stay connected for all your DIY and organizing needs!