One Room Challenge – Master Bathroom Progress
**This post contains affiliate links, which cost you nothing extra, but help me buy more cookies to treat my girls because they have been troopers these past few weekends.**
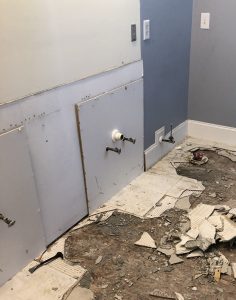
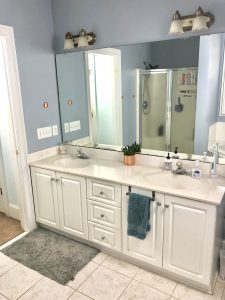
Last time I told you about how breaking the vanity added more cost to this project, but it also set off a change in our design plan. The vanity we chose changed the faucets, which in turn changed the lighting, and in turn just changed the whole vibe of the room. Despite this change, demo continued so we could get ready to put everything back together. First we had to figure out how to get the vanity back off of the wall. It appears that whom ever installed the vanity, finished the plumbing after the fact. I had to carefully cut the back off without damaging the plumbing.
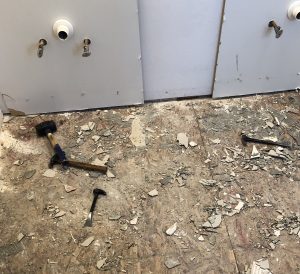
Our house is 16 years old and the tile that was in the bathroom definitely held its own during demo. I decided to leave a little surprise for the next DIY warriors in hopes that the new bathroom will last at least another 16 years. Think about it, 16 years ago Facebook didn’t even exist.

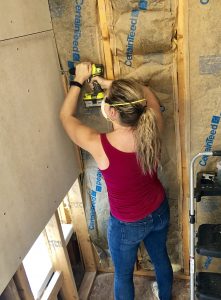
I will say by far this is the most research we have done for a project. First in line was what kind of cement backer we were going to use because our subfloor is orientated strand board, OSB for short, and it’s not recommended to adhere tile to this surface. After what felt like days of research, we settled on Hardie backer board both for the floor and the walls of the shower and tub surround. While it’s heavy, it’s actually quite easy to cut and install.
Oh the floor.
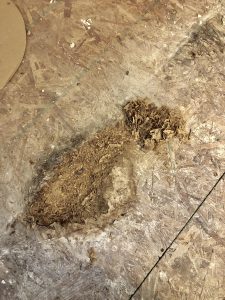
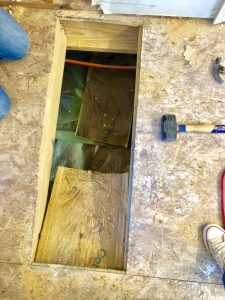
Remember that I told you we had a small leak? We had to take out that part of the floor, as there was no saving that spot, and replace the subfloor. Repairing the floor took the better part of a day only because we’ve never tackled this sort of problem before and again, there was a ton of research. Last thing we want is for the floor to fall through.
Then came the shower and how we were going to build the shower floor. Again, there were several options out there and because we had already taken up a lot of time just picking out the backer board, we splurged on the Schluter Kerdi shower pan, drain, and water proofing system. I had talked to a few people who have already used it and the reviews online sealed the deal. I placed the order, received confirmation, and when I checked the status of the order online a couple days later, the order had disappeared. (Insert minor heart attack.) Even the hardware store we ordered it from didn’t know what happened. All I have to say is thank goodness for Amazon and Prime two day shipping.
Until we install the shower floor, we can’t install any of the tile. Not wanting to just wait around for the order to arrive, I purchased the vanity lights and paint. I wanted to take advantage of the fact that I didn’t have a toilet or vanity in my way when I painted. If you’ve ever painted a bathroom you know how challenging it can be to get around. Ever try to set up a ladder around a toilet? Trust me when I say it’s quite the trapeze act some times.

And in one day I was hit with two more blows.
Removing the old vanity lights I realized I would have to do some patch work and also install two new junction boxes to allow for the new vanity lights. Just like the other issues we’ve had with this project, I’ve never changed a junction box, until now. Praise for YouTube videos. Also praise for the Ryobi task light which lit up my bathroom like it was mid day on a sunny day.
The night that I started painting ,the girls had a lacrosse game and planned to finish when we got back. Nope.
I noticed that when I was painting earlier that day that the paint wasn’t going on the way that it normally does, but I chalked it up to a bit more humidity than normal. When we got back the walls looked super shiny, which was odd because we were gone a couple hours and satin paint doesn’t dry super shiny. Then I remembered that the guy at the hardware store was training someone. I checked the can and they had given me semi-gloss and not satin!!!! Eeeeeekkkkkkk! Thank goodness for my quick thinking hubby who grabbed the can of wrong paint, and rushed out to the store. They understood what happened and made a new can of paint at no charge. Whew!
Talk about your ups and downs! Nothing detrimental by any means, just unfortunate time consuming setbacks. We have learned A LOT since the last time I updated you. Up until now, I realize we had just scratched the surface of the potential issues you can uncover when doing DIY. I just never imagined that we would encounter so many with this project. Naturally whenever you experience anything for the first time, it can be a bit intimidating yet completely doable. Many times during this process we’ve told ourselves that we’re not the first people to have “x” problem and sure enough, there’s a tutorial out there to help you figure out what to do next. As my husband brilliantly put it, “speed comes with knowledge and confidence”.
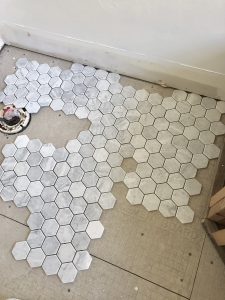
He also keeps telling me you can’t eat the whole elephant at once and as I stare at our list we need to complete in the next two weeks, that elephant IS starting to look smaller by the day. Cross your fingers for us that the next time we update, there is tile laid in this bathroom because I am dying to get my hands on these pretties from Jeffrey Court!
Stay up to date with the Jeffrey Court One Room Challenge!

XOXO,
Brooke
P.S. Check out the tools that we definitely used this go around:

Let's connect!!
Stay connected for all your DIY and organizing needs!

