How to Make an Inexpensive Farmhouse Picture Frame
**This post may contain affiliate links that pay me a small commission, but are of no additional cost to you.**
Not all do it yourself projects have to be large or cost a ton. Some of the best projects I’ve done have actually cost very little, and this one is no exception. I’m going to show you how to make an inexpensive farmhouse picture frame.

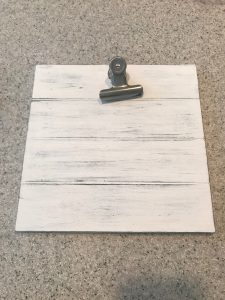
I stumbled upon this pre-made picture frame at Michael’s for $1!
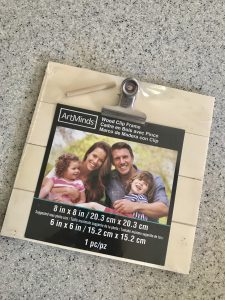
I know right?!
First I must say, that the day that I found this frame was also the same day that I found film for an old Polaroid camera. When I saw this frame it was like the crafting stars aligned and “instantly” I knew what I was going to do. (See what I did right there…)
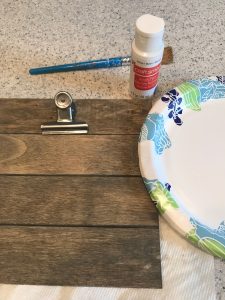
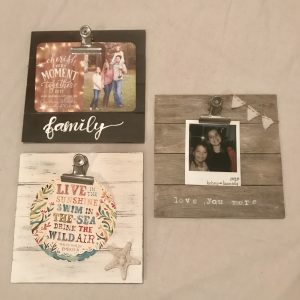
I gathered my favorite stains Weathered Gray and Special Walnut. First I added the Weathered Gray, let it sit for a bit and then layered on top the Special Walnut.


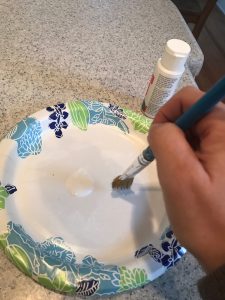
After all the stain dried, which took maybe 30 minutes total, I did a dry brush technique with white craft paint. All that entails is barely picking up paint on the brush, dabbing off the extra on a paper towel, and lightly brushing over the wood until you achieve the weathered look you want.

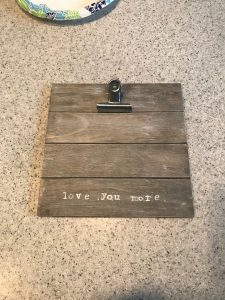
I also had some letter stamps on hand and decided I wanted to add wording to the bottom of the frame. I couldn’t stop there, I felt like it needed a little banner because what doesn’t say “farmhouse’ like a banner, made out of scrap drop cloth none the less. And of course I added a precious picture of my kiddos using my new film. Instant pictures are seriously the original Instagram. 😉

After I finished I didn’t feel like I could just stop there. I mean there were just TOO many possibilities. I wanted to know how the wood would take chalkboard paint and a chalk pen.


Rather well actually…

Then I decided, I had to keep going and do my take on shiplap because, well, farmhouse. I painted a second frame with the same chalkboard paint, added a coat of white craft paint, then used medium grit sandpaper to distress the frame.


Since I am all about the coastal farmhouse look, I added my favorite quote about the sea and a sweet little shell.

Needless to say, the $1 Michaels store find turned out to be more bang that I expected for that buck. Well actually THREE bucks since I couldn’t restrain myself. The frame comes with a small dowel to sit it up on a table or desk, but I’m sure it would be super easy to figure out a way to hang the frames as well. These sweet little frames would be perfect for a birthday party craft, a valentines gift, Christmas gift, teacher’s gift, small gallery wall… truly the possibilities are endless. Just have fun and let your creativity flow!
If you like this, don’t forget to share it and pin it! And if you want other fun tips like this, you can always subscribe HERE.
XOXO,
Brooke

Let's connect!!
Stay connected for all your DIY and organizing needs!