Cribbs Style

  • About
  • Blog
  • Let’s Connect!
  • Privacy Policy and Disclosure

How to Make a Simple Barn Door

Barn Door· DIY· Ideas· Master Bedroom· Money Saving· Tips· Woodworking

30 Nov

**I received product from Everbilt through Home Depot, however the opinion is my own. This post may contain affiliate links, which cost you nothing extra, but allow me to fund more projects. **

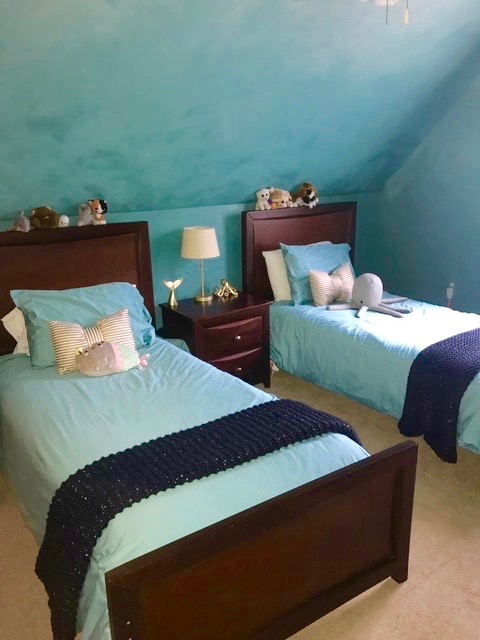
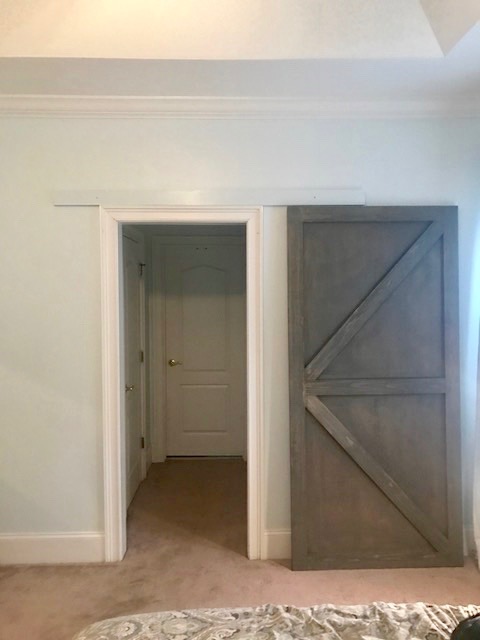
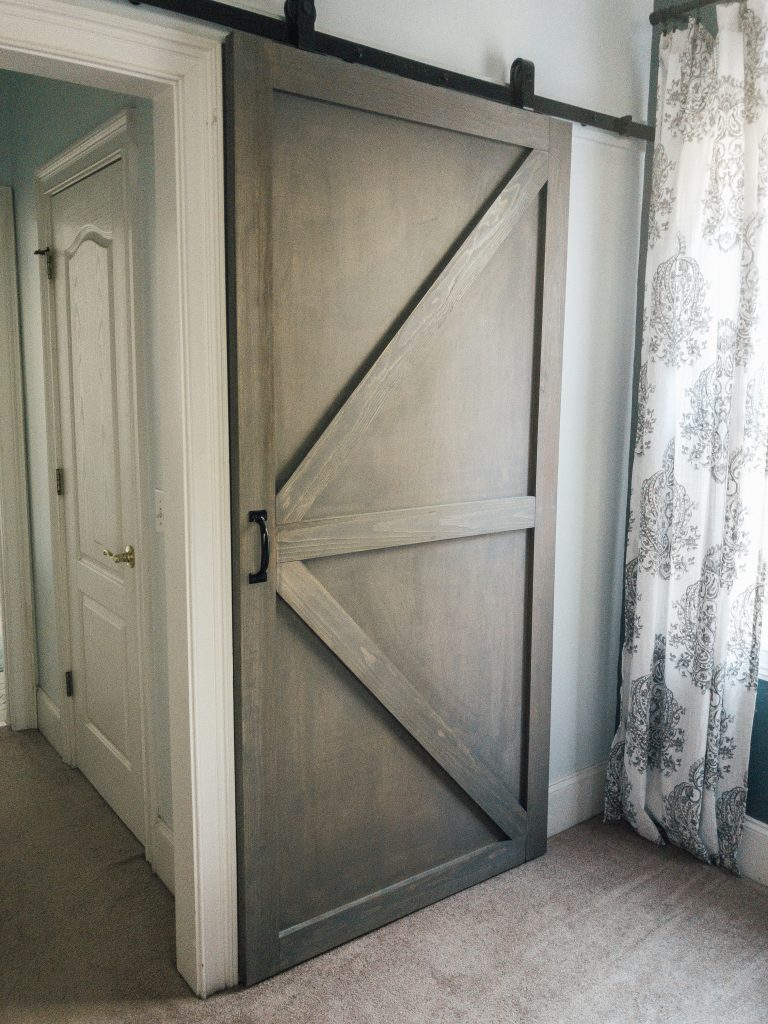
Adding a simple barn door added a stylish touch in our master bedroom and freed up room in our bathroom!

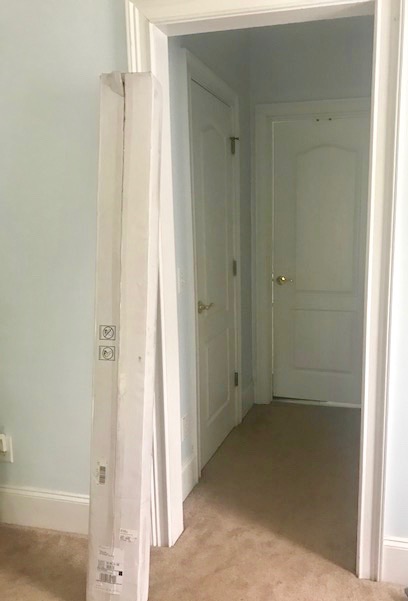
Barn doors are all the rage in home decor and I really don’t see them going out of style any time soon. Thankfully, I was given barn door hardware from Everbilt. I was shocked at the cost of buying a premade door and decided it would be better to build one ourself.  We had a little hallway that separated the master bedroom from the his and hers closets leading to the master bathroom. We wanted to open up the space in the master bathroom by removing the bathroom door, and close off the hall to the closets with a barn door so we could easily get dressed after showering.

Master Bedroom Hall

We selected the tiny hall that separates the bedroom and the bathroom in the master.

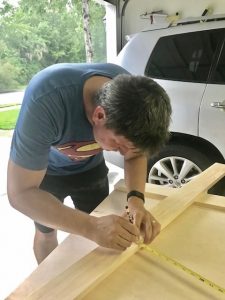
We measured the door frame and in order for the door to cover trim to trim, the barn door would need to be 40 inches wide.  To allow for the proper height for the hardware and a bit of a gap at the bottom of the door, the door needed to be 84 inches tall. The instructions that came with the hardware helped with making the measuring decisions, but I will also warn, that the measurements were in metrics. Thankfully my husband, who is amazing at math, had a way to convert the metric measurements to inches. He basically saved the day because I don’t “math” well. We all have our weaknesses and I’m ok with mine.  After a little debate, we settled on a design we both loved and purchased the wood from a local home improvement store.
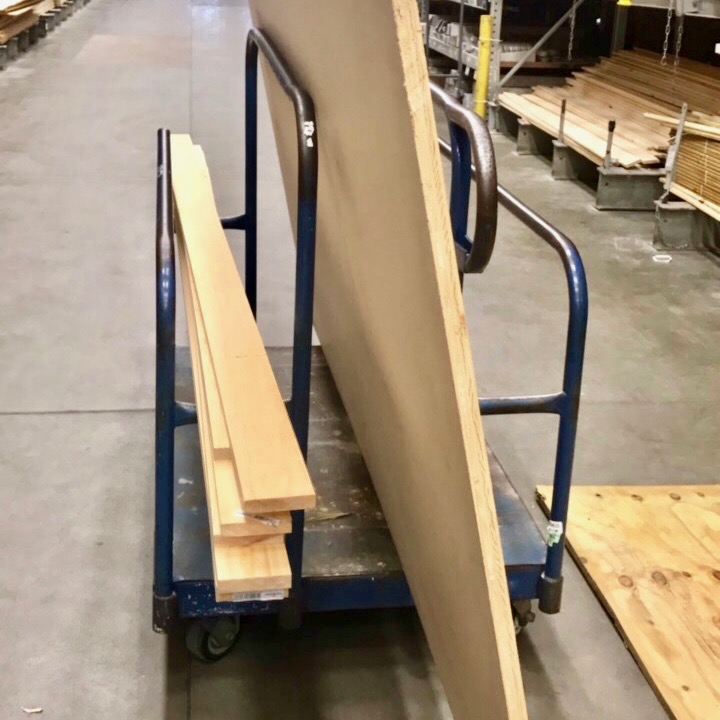
After almost two hours of deciding what plan we would use for the barn door, we finally selected our wood.

We purchased:

-One sheet of plywood

-Four 1″ x 4″ x8′ boards

-One 1″ x 4″ x 6′ board (for the header)

-Three inch wood screws

I already had on hand:

-Wood glue

-Stainable wood filler

–Ryobi brad nailer and nails

–Ryobi circular saw

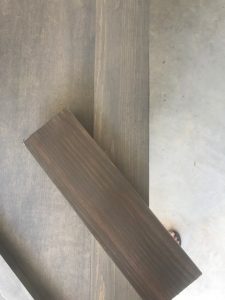
-Wood stain (I used Rustoleum Weathered Gray and Minwax Special Walnut)

–Everbilt Barn Door Track System

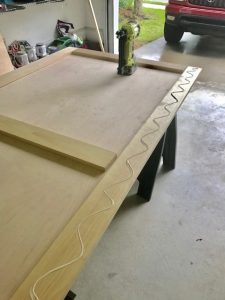
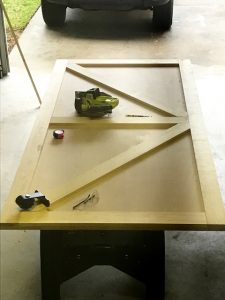
The piece of plywood served as the backer for the door and we measured out the exact size of the door we needed. I then used a circular saw to cut off the excess.

Marking the length of the barn door for the first cut.
First cut for our new barn door!
Thankful for my hubby and his magical math skills that came quite handy with this project.

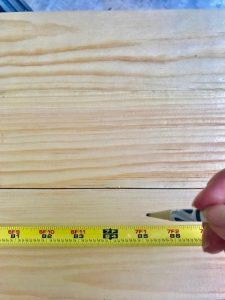
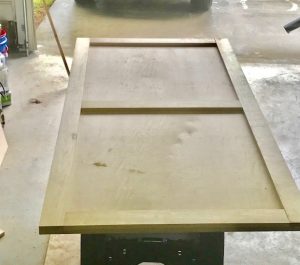
Next we measured two of the 1″x4″‘s to run along both sides of the door. Then we used another 1″x4″ for the top and bottom pieces. After everything was dry fit, I added wood glue and secured them with brad nails to the plywood backer. We decided we wanted to do a simple pattern, I say it’s an arrow and hubby says its a “Z” and a backward “Z”, you get the gist. This is where things get a little tricky because we tried to match the angles as best we could and we really didn’t do too bad of a job, except we needed to buy an extra piece of  1″x 4″. So make that FIVE boards we needed instead of the original four mentioned above. Which leads to my next piece of advice, buy extra wood just in case. Even if you don’t need it now, I’m sure you’ll be able to either take it back or use on another wood project.

Once the pieces were cut and dry fit, we used wood glue and brad nails to attach to the plywood back.
Using my Ryobi Brad Nailer, I attached the boards to the plywood back.
Time to add the decorative detail.

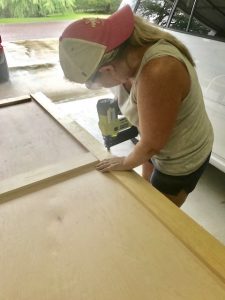
After everything was secured with wood glue and nails,  all the nail holes and seams were covered up with stainable wood putty and set to dry. After it dried, I applied two coats of the Rust-Oleum Weathered gray on each side of the door, starting with the back first. After those two coats dried, I then went over it with the Minwax Special Walnut to really give it that weathered barn door look. Again, we let this dry and while it was drying, we returned inside to start installing the hardware.

All finished and ready to fill all the holes and seams with stainable wood filler.
I used two different colors of wood stain to accomplish the final look.
This was the point that we discovered that we would need a header board to attach the barn door track and door securely to the wall studs.

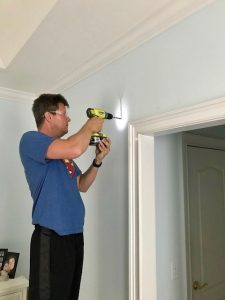
Due to the spacing for the bolts, we knew that they would not line up with the studs, which required us to install a header board.  The header board is just a piece of wood secured to the studs in the wall and the hardware is then secured to the header board. This ensured that once everything was installed, the door and hardware would be secure and not fall out of the wall. We painted the header board the same color as the wall ,which allowed it to blend in seamlessly. We used a stud finder to locate the studs and predrilled the holes through the header into the wall and attached the header with 3 inch wood screws.

As we were installing this, I started seeing red flags pop up in my head. This is where my “even though you’re not the best with math, something is mathematically wrong” sensor started going off. Remember I said that the door we built was 40 inches wide. If you saw earlier, we bought a header board that was 1″x 4″x 6′, this is because our barn door track was 72 inches long. I knew that I wanted the door to open all the way, which meant that the track needed to be at least double that of the door. And per the instructions,  they recommended a slight overhang the opposite side of where the door was going to slide.  This meant, that if we hung the door as is, you would only be able to walk through if you turned sideways. Houston, we have a problem.

When we first discovered there was an issue with the length of the barn door hardware and the size of our barn door.

I consulted with my friends at Everbilt about our dilemma, they informed me they have extension tracks and quickly sent one out. Potential disaster averted and everything was back on track. Get it, “back on track”. (I couldn’t help myself.) This also meant that we had to buy a new header board that was 9′ long to account for the original and the extension track.  We made some slight adjustments as far as where the track would be on the wall for aesthetic purposes and to our surprise, the bolts used to attach the track hit a couple of studs, but just to be safe, we still installed the header board because the door is still pretty heavy.

Overall, the barn door track was easy to install once we figured out the metric conversion and we discovered we needed a longer track based on the size of door we built. The door itself was fairly easy to build once we finally decided on the design that we liked. Thankfully, the price of the door came no where near the price of the pre-made barn door as we were able to make ours for under $100.  Yes we learned a lot of things and we ran into our fair share of bumps in the road, but really it just makes us appreciate the door that much more.

The finished barn door, so pretty and so simple.

xoxo,

Brooke

Let's connect!!

Stay connected for all your DIY and organizing needs!

Success! Now check your email to confirm your subscription.

There was an error submitting your subscription. Please try again.

We won't send you spam. Unsubscribe at any time. Powered by ConvertKit

« Living with Intent
How to Make an Easy Tabletop Lazy Susan »

Hi, I'm Brooke! Welcome to my little corner of the web where I share my (hopefully) helpful tips about how I'm navigating through life, one organizing and DIY project at a time. Come on in, make yourself comfortable, and let's get to work!

Let’s Connect

  • Facebook
  • Google+
  • Instagram
  • Pinterest

Stay Connected

Features

Featured on Hometalk.com

cribbsstyle

Lover of DIY• Organizing Nerd• Chaos Coordinator• Momma of 2• Wife• Living the dream in Charleston, SC •
brookecribbs@live.com

Brooke Cribbs
From early in my relationship with Courtney, we lo From early in my relationship with Courtney, we loved going to open houses and parade of homes. Anything to get ideas and inspiration on what we wanted in our own home. Believe it or not, we’ve moved 10 times. Of those 4 were homes we bought and one of them a home we built. Needless to say when we saw the online photos of our “hopeful” future home plan, we agreed we had at least one more move in us.  What’s something you’re looking for in your next home?
In my lifetime of doing DIY, I’ve picked up a fe In my lifetime of doing DIY, I’ve picked up a few tips and tricks along the way. #partner Check out the link in my profile for my first @homesdotcom article of the year where I share all my juicy secrets. 🙌🏽
I needed to take a long break after last week to p I needed to take a long break after last week to process all that’s going on. I’m still processing. One of my favorite things to do is take long walks through construction sites surrounded by plumbing and framing.  No lie. This is where we’ve gone multiple evenings over the last couple of weeks. This place has brought us a lot of peace and on the blog I’m spilling the beans on our secret.
I had to do it too and pull up my top nine from th I had to do it too and pull up my top nine from this year. And I’m not surprised by what’s there. The tragic helicopter accident that took Kobe, his daughter, and their friends rocked me in a way I didn’t know it would.  It was clear that y’all loved the bedroom renovations this year and our @wearewoodgrain accent wall was a huge crowd favorite. Kennedy’s diamond pattern wall is one of my most pinned on Pinterest to this day. I’m deep in planning mode for this year and can’t wait to bring more fun content. Hope that everyone had a great night and an even better weekend!!
Walking out of this year with a whole new perspect Walking out of this year with a whole new perspective. While this year was filled with so much uncertainty, I was still able to find some light and a more clear vision. (I’ve always said the best lessons come in the valleys of life.) I’ve spent the last few weeks with Court and the girls and I’ve come to some realizations that will change the vision I thought I had for the future. I thank you for being on this journey.  I’m blown away by the people I’ve met online and in person from this community.  The opportunities I’ve been blessed to experience.  I pray that everyone has a safe night and we all wake up tomorrow with hope that the new year will bring more peace.
Christmas is only two days away, but there’s sti Christmas is only two days away, but there’s still plenty of time to make one of the perfect handmade holiday courtesy of  the @homedepot! Home Depot doesn’t just focus on big DIY projects, they have all the supplies to help you with your smaller personalized DIY projects too! From stencils to wood shapes they can help you bring your handmade gifts to life. Looking for more holiday DIY gift ideas?  Don’t forget to check the link in my bio for other great DIY Holiday Handmade Ideas  to make the ones you care about most, smile.  #THDxHoliday #HomeDepotPartner #sponsored #thdxdiyworkshops
The holidays can be a stressful time of year, and The holidays can be a stressful time of year, and this year is no exception. If you’re looking for a last minute, budget friendly, and sentimental gift, the @homedepot has you covered! What better way to show someone you care, than with a thoughtful homemade gift.  Check out the link in my bio for all the other amazing DIY homemade holiday gift ideas. Also, be sure to check out my blog and how I took @_ashleighlaurn lazy susan tutorial and put my own personal spin on it. (See what I did right there?) 😉 #homedepotpartner #thdxholiday #sponsored #thdxdiyworkshops
Remember that sweet three tiered tray from Decor S Remember that sweet three tiered tray from Decor Steals? Here she is all decked out for Christmas! Speaking of Christmas, I some how misplaced my favorite Christmas t-shirt. I spent the better part of the night tearing my closet apart.  No dice. But at least my kitchen’s cute. 😉
Load More...

The bottom line

All work is Copyright of Cribbs Style and are solely the opinion and suggestion of Cribbs Style. Any links to affiliate sites could result in payment to me, but my honest opinion will be given in regards to the products. You are more than welcome to use one picture as long as you link back to this site and please do not crop out any watermarking.

Copyright © 2021 · Refined theme by Restored 316