My Experience With Peel and Stick Glass Tile Backsplash
Who knew peel and stick glass tiles could be an easy upgrade to our backsplash.
** I was given the material from Aspect, but the opinion of this product is my own **
**This post contains affiliate links which pay me a small commission, but is of no additional cost to you.**
As DIYer’s, we’re always looking for ways to expand our skill set and of course take on new and exciting projects. With anything you do for the first time, there is a learning curve. Naturally the project may take a little longer than if you hired a professional, but the satisfaction far outweighs the speed. We knew the kitchen backsplash would be no exception.

When you think of traditional tile, there are the basic materials: mastic/thin set, tile, spacers, grout, and wet saw. I’ve always heard that it takes practice to get the right amount of mastic/thin set to hold your tiles and it can be tricky. I’ve also heard that grout is very labor intensive and messy. None of that sounded appealing, which is probably why we never tackled that project. When we heard the concept of peel and stick tile, our ears perked up. No mastic and no grout? Sign me up!
The product
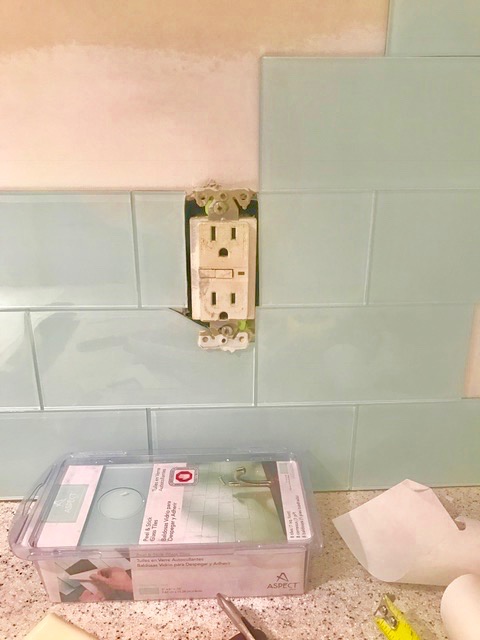
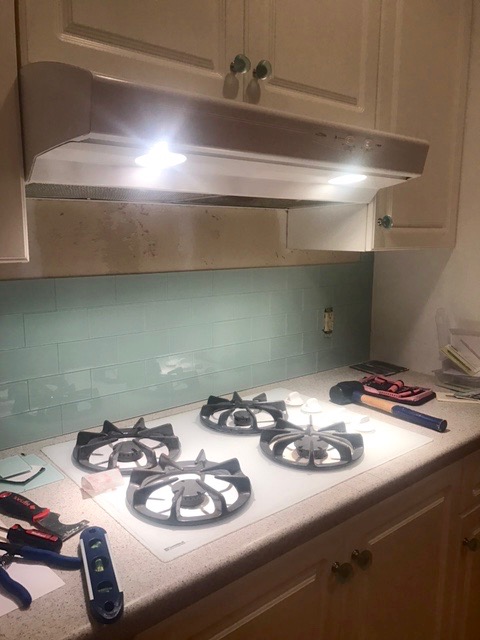
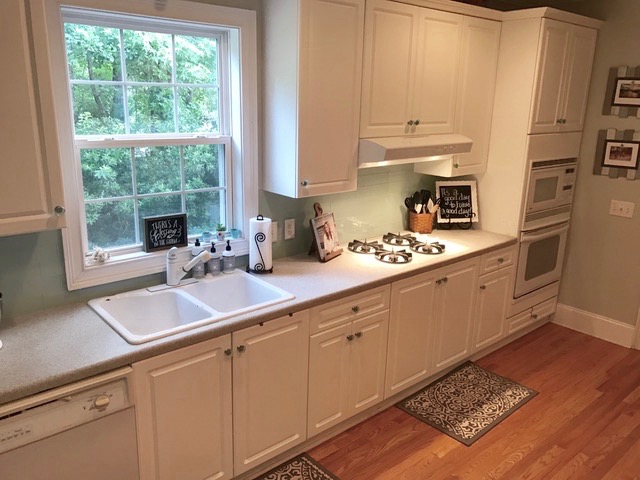
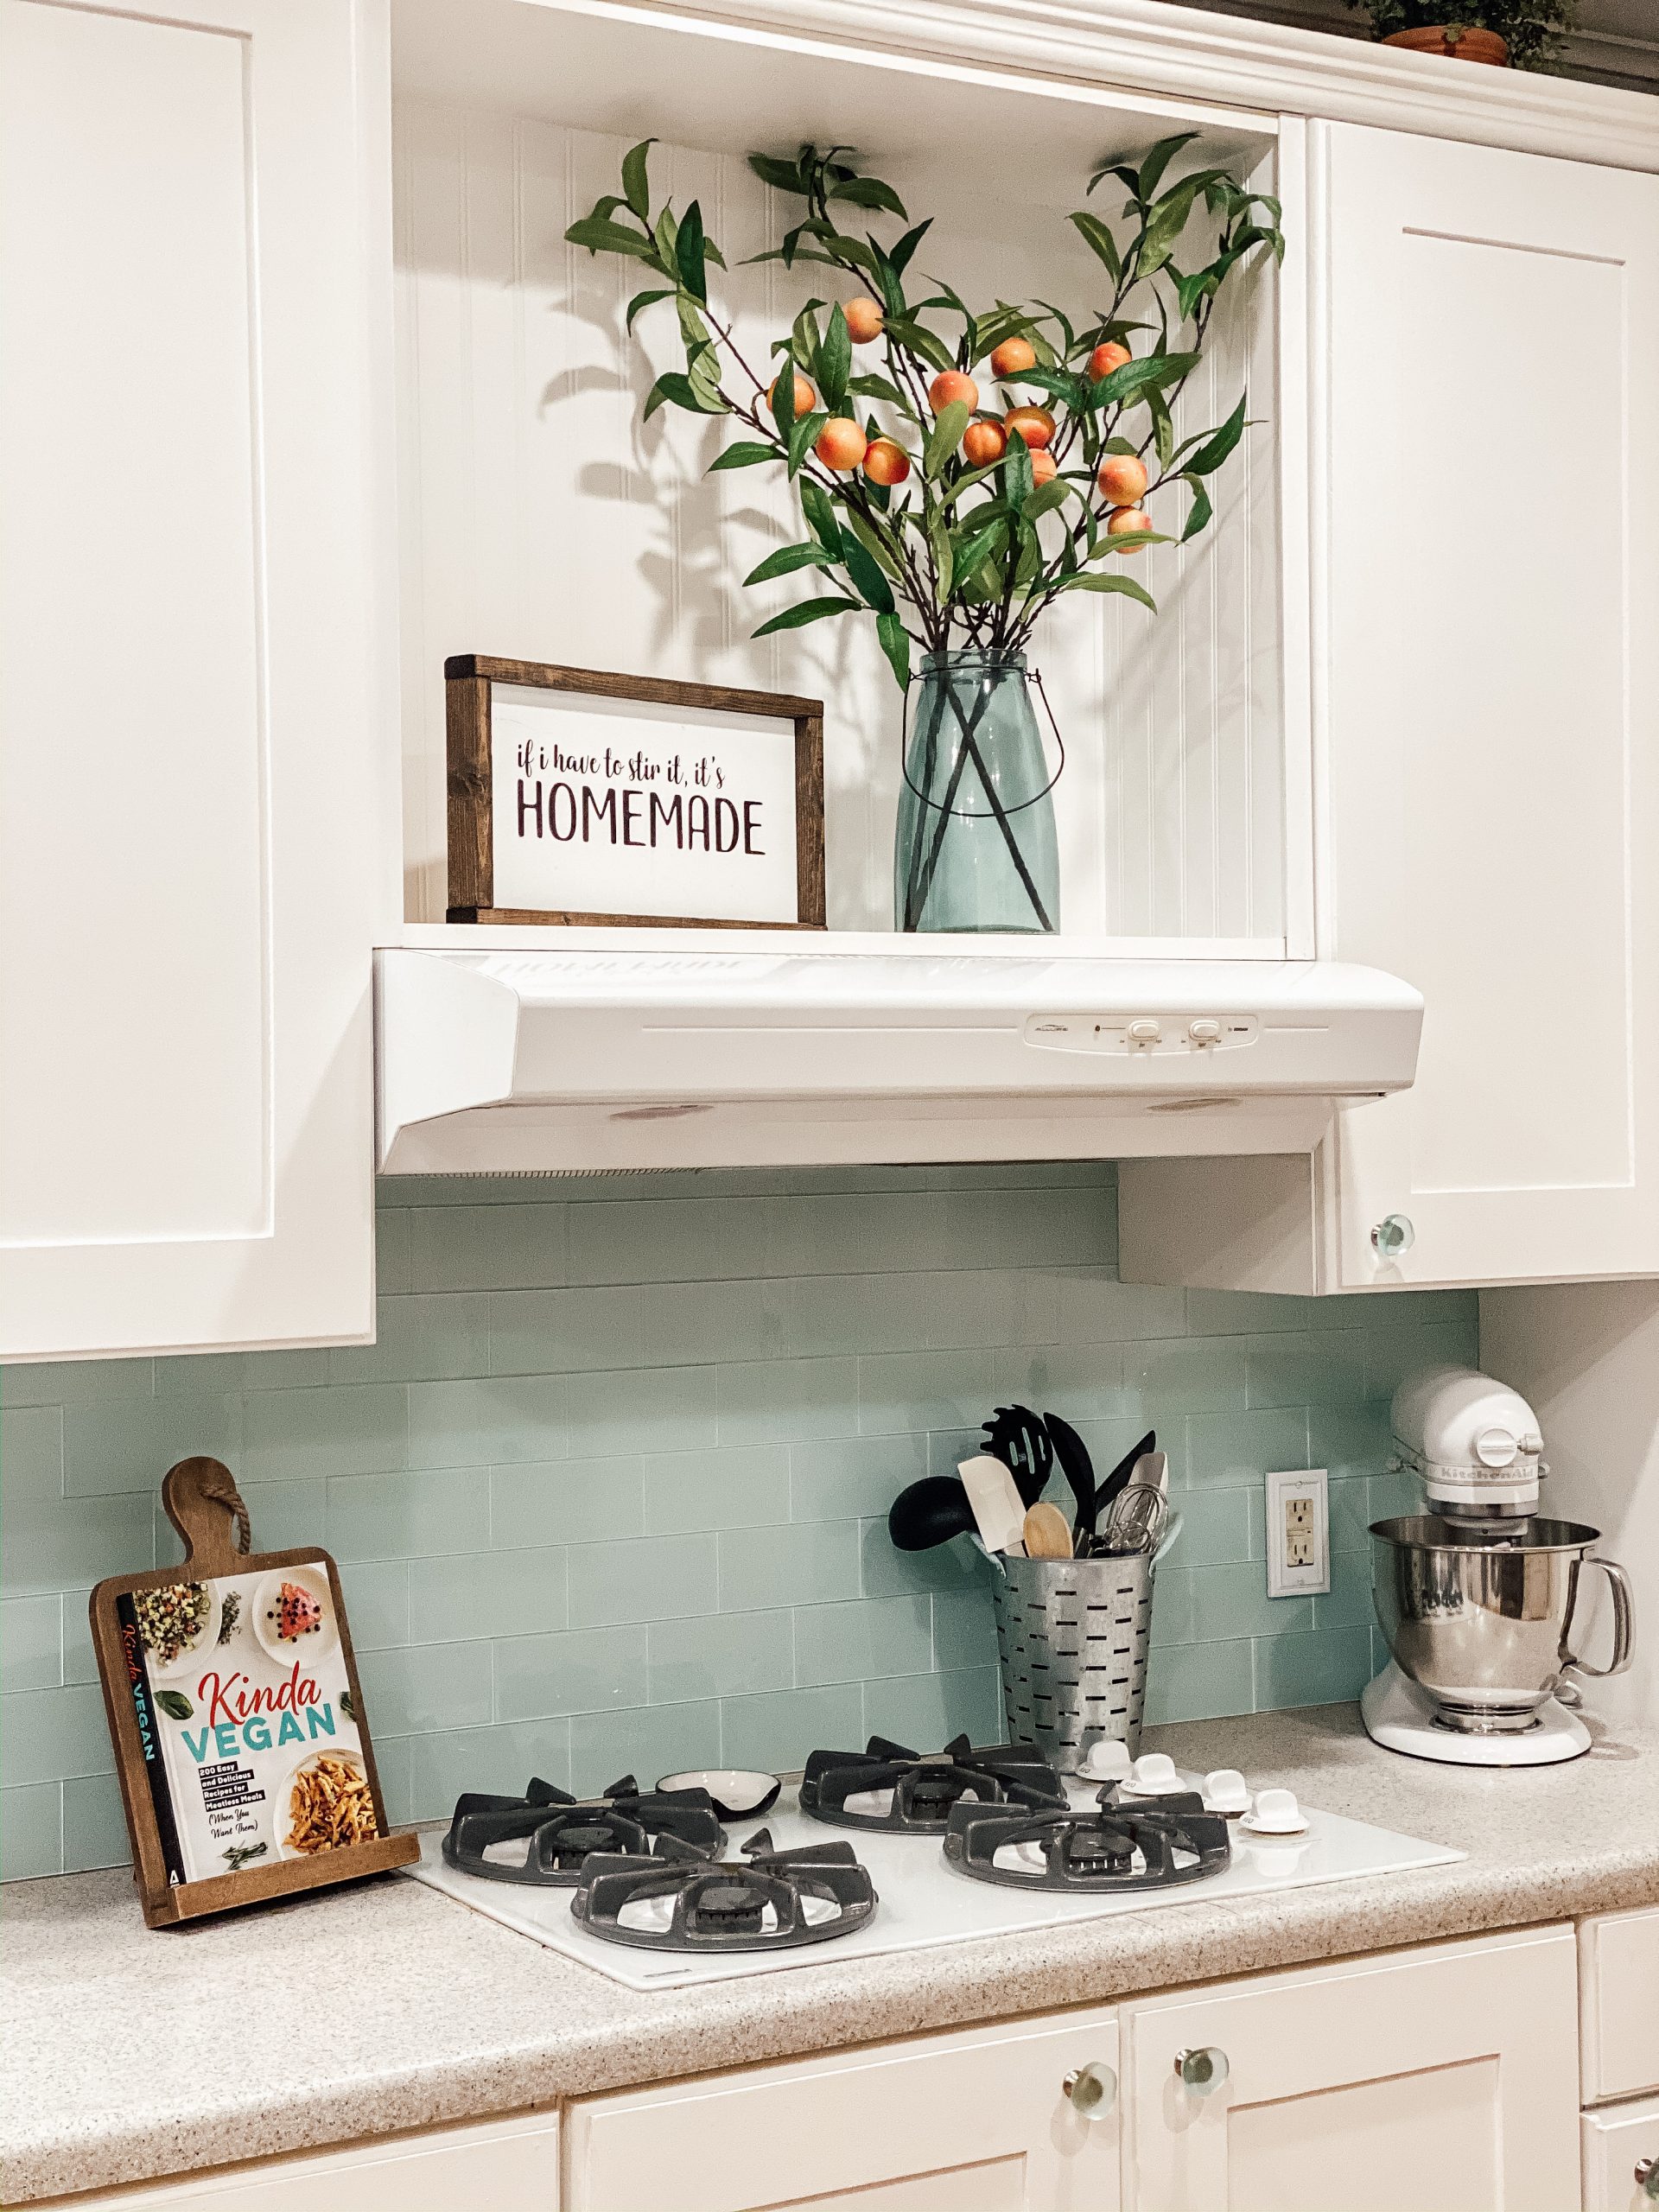
We were given a sample box of various materials available from Aspect. Between the metal, stone, and glass tile options, we chose glass subway tile in Morning Dew because we liked the subtle watery color that matched perfectly with our coastal feel. We thought about doing the white subway tile that is very trendy right now, but then why do what everyone else is doing?
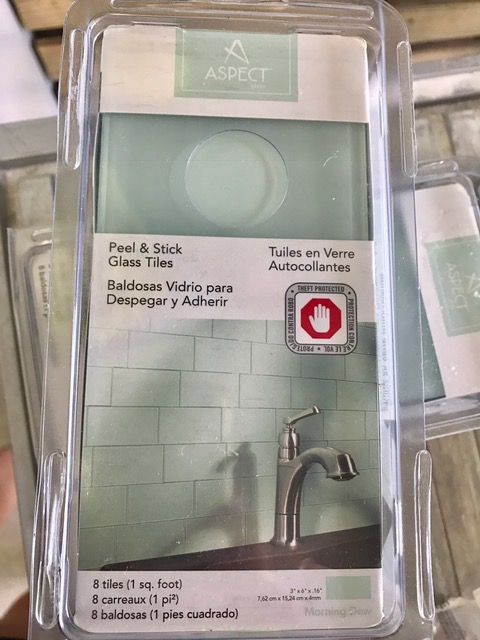
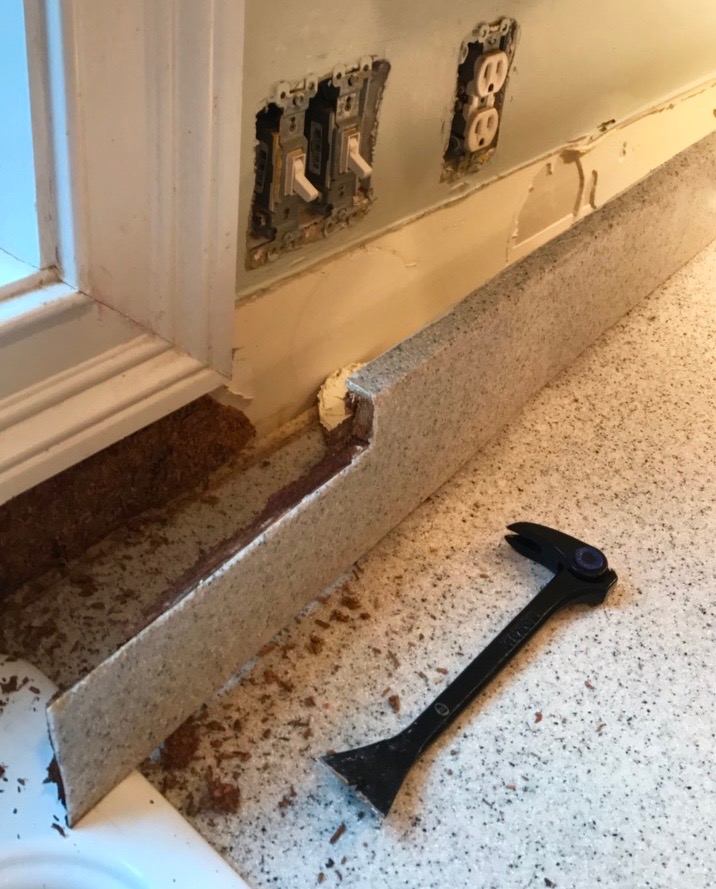
The packaging was very sturdy and the instructions were very easy to follow. Each package contains 8 glass tiles which covers 1 square foot. We started by taking down the builder back splash and prepping the walls.
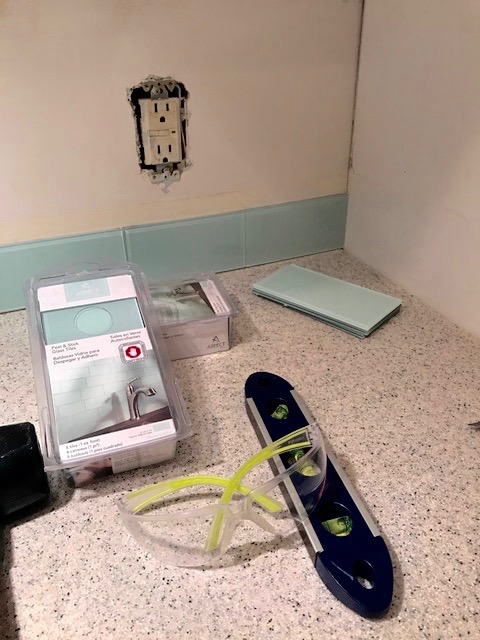
Getting started
We picked our starting area based on what one would see when they first walked into the kitchen. I used a level to get the first tile lined up and we were off! It is recommended that once you take the paper backing off, you barely hold it to the wall before you finally apply pressure and I highly recommend this as well. Once you place the tile, it is stuck. That adhesive is no joke and when they recommend you add an additional 10% of material, do it. We had to pry some of the tiles off and some would chip or the adhesive would take some of the wall off leaving the tile not usable unless you use a separate adhesive. Which we had to do in one area.
Minor setback
As I stated earlier we had to prep the walls. The builder backsplash they used left some imperfections in the wall once it was removed. I used wall patch to smooth out the walls, but apparently not well enough. I woke up one morning to find one of the tiles on the bottom row had slipped out of place and fallen behind the counter. This caused me to panic remove a couple of surrounding tiles to try to get it out. A lot of wiggling, a lot of praying I didn’t chip any other surrounding tiles, a few choice words… it finally came out. When I replaced the tile, I used the recommended adhesive to hold the tile in place. I am not messing around!
Lessons were learned
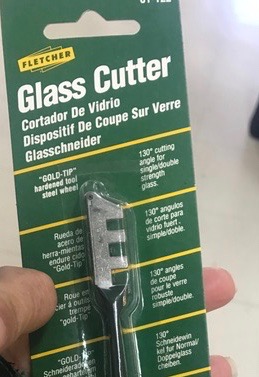
For whatever reason, don’t ask me why, I thought we could do all the cutting with an old school glass cutter. Now my husband and I laugh and laugh at this, even though I wasn’t laughing at the time when we got to our first “L” cut. I can’t even tell you how many tiles I ruined. Actually 2, before I gave up and begged any of my friends for the use of their wet saw. Thank goodness for generous friends. Don’t kid yourself, get a wet saw. You can rent one if you need to and it will save you a lot of grief and frustration. A lot.
Staying level and patient
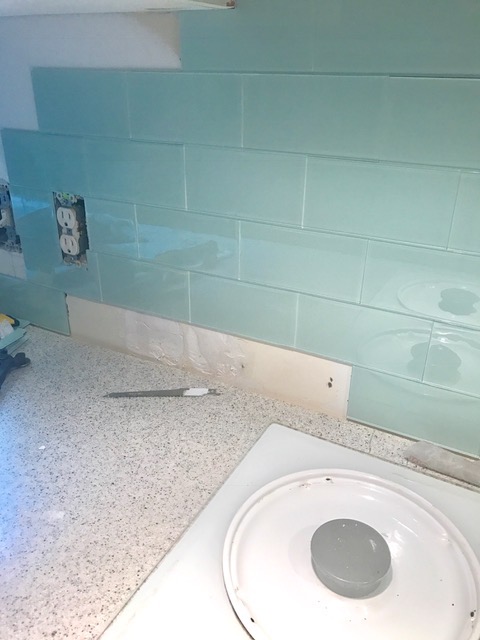
Since this product does not require grout, you are laying the tiles up against one another. Which is why it’s important to get your first tile level and be careful once you place your tile, there is no movement once it’s in place. With traditional tile laying, you can pick your tile up and reposition it from what I researched, and the grout may help with some forgiveness if there’s a slight bit of spacing difference between tiles. This is why the instructions also recommends painting the wall the same color as the tile should there be any slight gaps. We do have slight gaps in a couple areas, but you have to get right up on it to see. My husband and I being perfectionists had a couple of moments where we had to talk one another out of our tree and pinky swearing that if we saw someone that close inspecting the tile, we gave one another permission to take them down. (Kidding… not kidding.) It’s not “THAT” bad, but they are there, sneaky little gaps.
Just like that, we were done…
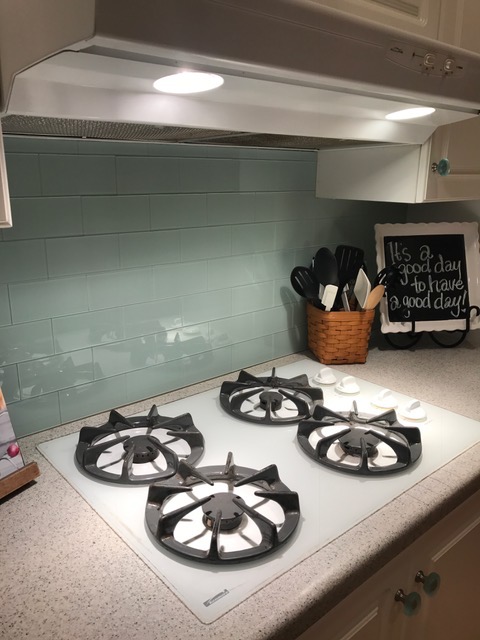
The great part about this project is that once it’s up, you’re done, no grout! We do need to caulk the counter line so no food or water gets between the counter and the wall. I didn’t want to lay the tile directly on or behind the counter because we are still trying to decide if we are going to change out the counter down the road. Other than the one tile that slipped, nothing else has come down. While you want the adhesive strong enough to hold in place, it was nerve wracking placing each tile exactly right. For that I’m thankful our backsplash area wasn’t that large. Since the pieces did line up right against one another, every cut piece was fitted perfectly before we peeled the paper backing off. Which required some additional cuts/shaves/sanding that were a little tedious, but doable.

Final thoughts
Overall we are very happy with the way that it turned out and are thankful to have the opportunity to try this new product. The glass tile we used cost around $20 per package and based on the area we covered, it would have been about $340. Not bad considering you don’t have to purchase any additional materials or pay someone else to install. I would rate our overall experience a “B” for our first tile project and ease of use. The only drawback to this product is that it’s not recommended for bathrooms or areas that have high moisture. We would be interested in seeing how the metal and the stone tile varieties of this product installation would compare to our experience with the glass tile. Those products only require tin snips to cut and not a wet saw. More information on this product can be found online through Aspect and purchased at your local Home Depot store.
Check out all the other tile choices available here!
Let's connect!!
Stay connected for all your DIY and organizing needs!